
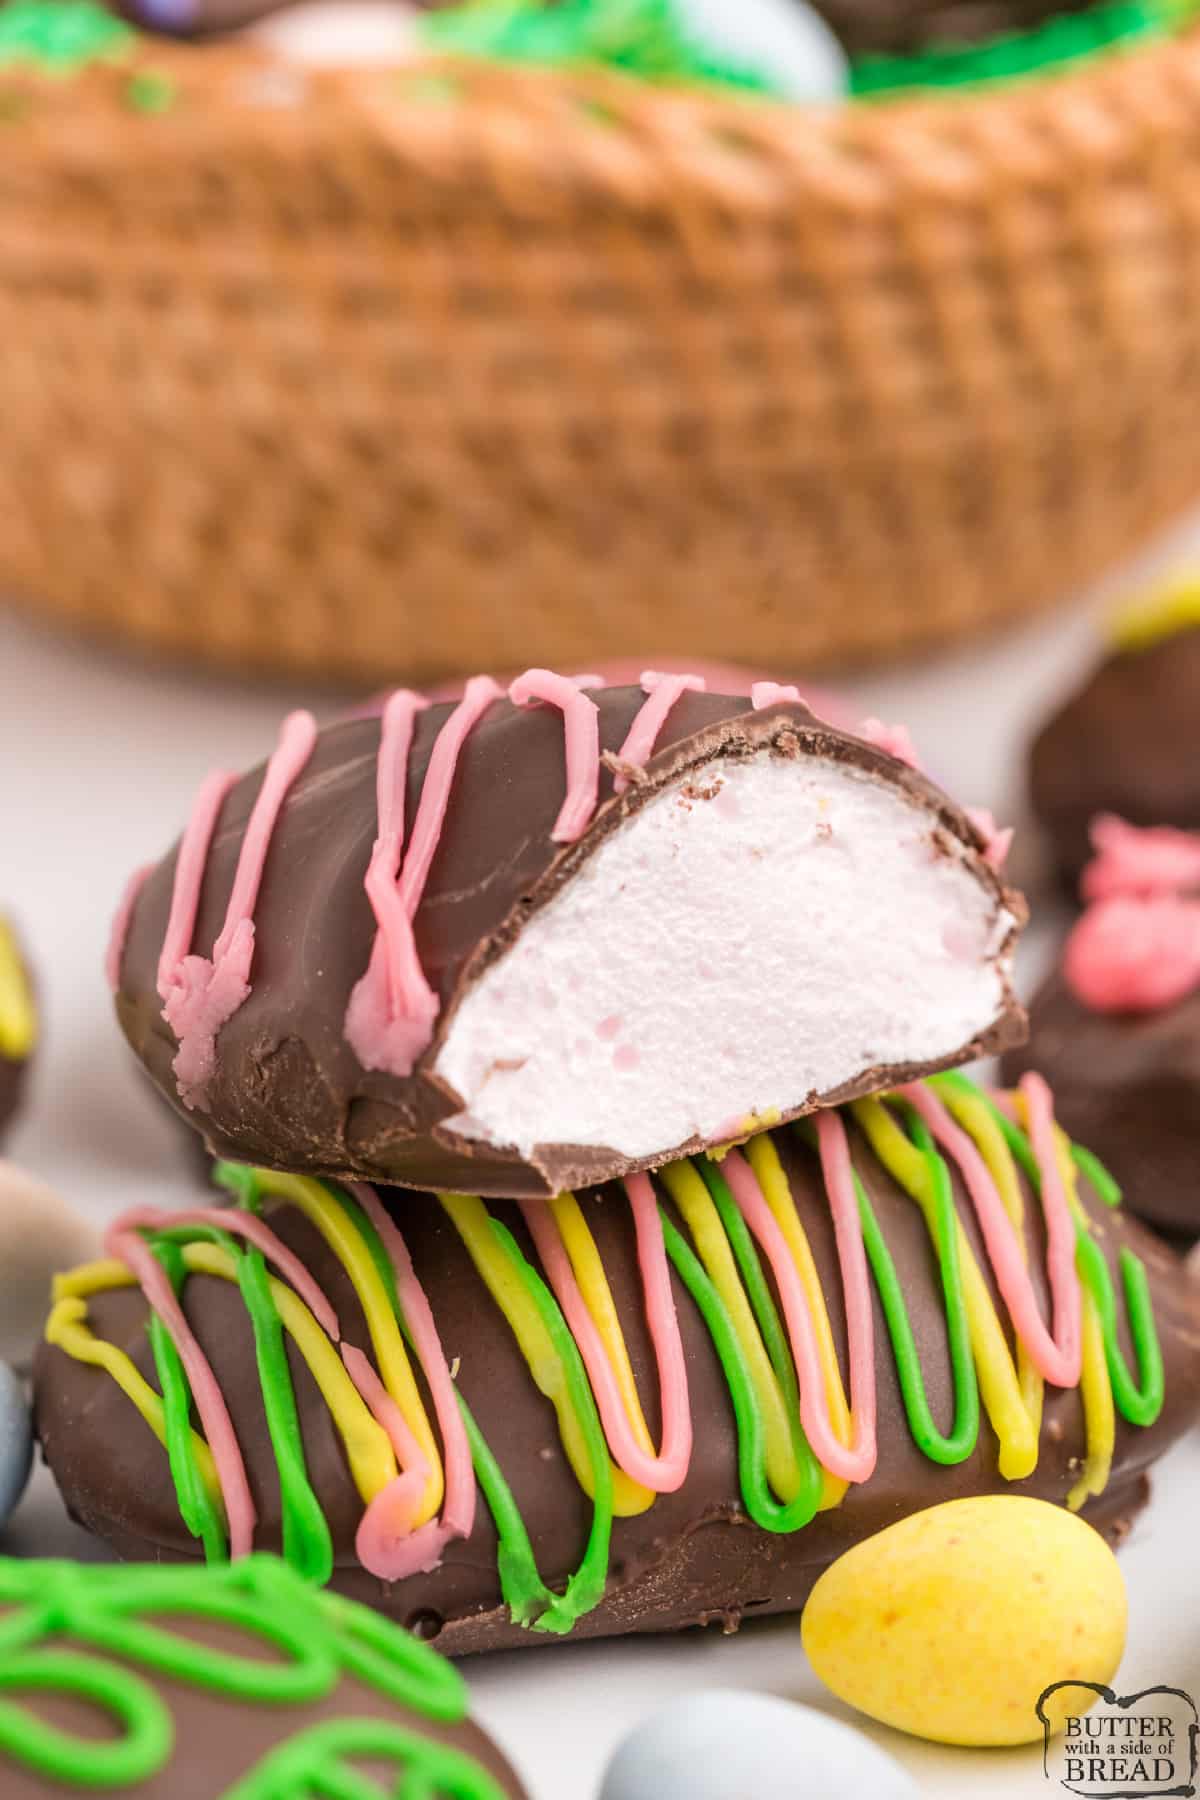
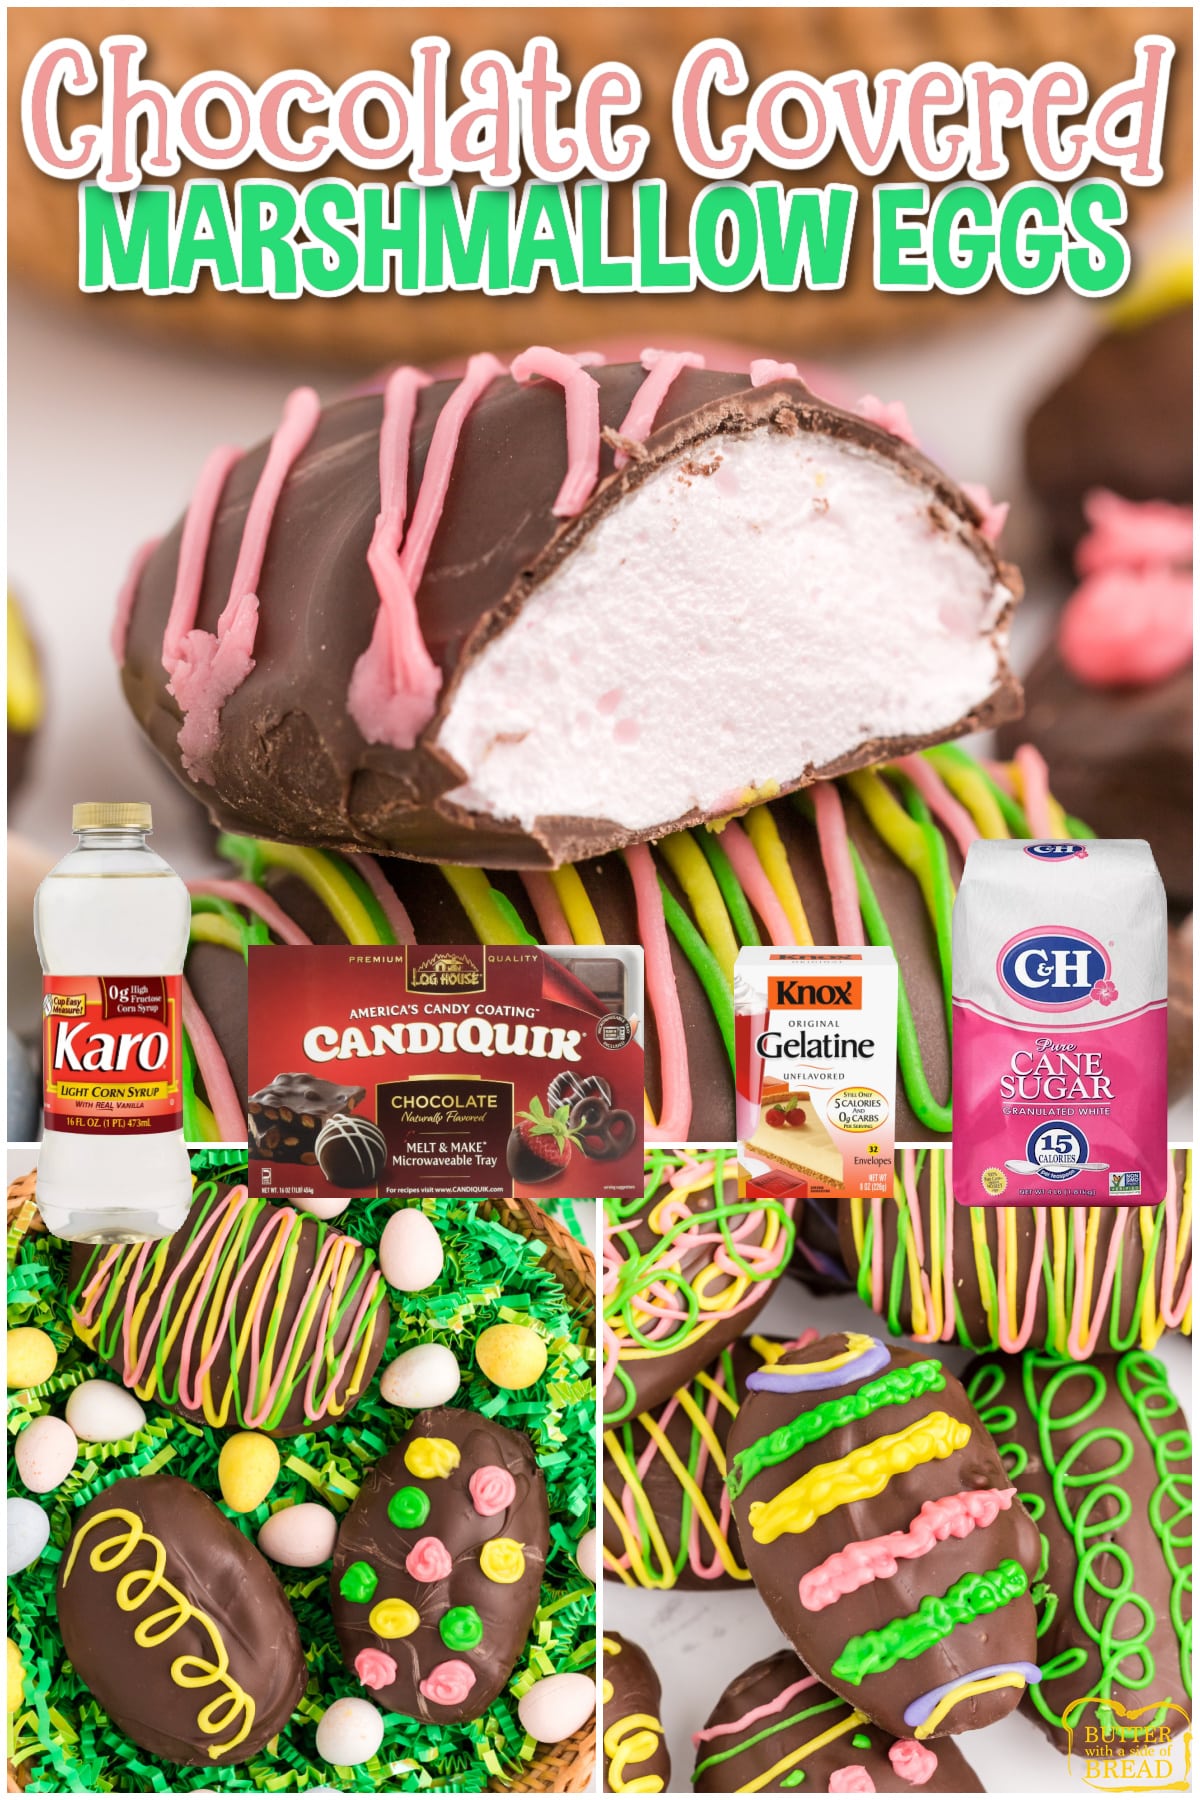
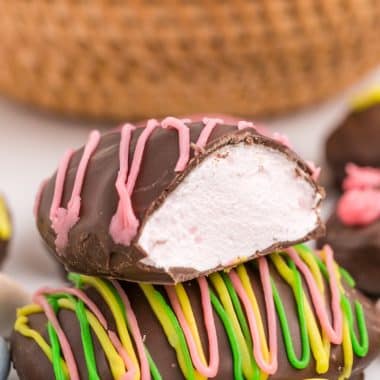
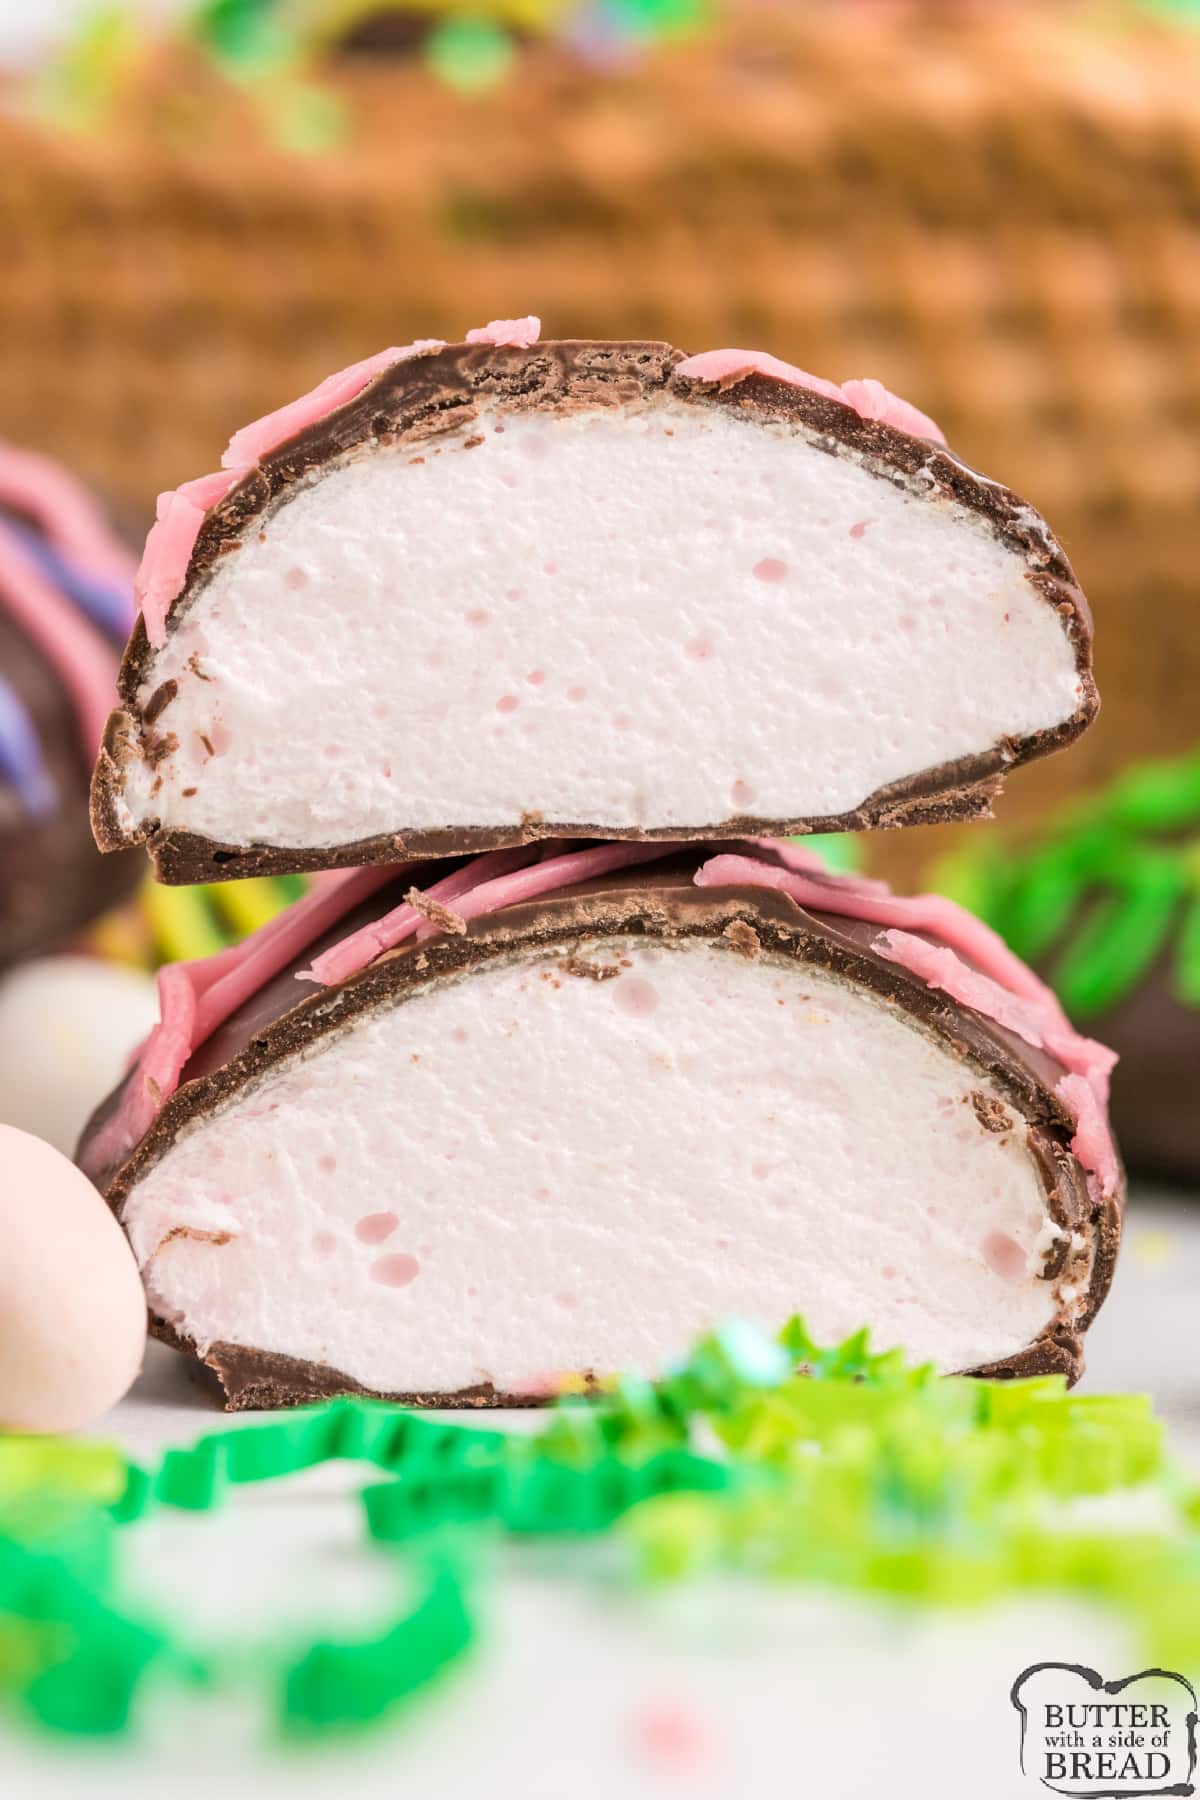
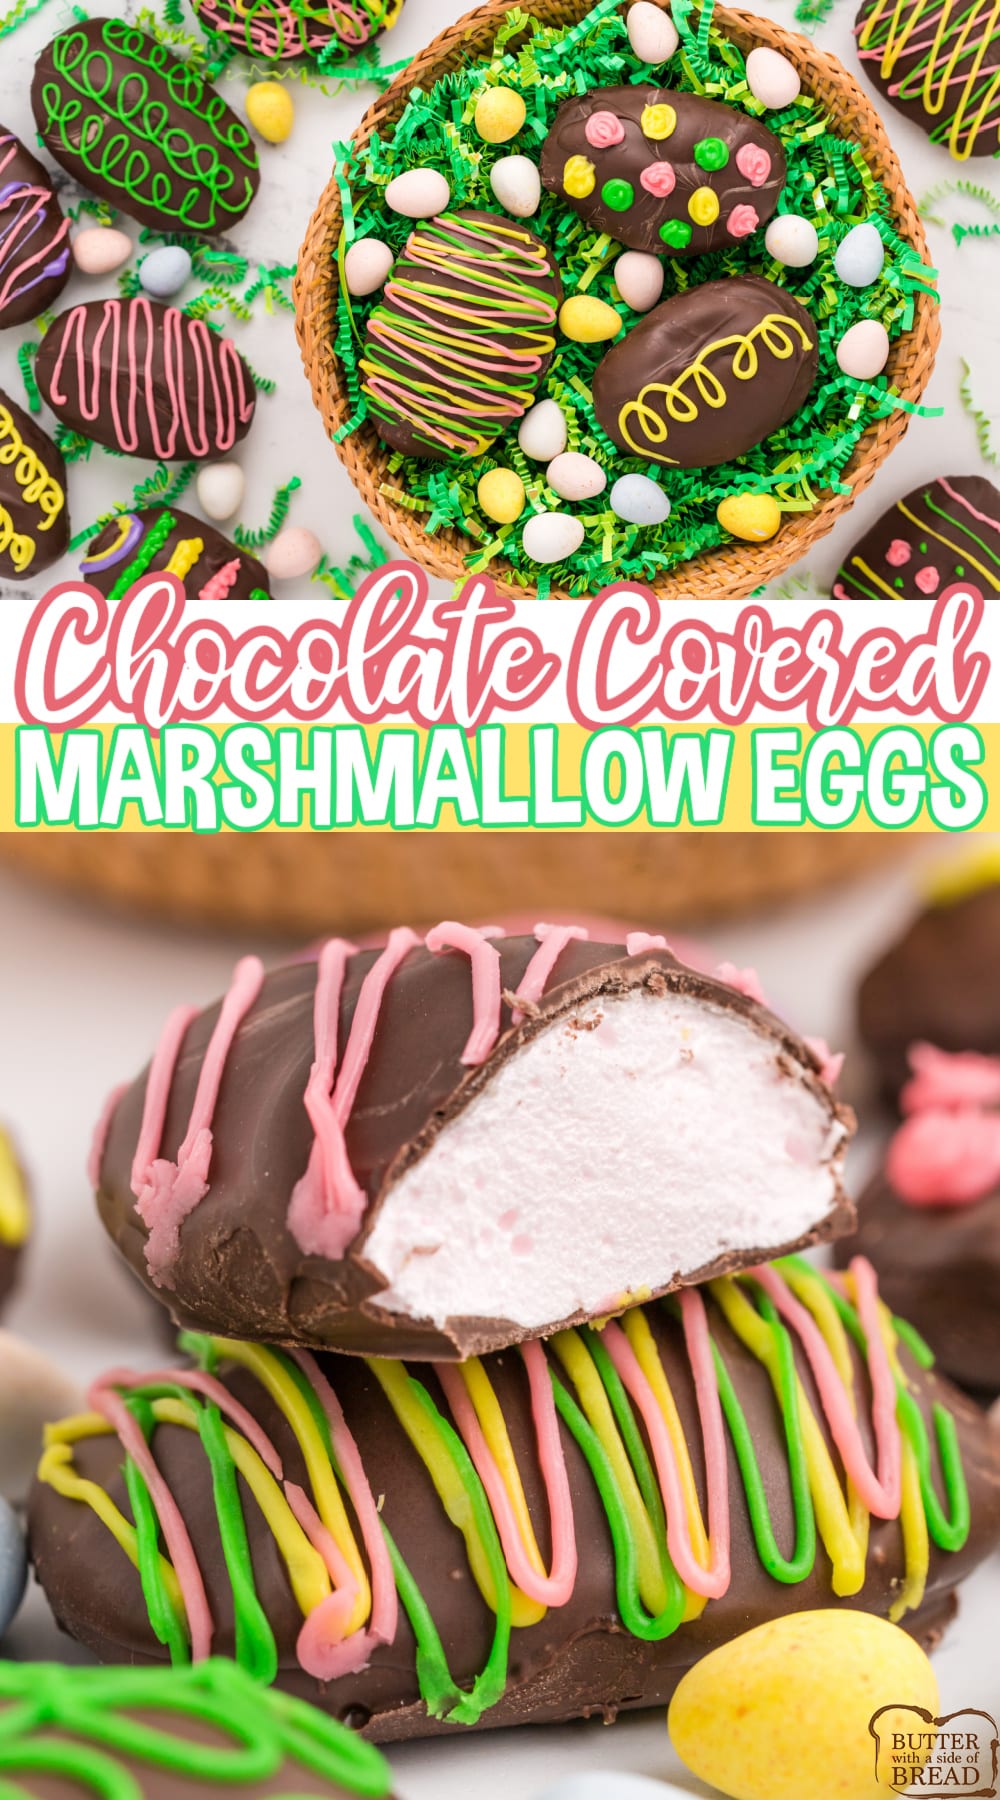
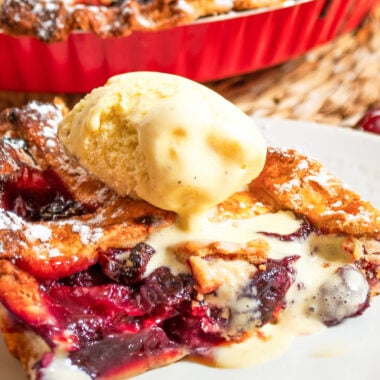
Chocolate Covered Marshmallow Easter Eggs are made with unflavored gelatin, sugar, and flavored extracts. The homemade marshmallow eggs are soft, flavorful, and much better than the store-bought variety!
Be sure to check out our updated collection of EASY EASTER DESSERTS here!
Marshmallow Easter Eggs are requested every spring at my house – the kids love to help make them, and they really do taste so much better than the kind you buy at the store.
Why you’ll love to make Chocolate Covered Marshmallow Easter Eggs
- The process is fascinating. Once the homemade marshmallow is made, you pour it into molds made from flour and plastic eggs! Amazingly, the flour doesn’t stick to the mixture – every year, my kids and I are amazed at how this works! My kids want to help me make these every year – it’s one of our favorite traditions.
- Best marshmallows ever! If you’ve never made (or tasted) homemade marshmallows before, you are missing out. Homemade marshmallows are so much better than store-bought ones, and they can be made in any flavor you want. Cherry, strawberry, lemon, and orange are some of our favorites.
- Perfect for parties and gift-giving. These eggs are fun to make, and you can get as creative as you want when decorating them. They are pretty enough to take to friends and neighbors, and they are always a popular treat to bring to Easter parties and gatherings. Everyone is always so impressed!

CHOCOLATE COVERED MARSHMALLOW EASTER EGGS
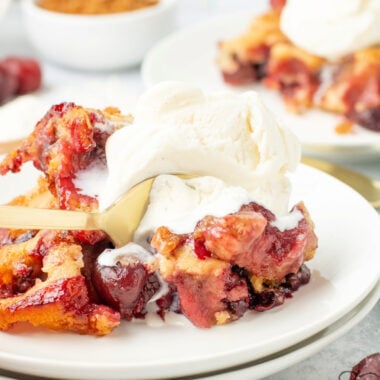
Marshmallow Eggs are made by making a simple gelatin mixture. Use unflavored gelatin and then use extracts to make any flavor you’d like – cherry, strawberry, orange, lemon, or any other flavor you want! Press an egg into a pan of flour to make egg-shaped molds, and then pour the gelatin mixture into the molds. Let the gelatin set up, and then dip it in melted chocolate and decorate! Easy and fun, and perfect for an Easter treat.
INGREDIENTS IN CHOCOLATE COVERED MARSHMALLOW EASTER EGGS
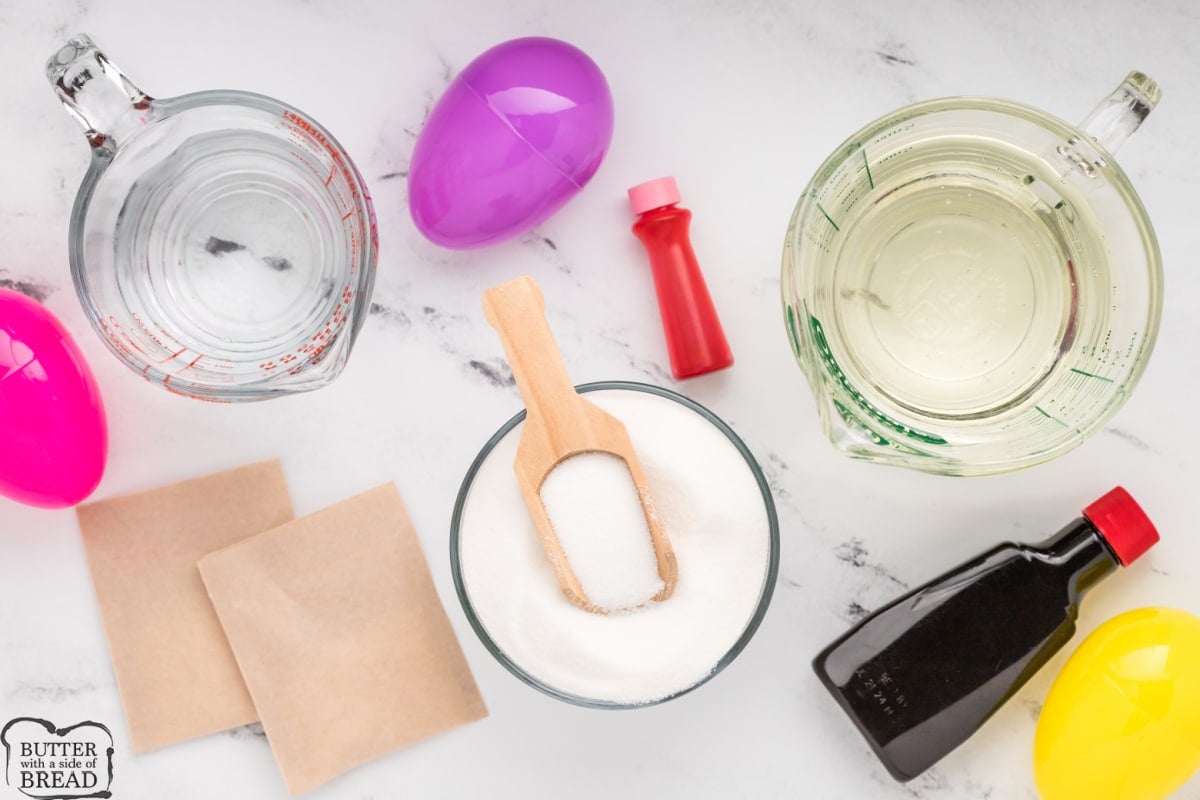
Unflavored gelatin – You will need 2 small packets of unflavored gelatin. Each packet has 2 1/2 teaspoons of gelatin, so you will need 5 teaspoons total.
Cold water – The cold water will help to dissolve the gelatin and provide the necessary liquid for the mixture.
Sugar – A cup of sugar provides all of the sweetness for these delicious chocolate eggs.
Light corn syrup – Corn syrup is necessary for making the marshmallows. Use light corn syrup to get the right flavor, taste, and color for the eggs.
Flavoring/food coloring – You can use whatever flavor of extract you want, and then you can use the corresponding food coloring to match. The food coloring is completely optional, but I recommend adding flavor to the marshmallow mixture. You will need about 1/2-1 teaspoon of extract for each batch of eggs. (I used 1/2 tsp cherry extract and red food coloring, but feel free to experiment!)
CandiQuik melting chocolate – You will need 16 ounces of CandiQuik chocolate coating. You can use almond bark or any other type of melting chocolate. You could use dark chocolate or white chocolate, but I prefer Candiquik or milk chocolate.

HOW TO MAKE CHOCOLATE COVERED MARSHMALLOW EASTER EGGS
Full instructions can be found in the recipe card below, but here are a few helpful tips for each step of the process. It’s not complicated, but probably different from anything you’ve done before!
PREPARE THE MOLDS
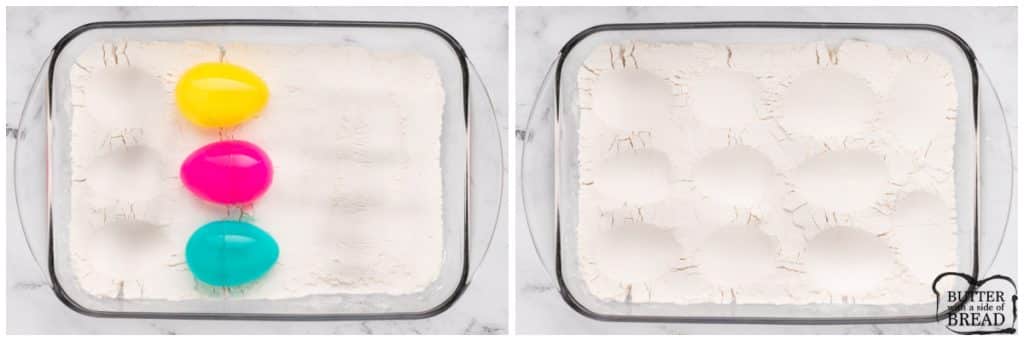
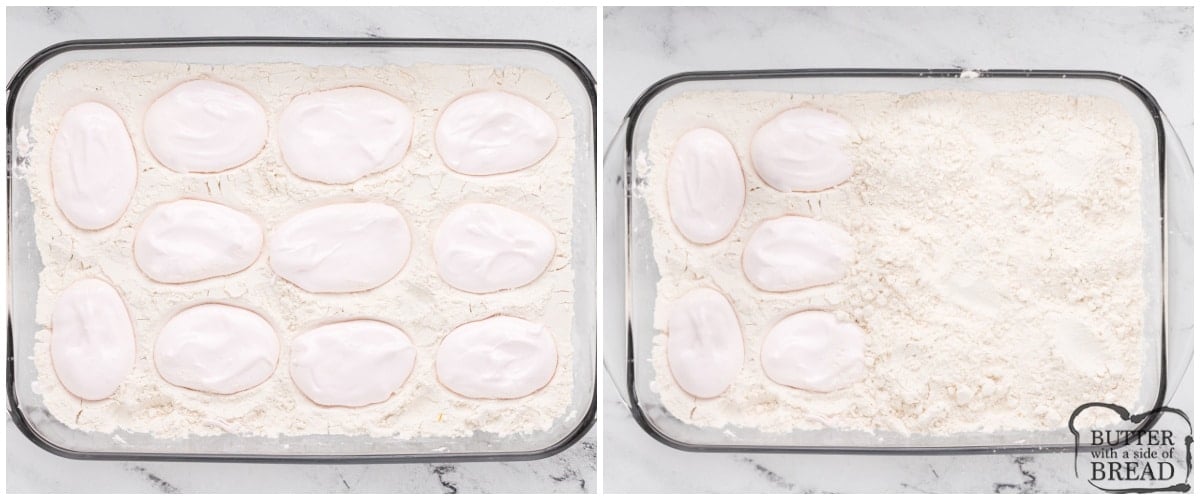
Fill pans with an inch of flour to make the molds for the marshmallows. The flour will not get contaminated, and you’ll be able to pour it back into your canister to use again. You can use a real egg to make the egg-shaped molds, but plastic eggs are generally more rounded and perfectly shaped. Make sure you don’t press the egg too far into the flour – you shouldn’t be able to see the bottom of the pan.
MAKE THE MARSHMALLOW MIXTURE
You can add any flavor or food coloring that you’d like! If you don’t want to use food coloring, you can leave it out. All the marshmallows will be white, but you can still add flavored extracts to make the marshmallows any flavor you want.
FILL THE MOLDS
Spoon the mixture into your prepared molds. (This part is so cool! You would think the flour would get all mixed up with the marshmallow mixture, but they don’t…at ALL! It is the strangest thing- my kids were amazed. Ok, I was too!) When the molds are filled, cover the eggs completely with flour and then let them sit out overnight.
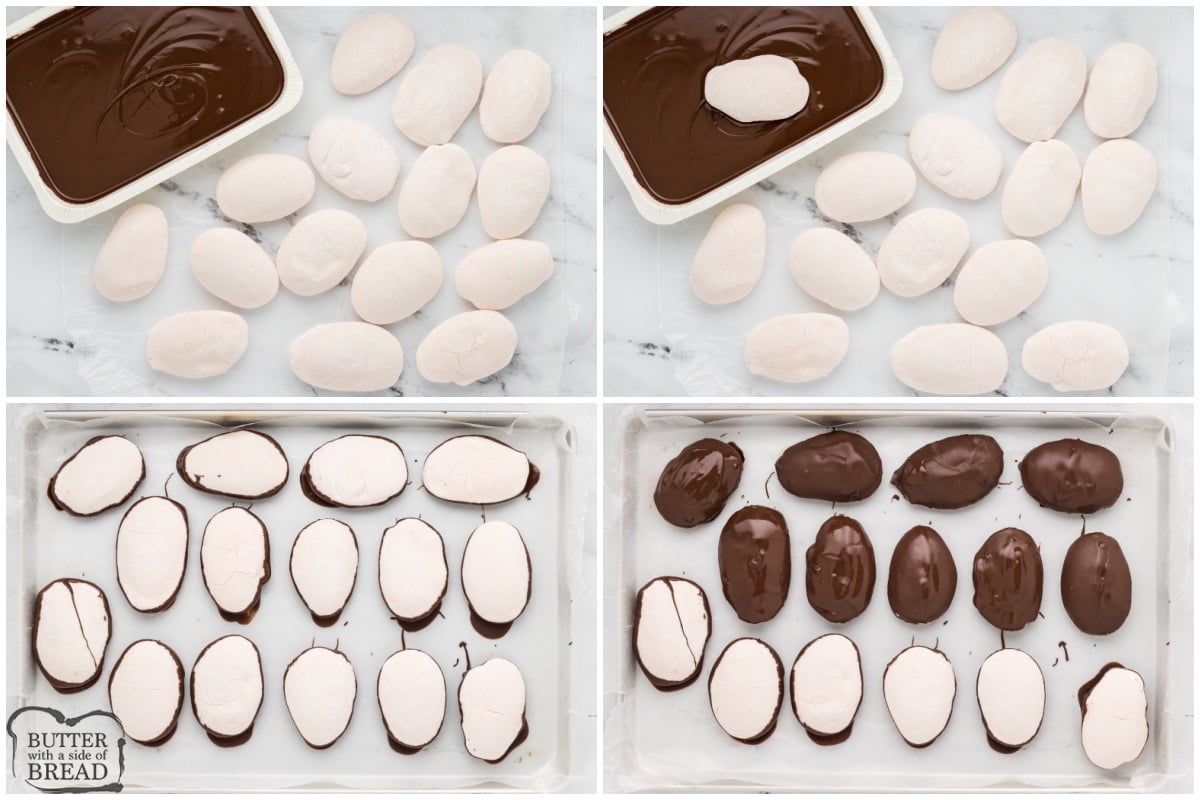
The next day, pull the eggs out of the molds and brush all of the excess flour off.
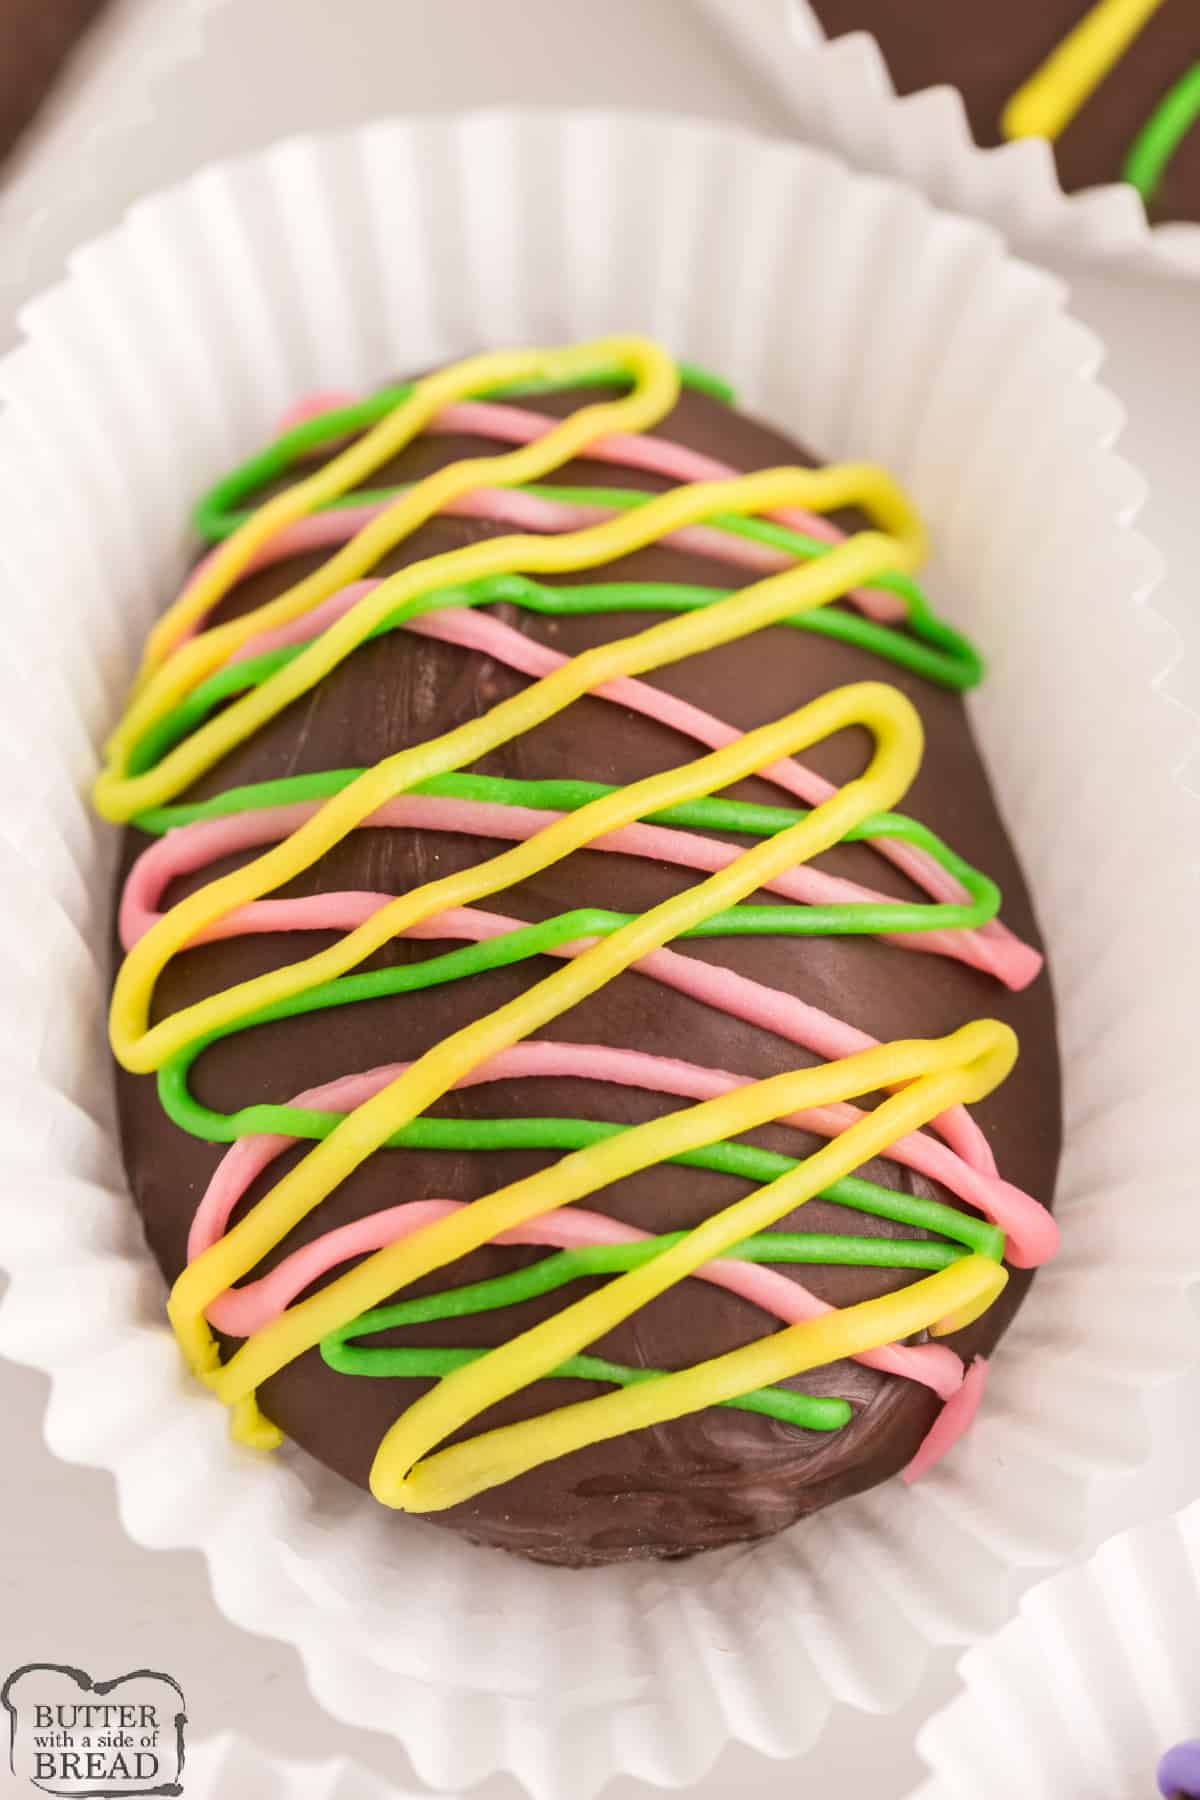
DIP AND DECORATE THE MARSHMALLOW EGGS
Dip one side of each egg in chocolate and let it set up before dipping the other half. You don’t have to decorate the eggs, but it’s kind of fun, and you can get as creative as you want!
HOW TO STORE MARSHMALLOW EASTER EGGS
Chocolate Covered Marshmallow Eggs are good for 1-2 weeks if stored in an airtight container at room temperature. I’ve never tried freezing them, but I would imagine that would work well if you wanted to make the eggs 1-2 months in advance of needing them.
HOMEMADE CHOCOLATE MARSHMALLOW EGGS
Ingredients
- 2 pkgs. Knox unflavored gelatin
- ⅔ cup cold water
- 1 cup sugar
- 1 ⅓ cup light corn syrup
- flavoring/food coloring I used 1/2 tsp cherry extract and red food coloring, but feel free to experiment!
- 1 pkg. CandiQuik melting chocolate
Instructions
- Before you begin, you will be filling 3-4 9X13 pans with about an inch of flour to make your egg molds with. (Don't worry – the flour will not get contaminated at all and you will be able to pour it back in your canister and use it for your next baking project!) Use a plastic Easter egg and press into the flour to make the forms for your marshmallows. (You can use a real egg too, but the plastic ones are usually a little rounder and perfectly shaped. ) Just make sure that you can't see the bottom of the pan through the flour – if you can, you need to make it a little deeper.
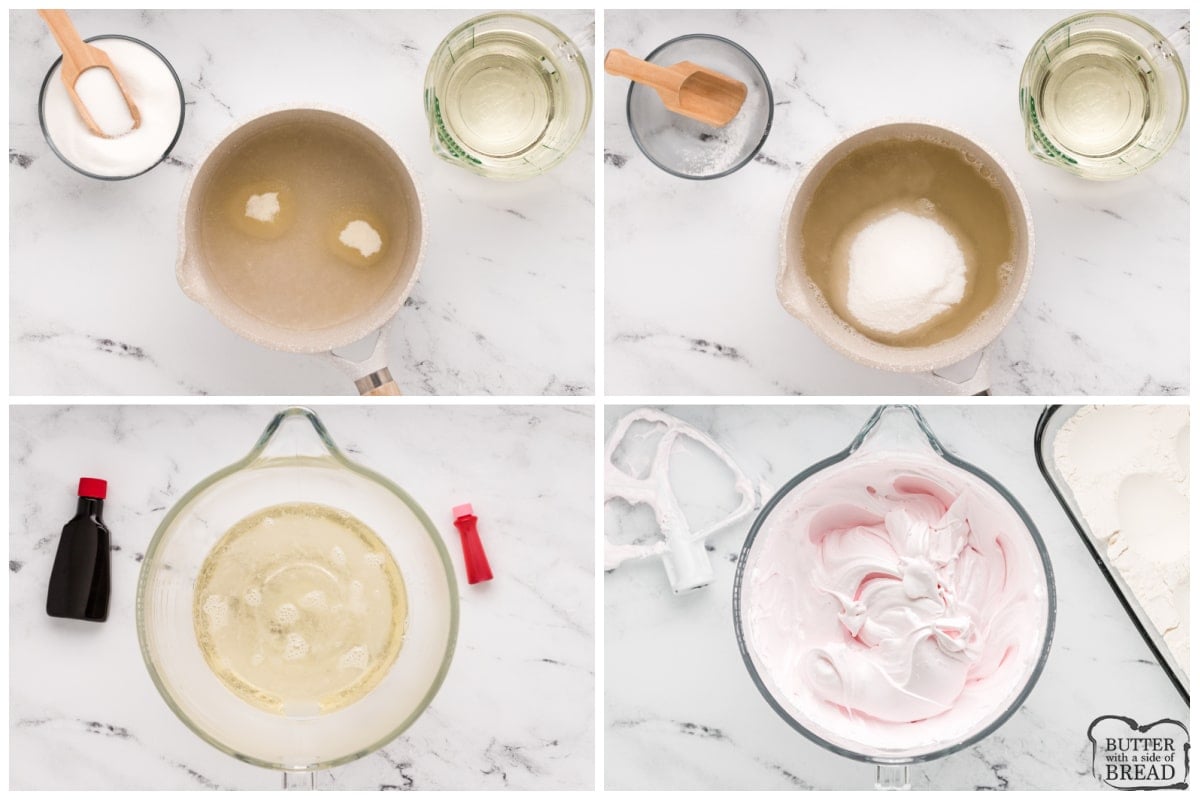
- Soften the gelatin in cold water in a saucepan. Heat to medium-high heat and add sugar. Stir until dissolved (about 3-4 minutes).
- Pour the corn syrup into a mixing bowl and then add the hot mixture to the corn syrup. Immediately start beating the mixture on high speed.
- Add flavor and food coloring if desired. Continue beating until thick, fluffy and air-filled. It took me about 10 minutes to get the mixture to this point.
- Spoon the mixture into your prepared molds. (This part is so cool! You would think the flour would get all mixed up with the marshmallow mixture, but they don’t…at ALL! It is the strangest thing- my kids were amazed. Ok, I was too!) When the molds are filled, cover the eggs completely with flour and then let them sit out overnight.
- The next day, pull the eggs out of the molds and brush all of the excess flour off.
- Melt the CandiQuik according the package directions (only takes 1-2 minutes in the microwave). Dip the bottom of the egg in the melted chocolate and then place the chocolate side down on waxed paper.
- Once that chocolate has set (only takes a couple of minutes), you can dip the top in chocolate as well. Make sure to place the bottom of the eggs (dry side) back on the waxed paper so that the tops stay smooth and rounded.
- You can either eat the eggs just like that, or you can decorate them if you want to. You can pipe some frosting onto the eggs and coat the frosting with colored sugar or sprinkles or you can color some white chocolate, melt it and drizzle on top. Store at room temperature until ready to serve.
Video
Nutrition
📫 Save this recipe! Send it to your email! 📩
I consent to receiving emails from this site.

ARE HOMEMADE MARSHMALLOW EGGS DIFFICULT TO MAKE?
I know that the process seems a little bit time-consuming and a lot of readers have commented that it is too much work, but it isn’t that difficult! The marshmallow mixture only takes about 15 minutes to make, and then once it is poured into the molds, it has to sit overnight, but you don’t have to do anything during that time. As soon as you take the marshmallow eggs out of the flour molds, they can immediately be dipped into chocolate and are ready to eat within minutes.
DO YOU USE CORNSTARCH OR FLOUR FOR MAKING MARSHMALLOW MOLDS?
I have also had quite a few readers ask if you can use cornstarch instead of flour for the molds. Apparently cornstarch is traditionally used in candy making? I’m not a professional at all, so maybe cornstarch is better, but you need quite a bit, and I usually have a lot more flour than cornstarch available.
It would take a lot of containers of cornstarch to fill a few 9X13 pans, so I think it’s much more convenient to use flour. You brush off the excess flour when you remove the marshmallows from the molds, and you can’t taste it at all! And the marshmallow mixture doesn’t stick to the flour at all, so I just put the flour right back into my canister when I’m done – no need to waste it!
More delicious Easter dessert recipes to try:
- We love easy treats! Easter Golden Oreo Truffles, Cookie Dough Easter Eggs, and Mini Egg Rice Krispie Treats are some of our favorite no-bake Easter treats.
- If you have a little bit more time, make a festive Easter cake! Easter Bunny Kit-Kat Cake and Easter Poke Cake are two of our favorites.
- One of my favorite things about Easter is the Cadbury Mini Eggs. Cadbury Mini Egg Brownies, Mini Egg Rice Krispie Treats, and Cadbury Mini Egg Cookies are some of my favorite Easter recipes.
Marshmallow Easter Eggs are easily made with a homemade gelatin mixture dipped in melted chocolate. Delicious chocolate marshmallow egg recipe that is fun to make and tastes better than the ones from the store!


Sonia Barrera says
I make these every year however mine are made with Jello. Then you can have any flavor you want. the sky’s the limit when you have a variety of flavor and you don’t have to use food coloring. You can also use white chocolate to intensify the flavor of some jello flavors such as Lemon flavored jello eggs dipped in white chocolate or raspberry flavored jello eggs dipped in milk chocolate.
Jessica says
Great idea!!
C Hatfield says
I love your blog I just joined yesterday and this Marshmallow Easter egg recipe confirms why I joined I do not join many, but you are a very good baker and you explain details very nicely (this comes from a retired school teacher) Love the recipe and look forward to many more of your wonderful recipes
Jessica says
So glad to have you here!
KA Narlock says
I made 3 batches tonight. The first one was too thick to put in the molds. The second one was not as thick as the first but still didn’t didn’t flow into the molds. The third filled the molds easily. So, did I beat the mixture too long? Cook the mixture too long? They all taste great. Tomorrow we will be covering them with the chocolate.
Nellie says
It sounds like you probably just mixed a little bit too long if the mixture was too thick, so maybe just reduce the mixing time by a minute or two next time (although it sounds like your last batch worked well)!
Madri says
Got all the ingredients, but not sure how much gelatine to use? Mine came as a ground powder and is in a large packet of 500grams. Cant wait to make these with milk free chocolate for my allergic kids!!
Nellie says
I use the little packets and they each have 2 1/2 teaspoons. The recipe calls for 2 packets so 5 teaspoons should be the correct amount.
Jean Kyle says
Can you use agave syrup in place of corn syrup?
Nellie says
I’ve never tried! Please let us know if you experiment!