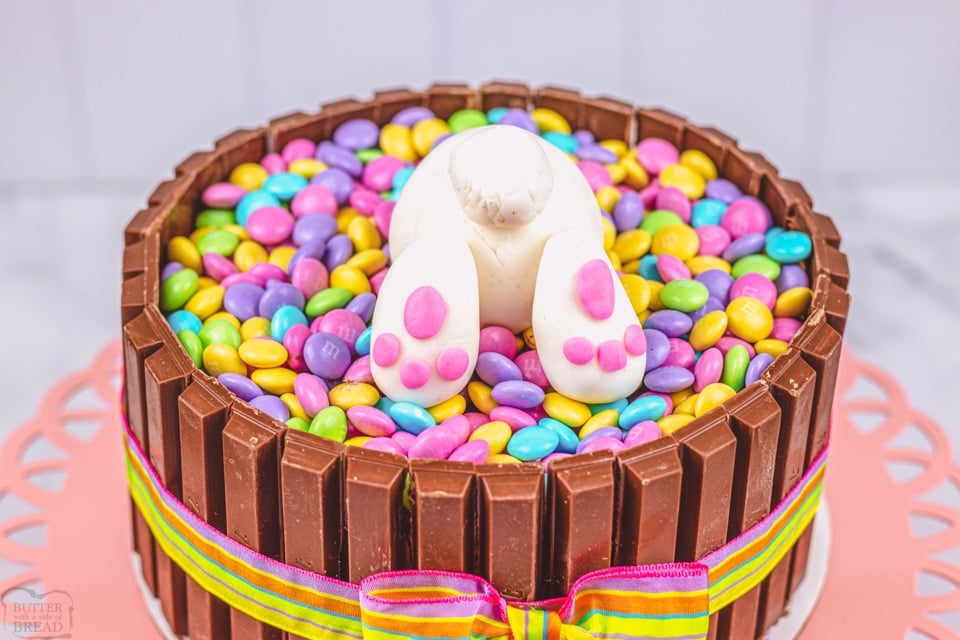
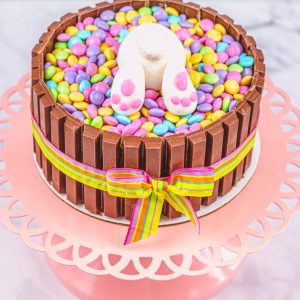
Easter Bunny KitKat Cake made easy with a cake mix! KitKats line the outside of the cake and the top has a cute Easter Bunny peeking out of pastel M&M candies.
You’re going to love how simple and easy it is to make cakes that look as incredible as they taste. Made with boxed cake mix, store bought frosting, and premade fondant you just have to mix, bake, frost, and decorate. Save the hard work for someone else and enjoy an easy dessert that looks like you slaved away for hours.
📫 Save this recipe! Send it to your email! 📩
I consent to receiving emails from this site.
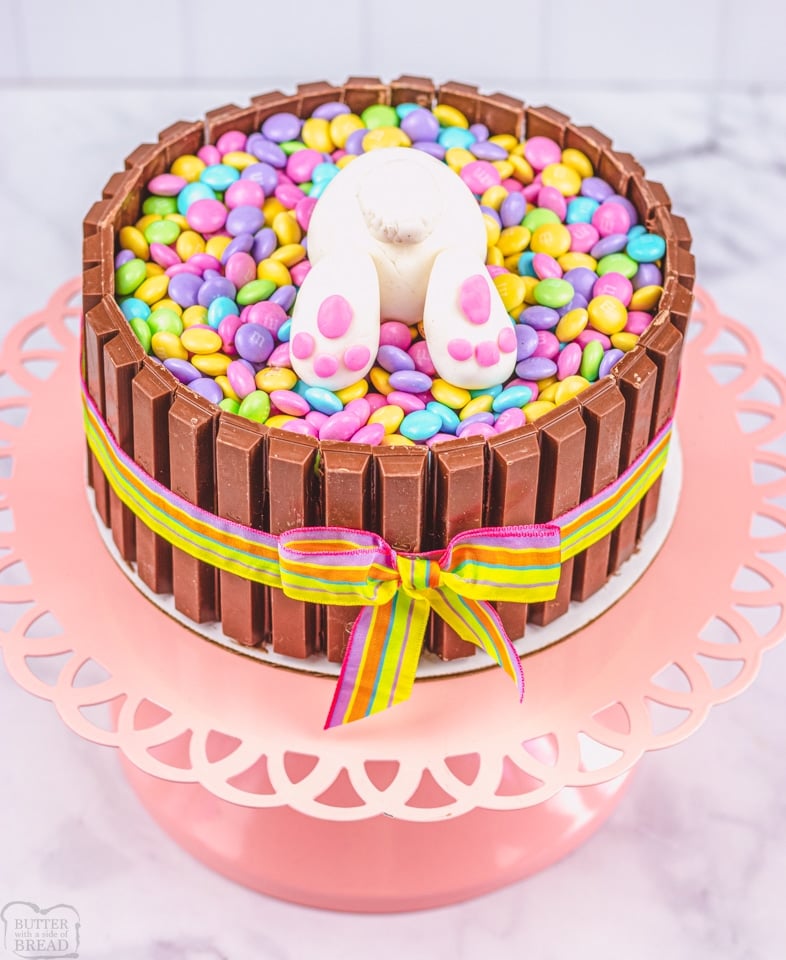
No one needs to know how truly simple this fabulous recipe was. Enjoy the cake as a centerpiece and conversation item up until the first slice is made. No one can stop raving about bunny butt cakes, even long after Easter is over!
Easy Easter Bunny Kit Kat Cake Ingredients
-Chocolate cake mix: To make this cake simple and easy we want to use a box of chocolate cake mix. Account for the eggs, oil, and milk/water requested on the box.
-Chocolate frosting: Using 2 store-bought tubs of chocolate frosting or even a homemade buttercream we can coat our cake in delicious frosting to hold everything together.
-KitKat bars: We will need to use 9 packages of full-sized KitKat bars. Hopefully, this accounts for the ones that will break as they’re separated.
-M&Ms: With an entire package of pastel-colored M&Ms (a 10-ounce bag) we will have enough to cover the top of the cake.
-Fondant: We need to use white and pink fondant. Wilton has a great selection of store bought fondants often found in the cake decorating section of stores.
-Ribbon: While not a food item, this is an important thing needed to help “tie” the theme together and hold the KitKats in place.
Easter Bunny Butt Cake Instructions:
Blend the cake mix with the eggs, oil, and water as directed on the box.
Bake in 7 inch round cake pans for approximately 30 minutes or until a toothpick can be inserted and come out clean.
Cool the cakes completely.
Level the cakes by slicing off the tops of the cake and apply a thin layer of frosting to the top of the first cake. Place the second cake on top of the frosting to stack.
Apply a thin layer of frosting around the cake to act as the crumb layer. Then place the cake in the fridge for freezer to chill for 15 minutes. A “crumb coat” as it’s called will help to prevent crumbs from showing in our final layer of frosting and make the cake look more professional.
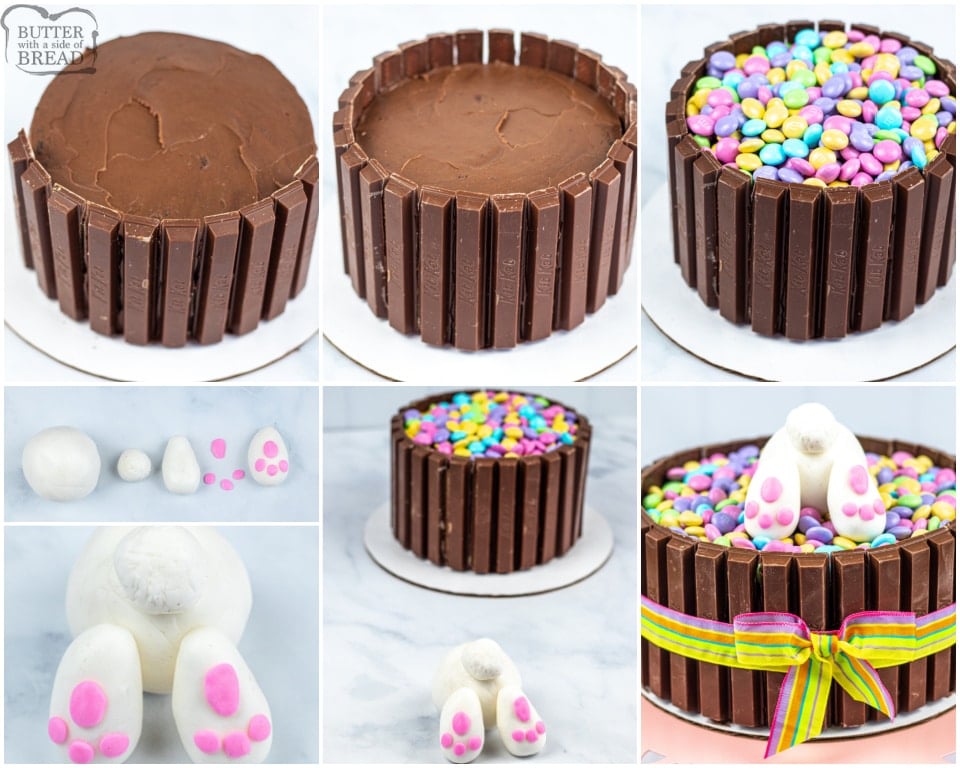
Once chilled, apply a second layer of frosting to the cake.
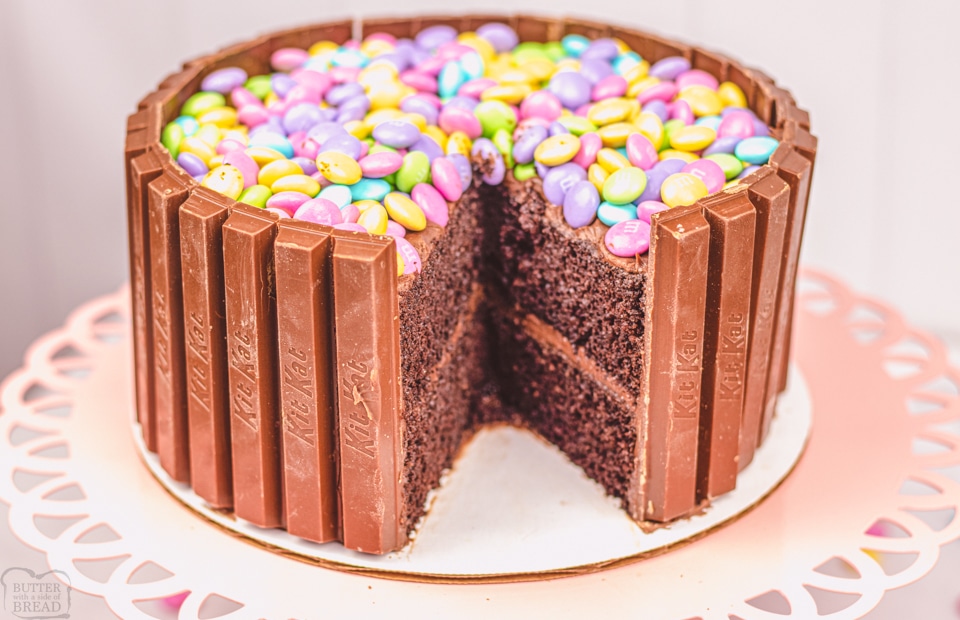
After frosting the cake for a second time, take your KitKat bars and break them into single sticks. Place the cakes along the side of the cake, one by one until the entire cake has been surrounded by KitKats.
Pour the pastel colored M&Ms on the top of the cake, spreading them out to coat the top of the cake. You will use the whole bag.
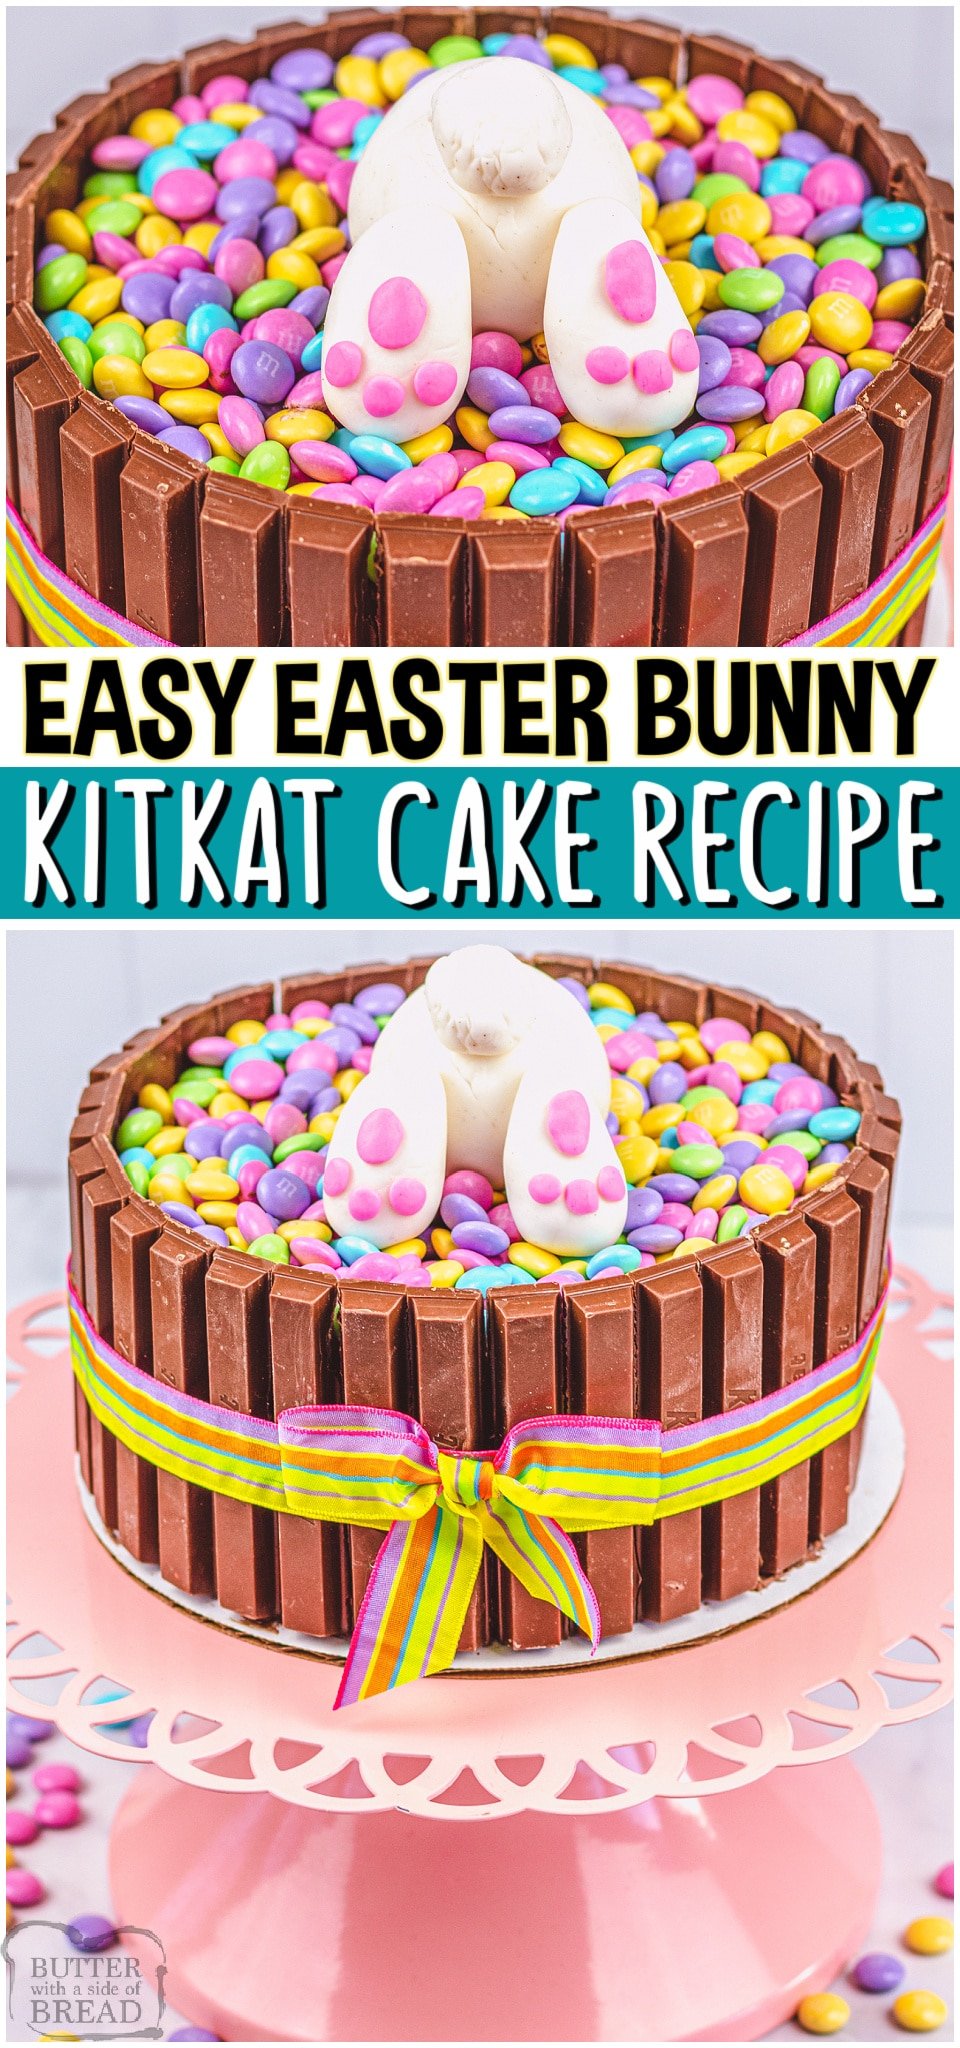
To make the bunny butt and til, take the white fondant and knead it until it’s soft and easy to work with (like playdough). You will need 1 large ball for the bunny butt and 1 small ball for the tail. Take a toothpick along the sides of the tail to create a little fluffy texture.
Now you’ll need to make the bunny feet. Make two tear drop sized shapes and flatten them slightly to give you a good surface for the bunny pads.
With the pink fondant, make 1 oval for the pad and place it in the center of the bunny foot. Then make 3 smaller dots for the toes. Attach them to the feet by using a small drop of water on the pink pads. Repeat the process for the other foot.
Place the bunny butt onto the cake and then attach the tail by adding another drop of water onto the tail before adhering it to the butt.
Place two feet on the back of the butt, attaching with water in the same manner.
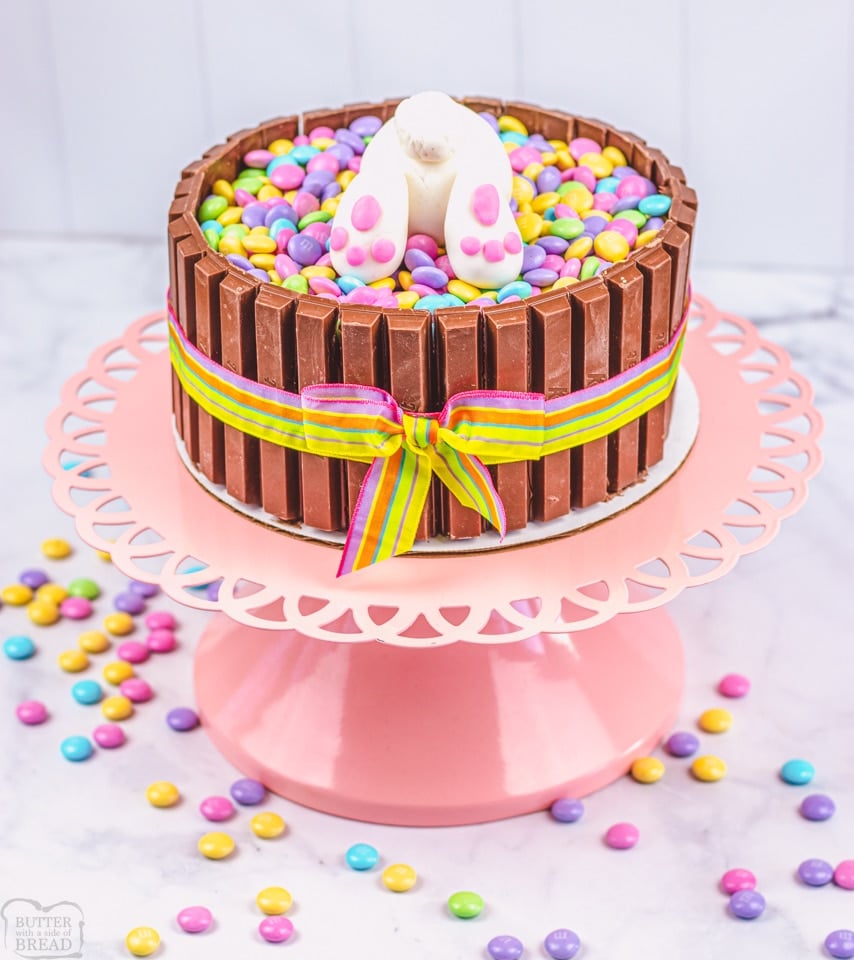
The final step is to take your festive ribbon and tie it around the base of the cake, securing it with a small piece of tape to hold the ribbon together.
Tie a small bow and place it onto the front of the cake. I used a small dab of glue to adhere the bow to the ribbon. Enjoy!
Easy Easter Bunny Kit Kat Cake Recipe
Easter Bunny KitKat Cake made easy & no one can resist this darling Easter cake! KitKats line the outside of the cake and the top has a cute Easter Bunny peeking out of pastel M&M candies.
Chocolate cake mixplus ingredients listed on box- oil, water and eggs
2ctchocolate frosting
9ctfull size kit kat barsaccounting for extras in case some of the bars are broken when separating them
10ozpastel colored M&Ms
Wilton White fondant½ of a package
Wilton Pink Fondanta small ball
Pastel ribboncolor of your choice
Instructions
Bake the 2 cakes according to box instructions. (Blend cake mix, water, oil and eggs in a large bowl at low speed for about 30 seconds. Beat at medium speed for about 2 minutes. Pour batter in your cake pans and bake immediately for approximately 30 minutes. Cake is done baking when a toothpick inserted in the center comes out clean. Cool completely.)
Level cakes by slicing/ shaving cake from the top of each. Apply a thin layer of frosting to the top of the first cake then put the second cake on top.
Apply a thin layer of chocolate frosting to keep the crumbs on the cake. Chill for about 15 minutes.
Apply another layer of chocolate frosting.
After frosting the cake, take the kit kat bars and break into single pieces. Place all along the side of the cake one by one until you line the entire cake with kit kat bars.
Pour the pastel M&Ms on the top of the cake, using the whole bag.
For the bunny butt and tail, take the white fondant ball and knead until pliable. You will need 1 large round ball for the bunny butt and 1 small ball for the tail. Take a toothpick and stick it into the small ball to give the tail texture.
Now you need to make the bunny feet. Make two tear drop shapes of fondant and flatten slightly to give you a surface to add the bunny pads.
With the pink fondant, make 1 large oval for the pad in the center of the bunny foot. Then, make 3 small circles for the toes. Attach these to the foot by adding a small dot of water to the pink circles and the oval pad. Repeat the process for the 2nd foot.
Place the bunny butt on the cake and then attach the tail by adding a dot of water on the tail and placing it onto the bunny butt.
Place the 2 feet on the back of the bunny butt and then attach with a small dot of water.
The final step is to cut a piece of ribbon that fits around the center of the cake and use a small piece of tape to secure the ribbon together. Tie a small bow and place it onto the front of the cake. I ended up using a small dab of glue in order to attach it to the ribbon. Enjoy!
Notes
Cake can be made a day or two ahead of time. Just cover completely and store in the fridge. (Cake doesn’t necessarily need to be refrigerated, but when you make it ahead of time, keeping it cool just preserves it better.)
This cake can last about 3-5 days if properly stored. You want to keep it from getting too warm as the chocolate can melt, but you also need to keep it well covered so that it doesn’t dry out.
Can I freeze KitKat cake?
I wouldn’t freeze the cake once fully decorated. This cake could be frosted at the crumb layer step and be stored covered in the freezer for up to 3 months before being pulled out and finished. To freeze the cake after the cake has been decorated will lead to white spots on the chocolate as the chocolate will separate and the frosting may sweat as it thaws causing colors to bleed together or look less appealing.
Other Easter Recipes you’re going to love this year!
This easy chocolate Easter bunny cake is sure to be a huge hit at your next family gathering or holiday party. Enjoy knowing that it tastes as good as it looks and didn’t take much effort to make. Desserts like this are always a crowd-pleasing favorite.
ABOUT US
I began Butter, with a Side of Bread to delve deeper into my fascination with food! I love cooking easy, delicious recipes and trying out new products. Welcome and I hope you stick around! Meet Jessica & Nellie...
What a cute – and very delicious looking – cake! I love that it is very straight-forward to make as well. Your step by step directions are fantastic. Thank you for sharing, and for being a part of the Hearth and Soul Link Party. I’m featuring this post at the party this week. Hope to ‘see’ you there!
It is very easy too make. I would reccomend not making it with a bigger circle cake pan. The dimensions with the kit-Kat’s and the bunny butt look a little off. I made it the day before Easter and it still looks cute in the end. Love the texture in the tale.would never of thought of it. I would recommend when coloring the fondant using gel coloring not liquid.overall loved the cake


April Harris says
What a cute – and very delicious looking – cake! I love that it is very straight-forward to make as well. Your step by step directions are fantastic. Thank you for sharing, and for being a part of the Hearth and Soul Link Party. I’m featuring this post at the party this week. Hope to ‘see’ you there!
Lydia says
It is very easy too make. I would reccomend not making it with a bigger circle cake pan. The dimensions with the kit-Kat’s and the bunny butt look a little off. I made it the day before Easter and it still looks cute in the end. Love the texture in the tale.would never of thought of it. I would recommend when coloring the fondant using gel coloring not liquid.overall loved the cake