
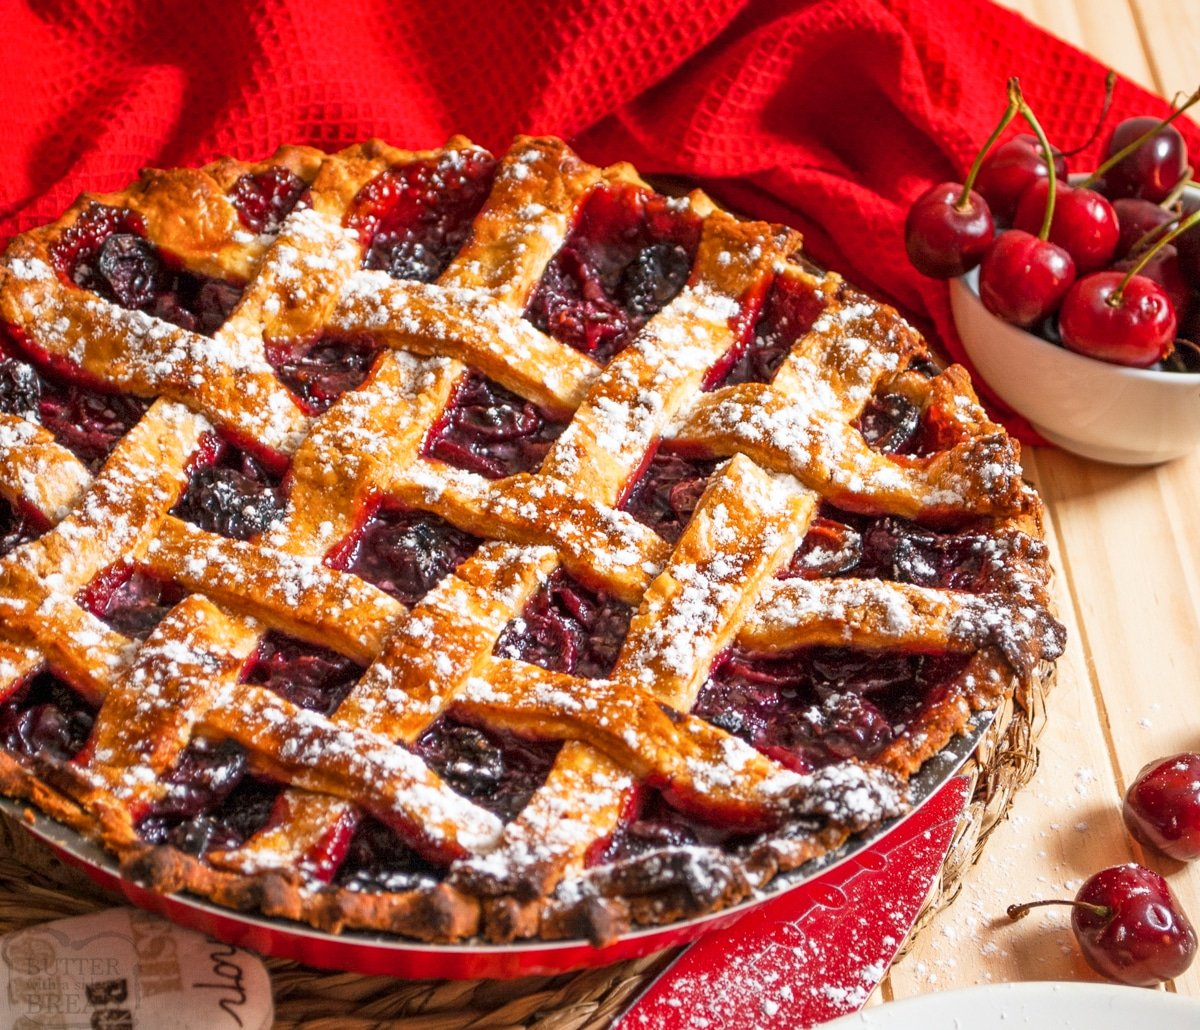
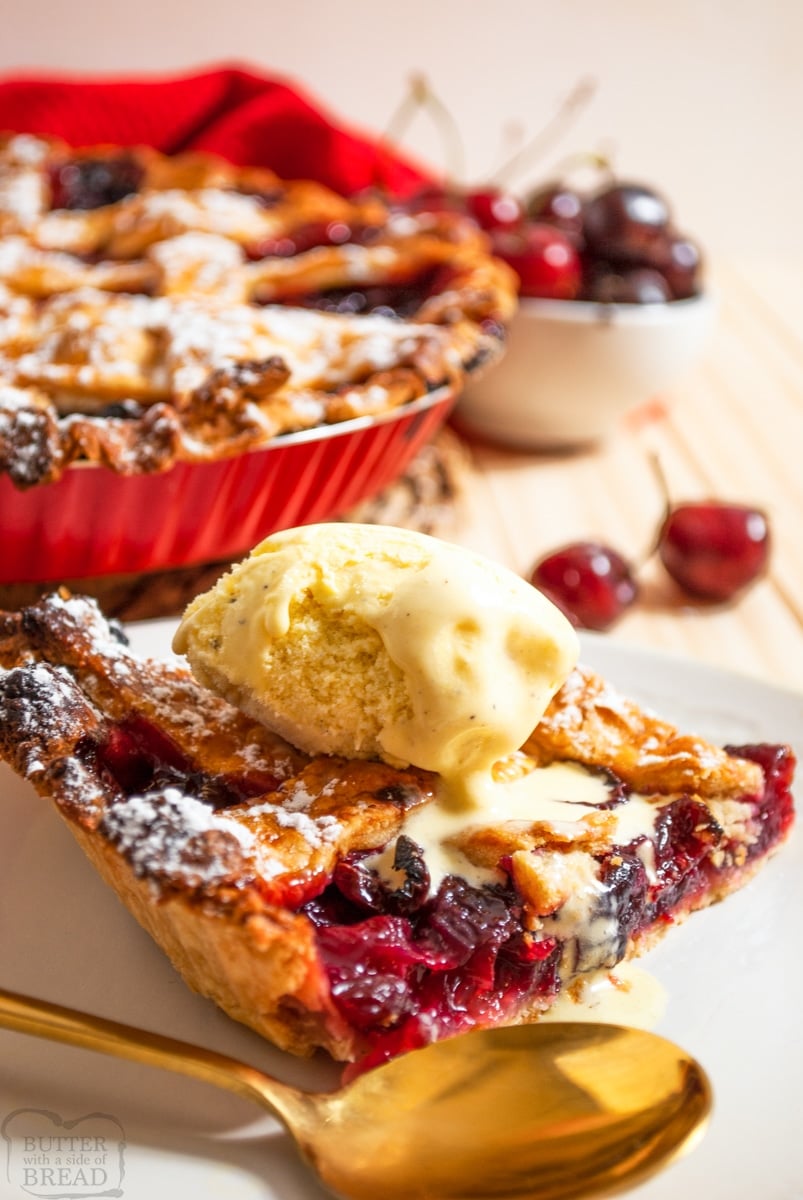
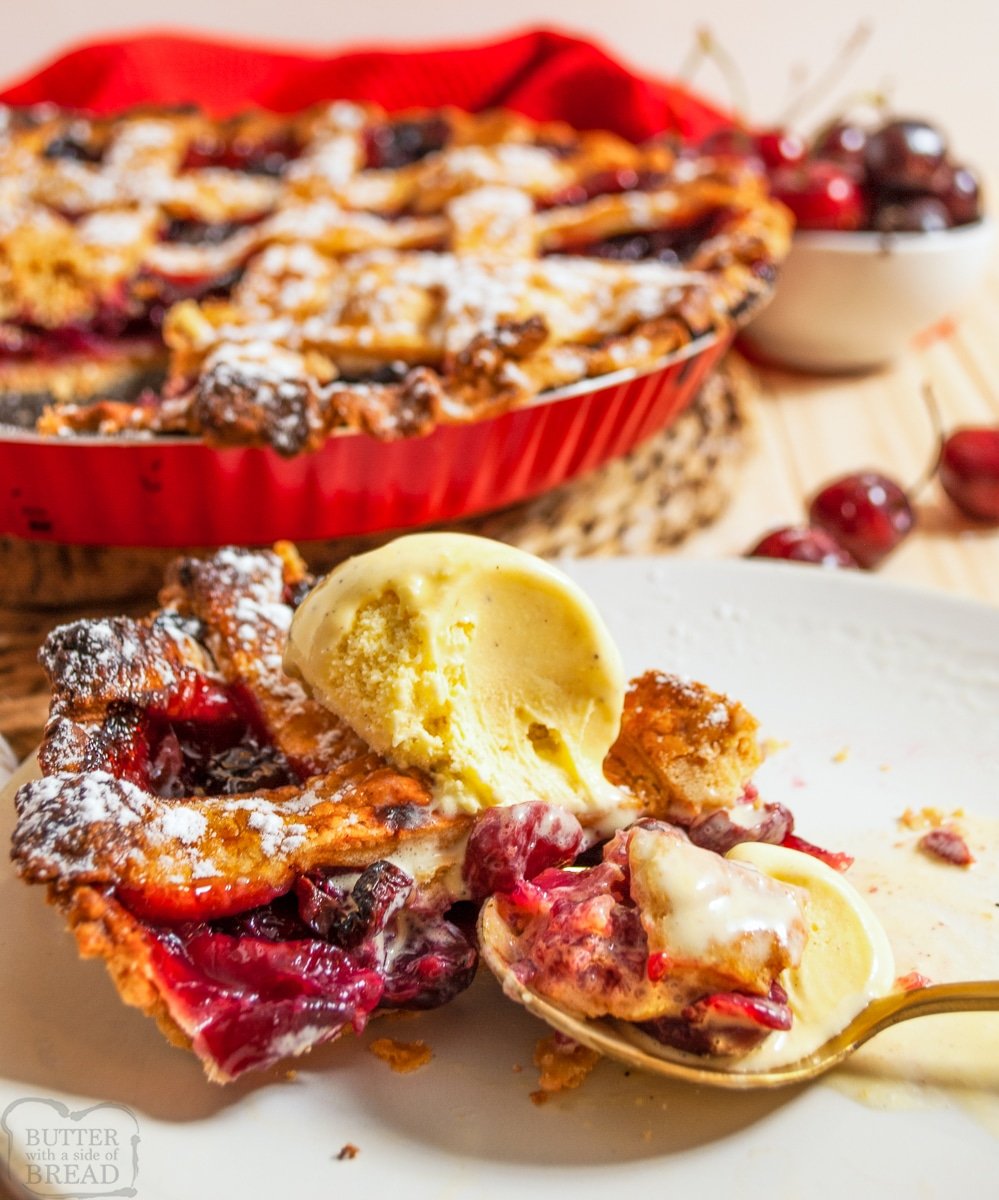
Fresh cherry season is short — and this is the recipe worth making every single year while it lasts. A flaky all-butter crust, a sweet-tart fresh cherry filling with almond extract, and a classic lattice top. Serve it warm with vanilla ice cream and it is one of the best things summer has to offer.

Check out these 5 ⭐️ reviews for this incredible cherry pie:

Why You’ll Love This Recipe
- Freezer friendly — both the crust and the filling can be made ahead and frozen
- Fresh cherries make all the difference — the bright, natural flavor of real cherries in peak season is something canned filling simply cannot replicate
- Flaky homemade butter crust — this is the crust recipe you will use for every pie from here on out
- Almond extract is the secret — a small amount adds that classic cherry pie flavor that makes people ask what your secret is
- Beautiful lattice top — looks impressive and is much easier to weave than it appears
Fresh vs Frozen vs Canned Cherries — Which Is Best?
- Fresh cherries are the best choice when they are in season — June through August in most of the United States. They have the brightest flavor, the best texture, and hold up beautifully in a baked pie. Use sweet cherries for a milder filling or sour cherries for a more classic tart cherry pie flavor. A mix of both is our favorite.
- Frozen cherries are an excellent option when fresh are not available. Use a 24-ounce bag of frozen pitted cherries (about 5 cups) and do not thaw them before using — add them straight to the filling mixture. The pie may need an extra 5 minutes of bake time.
- Canned cherry pie filling is a shortcut that skips the homemade filling entirely. It works in a pinch but the flavor and texture are noticeably different from a filling made with real cherries. If you go this route, use two 21-ounce cans and skip the cornstarch, sugar, and extracts.
How to Pit Fresh Cherries
A cherry pitter is the fastest and cleanest method — especially for a full pie that needs 5 cups of cherries. Here are two options depending on how often you plan to use it:
A single-cherry pitter works well for small batches and is inexpensive. A six-cherry pitter is a great middle-ground for regular baking.
No cherry pitter? Use a frosting piping tip with a round opening about the same size as the cherry pit. Remove the stem, press the tip into the top of the cherry where the stem was, and push down — the pit pops out the bottom. It works best with ripe cherries and leaves most of them intact. You can also halve the cherries with a knife and remove the pit that way, though the filling will be slightly different in texture.
Ingredients in Fresh Cherry Pie
For the Homemade Butter Crust
Cold unsalted butter — Fourteen tablespoons, cubed and kept very cold until the moment you use it. Cold butter is what creates the flaky layers in the finished crust. Do not let it soften.
All-purpose flour — Three cups form the base of the dough.
Powdered sugar — Six tablespoons sweeten the crust slightly. For a savory pie you can swap this for salt.
Salt — A pinch to bring out all the flavors.
Egg yolks — Two egg yolks make the dough richer and more pliable.
Ice cold water — Four to six tablespoons added one at a time until the dough just barely holds together. Add slowly — you can always add more but you cannot take it out.
Egg whites — For brushing over the top crust before baking to get that beautiful golden color.
For the Fresh Cherry Filling
Fresh cherries — Five cups, pitted. Sweet, sour, or a mixture of both. Fresh is ideal during peak season; frozen works well year-round.
Cornstarch — A quarter cup thickens the filling so it holds its shape when sliced instead of running out across the plate.
Sugar — Two thirds of a cup sweetens the filling and balances the tartness of the cherries. Adjust up or down slightly depending on how sweet your cherries are.
Vanilla extract — One teaspoon rounds out the cherry flavor beautifully.
Lemon juice — One tablespoon of freshly squeezed lemon juice keeps the filling tasting bright and fresh.
Almond extract — A quarter teaspoon is the traditional secret ingredient in cherry pie. It amplifies the natural cherry flavor in a way that is hard to pinpoint but immediately noticeable. You can omit it but it is worth including.
How to Make Cherry Pie with Fresh Cherries
Make the Butter Pie Crust
Step 1. Combine the flour, salt, powdered sugar, and cold cubed butter in a large bowl. Using clean hands or a pastry cutter, work the butter into the flour mixture until you have pea-sized pieces throughout. Do not overwork — those uneven bits of butter are what create the flaky layers.
Step 2. Add the egg yolks and mix to combine.
Step 3. Add the cold water one tablespoon at a time, mixing between each addition, until the dough just barely holds together when pressed. It should not feel wet or sticky.
Step 4. Form the dough into a ball, divide it into two equal discs, wrap each tightly in plastic wrap, and refrigerate for at least 30 minutes. This lets the flour hydrate and keeps the butter cold. Crusts can be made ahead and frozen for up to 8 weeks — thaw for 2 to 3 hours before rolling.

Make the Fresh Cherry Filling
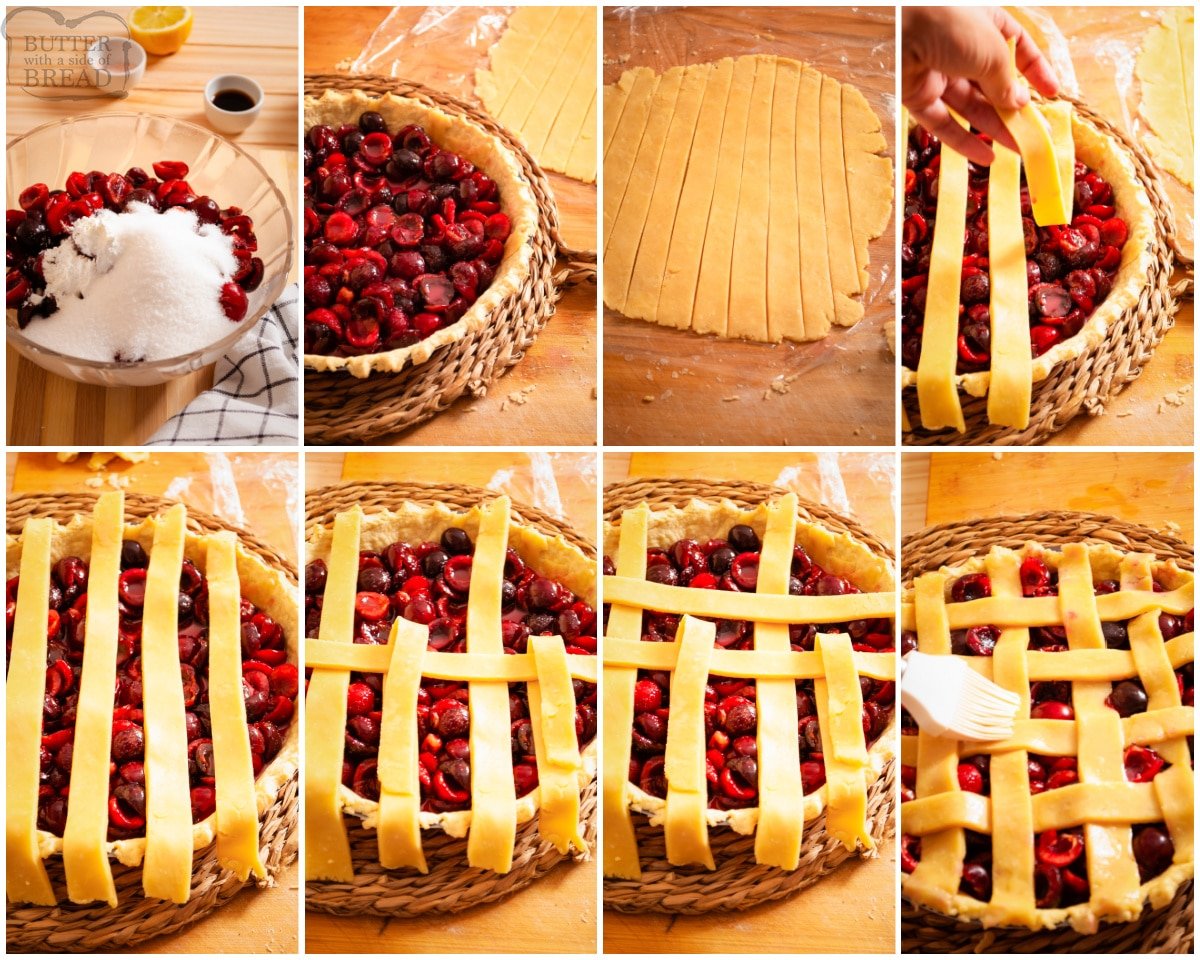
Step 5. Preheat the oven to 400°F. In a large bowl combine the pitted cherries, cornstarch, sugar, vanilla extract, almond extract, and lemon juice. Stir to combine and set aside. Discard any excess liquid that pools in the bowl before filling the pie.
Assemble and Bake
Step 6. On a lightly floured surface, roll one dough disc to about ¼ inch thickness using the following technique: roll up and down, rotate 90 degrees, roll again, rotate again. This keeps the circle even and prevents the dough from sticking. Line your pie pan with the first crust, pressing gently into the bottom and sides without stretching it. Trim any excess, leaving about an inch of overhang.
Step 7. Roll the second dough disc the same way and cut into strips with a knife or pastry wheel for the lattice top. Set aside.
Step 8. Pour the cherry filling into the crust-lined pan, discarding any excess liquid from the bowl.
Step 9. Create the lattice top by laying 4 strips across the filling with space between them. Fold every other strip back halfway, lay a perpendicular strip across the center, and unfold the folded strips. Repeat on both sides, alternating which strips are folded to create the woven effect. Press the strip ends into the bottom crust overhang and crimp the edges with your fingers or a fork.
Step 10. Brush the lattice and crimped edges with egg wash.
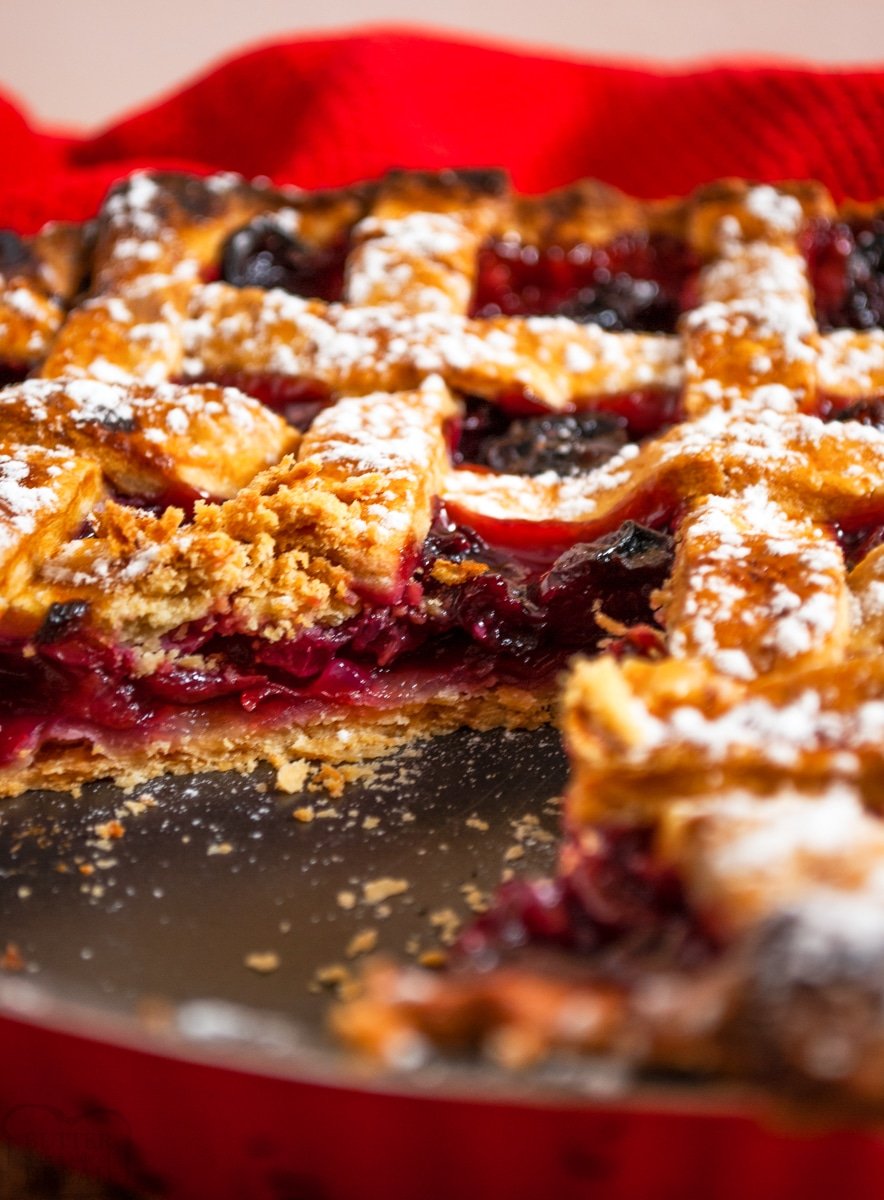
Step 11. Bake at 400°F for 15 minutes, then reduce heat to 350°F and bake for another 30 to 40 minutes until the crust is golden and the filling is bubbling through the lattice. If the crust starts browning too quickly, move the pie to a lower rack or loosely tent the edges with foil.
Step 12. Let the pie cool completely before slicing — at least 2 hours. This allows the filling to set fully so it holds its shape when cut. Serve warm or at room temperature with a scoop of vanilla ice cream.

Cherry Pie with Fresh Cherries Recipe
Ingredients
Pie Crust
- 3 cups all-purpose flour 14.2 oz
- 14 TBSP cold unsalted butter cubed (7 oz)
- 1 tsp salt
- 6 TBSP icing sugar
- 2 egg yolks
- 4-6 TBSP ice-cold water
- 2 Egg whites for the egg wash on the crust
Fresh Cherry Pie Filling
- 5 cups cherries pitted, fresh or frozen 24 oz
- ¼ cup cornstarch
- ⅔ cup sugar 5 oz
- 1 tsp vanilla extract
- 1 TBSP freshly squeezed lemon juice
- ¼ tsp almond extract
- pinch salt
Instructions
- TO MAKE HOMEMADE PIE CRUST: In a bowl, combine the all-purpose flour, a pinch of salt, the powdered sugar, and the cubed cold butter. With your clean hands, start mixing the butter with the rest of the ingredients. You want to break down the butter until you get small pea-sized pieces, it doesn't matter if some are bigger than others. Be careful not to overwork the butter. These bits of un-mixed butter will help to create the flakiness of the crust. You can make this step with a pastry cutter or a food processor.
- Once you achieve said consistency, add the egg yolks and mix.
- Add tablespoons of cold water one by one, mixing in between. You want to achieve a consistency that is not too wet. It needs to stay barely together when pressed and should not stick to your hands. It’s best to add the very cold water one tablespoon at the time, and check if the dough needs more water or not. Remember you can always add, but never take out. Keep mixing until you form a ball of dough, you should end up with a “clean” bowl.
- Divide into two balls and form each into a disk, wrap it in cling wrap and let it cool in the fridge for 30 minutes. This will allow the flour to hydrate and drop the temperature of the dough a bit. Crusts can be made ahead and frozen up to 8 weeks. Defrost for 2-3 hours or until dough is soft before rolling and shaping.
- MAKE THE FRESH CHERRY PIE: Start by preheating your oven to 400°F /200c.
- In a large bowl combine the pitted cherries, cornstarch, sugar, vanilla & almond extract, lemon juice and pinch of salt. Set aside.
- Roll out one of your pie dough disks: on a floured surface roll it until you reach a 1/4 inch (13mm) inch thickness as it follows: Roll a bit up and down and then turn 90º to one side. Roll again in the same direction and then turn again 90º. Keep rolling until you obtain the desired thickness. Roll the other dough disk, cut it in strips with a knife or a pastry wheel cutter, and set it aside.
- Line the pie pan with the first rolled crust and adjust the dough making sure there are no air bubbles underneath. Do not worry about the excess dough you are going to use it to create a nice decoration on the border.
- Fill the pie pan with the cherry mixture, discarding any excess liquid formed in the bowl.
- Create the lattice top crust by placing 4 dough strips on top of the pie pan leaving some space between them. Fold the second and third strips up & place two more strips on the opposite direction creating a crossed pattern and repeat all around the pie. The idea is to obtain weaving effect, by having always one strip up, one down.
- Press together the excess bottom crust with the end of the strips and crimp the edges with your fingers, or use a fork to press them together. Whisk the egg whites, then brush the surface of the crust.
- Bake for 15 minutes at 400°F, then reduce the heat to 350°F or 180C and bake for 30-40 minutes depending on your oven. Keep an eye on the crust, so it doesn't get too browned, if it starts to get two brown move it to a lower rack or place a piece of foil on the pie.
- Once fully baked, let the pie cool so that the filling will fully set. Serve with vanilla ice cream and enjoy!
Notes
Nutrition
📫 Save this recipe! Send it to your email! 📩
I consent to receiving emails from this site.
Tips for the Best Cherry Pie
Keep everything cold. Cold butter, cold water, cold hands if possible. The flakiness of the crust depends on the butter staying solid until it hits the oven. If the dough feels warm while you are working with it, pop it back in the fridge for 10 minutes.
Do not skip the chill time. Thirty minutes in the refrigerator lets the gluten relax and the flour hydrate, which makes the dough much easier to roll and results in a more tender crust.
Discard the excess liquid. After mixing the cherry filling, some liquid will pool in the bowl. Pour it off before filling the pie — too much liquid makes a soggy bottom crust and a filling that never fully sets.
The lattice is easier than it looks. Take it one strip at a time and do not worry if it isn’t perfect. A slightly imperfect lattice looks charming and homemade. No one is grading it.
Wait for the bubbles. The filling needs to bubble visibly through the lattice before you pull the pie from the oven — that’s how you know the cornstarch has activated and the filling will set properly as it cools.
Cool completely before slicing. This is the hardest part. A pie that hasn’t fully cooled will have a runny filling even if it bubbled beautifully in the oven. Two hours minimum, three is better.
How to Store Cherry Pie
Room temperature: Covered loosely with plastic wrap or foil, cherry pie keeps at room temperature for up to 2 days.
Refrigerator: Store covered in the refrigerator for up to 4 days. Let slices come to room temperature before serving or warm briefly in the oven.
Freezer (baked pie): Wrap the cooled pie tightly in plastic wrap and then foil. Freeze for up to 3 months. Thaw overnight in the refrigerator and reheat in a 350°F oven for 15 to 20 minutes.
Freezer (cherry filling only): Mix together the filling ingredients and freeze in an airtight container for up to 6 months. Thaw, stir, and use directly in the pie without any adjustments.
Freezer (unbaked pie): Assemble the pie completely, freeze until solid, then wrap tightly. Bake from frozen at 400°F for 20 minutes then reduce to 375°F for 45 to 55 minutes. No need to thaw first.
Frequently Asked Questions
What type of cherries are best for cherry pie? Sour or tart cherries are the traditional choice for cherry pie — they hold their shape beautifully when baked and have a bright, tangy flavor that balances the sweetness of the filling. Sweet cherries work well too and make a milder, sweeter pie. A mix of both is our favorite combination.
Can I use frozen cherries instead of fresh? Yes — frozen cherries work beautifully in this recipe. Use them straight from frozen without thawing and add about 5 extra minutes to the bake time. The flavor is very close to fresh, especially outside of cherry season.
Can I use canned cherry pie filling? You can — use two 21-ounce cans and skip the cornstarch, sugar, and extracts entirely. The flavor and texture will be different from homemade filling, but it is a much faster option.
Why is my cherry pie filling runny? Three common culprits — too much liquid left in the bowl before filling the pie, not enough bake time for the filling to bubble and activate the cornstarch, or slicing the pie before it has fully cooled. All three are easy to avoid with the tips above.
How do I keep the crust from getting soggy? Discarding the excess liquid from the cherry filling before adding it to the crust is the most important step. You can also blind bake the bottom crust for 10 minutes before adding the filling for extra insurance against a soggy bottom.
Can I make cherry pie ahead of time? Yes — the crust can be made up to 3 days ahead and refrigerated, or frozen for up to 8 weeks. The filling can be mixed and refrigerated for up to 24 hours before assembling. The assembled pie can also be frozen unbaked and baked directly from frozen.
How many cherries do I need for one pie? About 5 cups of pitted cherries, which is roughly 2 to 2½ pounds of whole fresh cherries before pitting. A good cherry pitter makes the process much faster.
What is the best way to pit cherries without a cherry pitter? Use a round frosting piping tip — press it into the top of the cherry where the stem was and push down to pop the pit out the bottom. A sturdy straw works similarly. Or simply halve the cherries with a paring knife and remove the pit by hand.
More Cherry Recipes to Try
Hidden Cherry Shortbread Cookies — buttery shortbread cookies with a maraschino cherry hidden inside every single one. A beautiful and surprising cookie that looks as impressive as it tastes.
Cherry Chocolate Quick Bread — rich chocolate quick bread with fresh cherry pieces folded throughout. Ready in about an hour and completely irresistible warm from the oven.
Cherry Chocolate Muffins — soft, tender muffins packed with chocolate and fresh cherry flavor. A perfect way to use up cherries during peak season.
Cherry Puff Pastry Turnovers — flaky puff pastry filled with a sweet cherry filling — an impressive summer treat that comes together much faster than a full pie.
No-Bake Cherry Lush Dessert — layers of creamy cheesecake filling and cherry topping over a buttery crust — no oven required and perfect for hot summer days.


Katie says
Cherry pie is one of my favorite desserts ever. I especially love it cold!
Suzy says
This turned out great! Loved that it was completely homemade!
Kallie Thomas says
This is my great grandmother’s recipe and I am sure that she is watching over everyone who makes this, smiling. My Great Grandmother and her children (my Grandmother and Great Aunt) were the best cooks and they loved to fill your belly. I am proud to see all the rave reviews and hope that you will try this recipe and enjoy it as much as we did and do to this day. Also a note try it as is the first time it is perfect the way it is but if you feel that you still need to modify it or tweak it to your own. that’s cool! Thanks to all! and I love you, Great Grandma, Grandma, and Nanny.
Jessica says
thanks Kallie!
Kathy says
So so good!! I usually do not like crust but I loved this one! Love the almond extract flavor. Yum!
Jessica says
Thanks Kathy!
shirley olson says
YUM!
Jessica says
Agreed Shirley!
Alejandra says
Great recipe!! Loved it, did it exactly as told and it came out delicious! I might try to put a tad less sugar next time.
Jessica says
So glad you liked it! Yes, the sugar amount can be adjusted; it really depends on how naturally sweet your cherries are!
Julie Monaco says
The ingredients calls for 1 tsp of salt for pie dough and the recipe then says a pinch. That is a big difference. Also, assume a standar 9 inch pie plate as that is not stated. Would also be curious as to what type you recommend for this crust – glass, ceramic or metal.
Jessica says
I apologize- there’s a teaspoon of salt in the crust and a pinch of salt in the filling! I made it more clear!