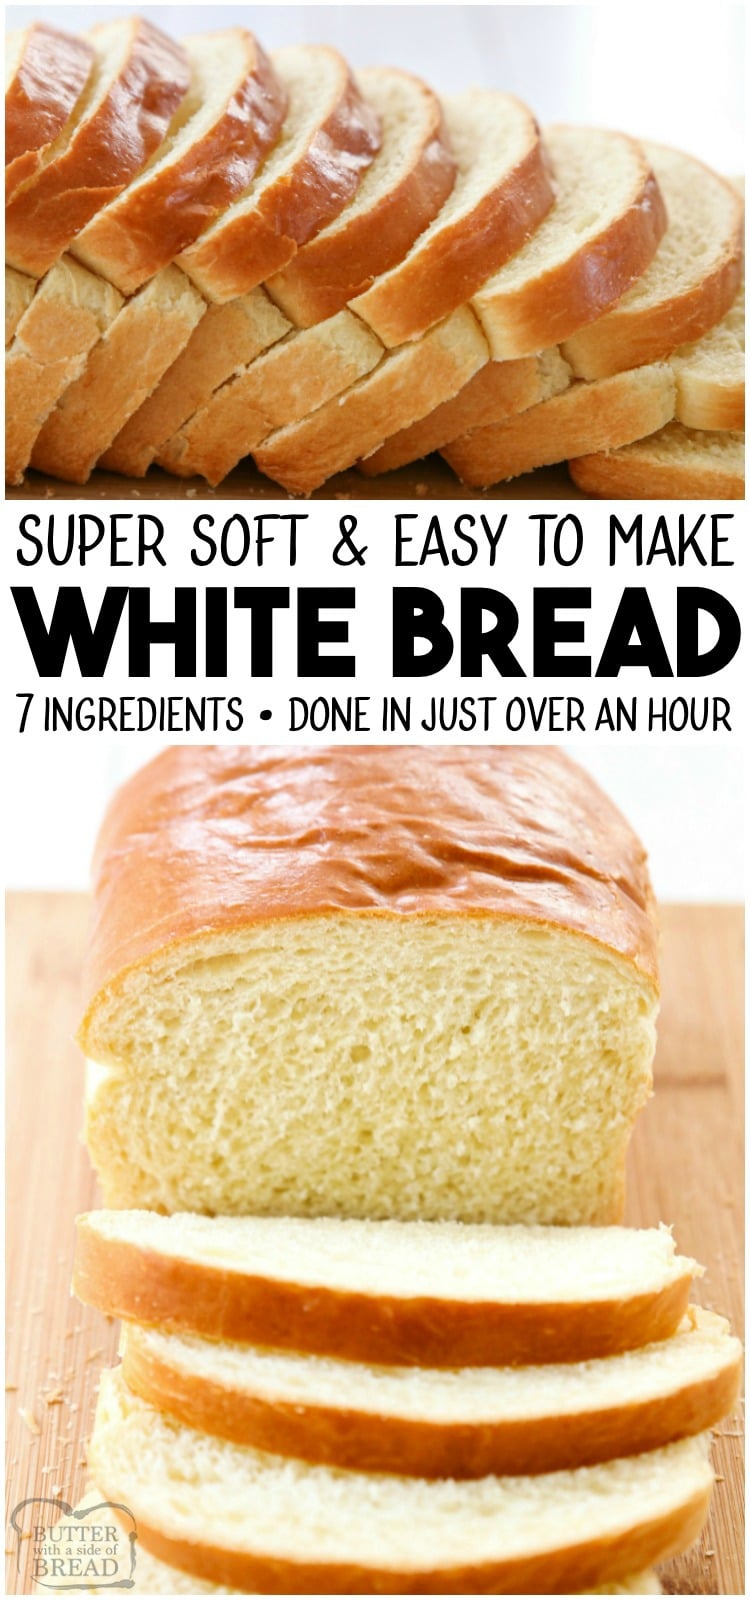
White Bread recipe is made with basic ingredients & detailed instructions showing how to make bread! Done in just over an hour this recipe is one of the best soft white sandwich bread recipes.
If you love Bread as much as we do, find all of our Best Bread Recipes Here!
I began experimenting with bread recipes years and years ago and I get SO excited when I find a new one I love! It always amazed me how tiny shifts in ingredients come together and yield such a different result.
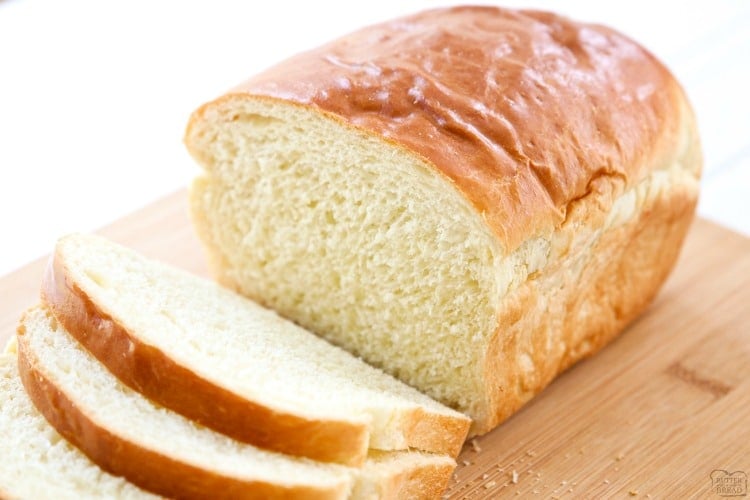
Soft White Bread Recipe
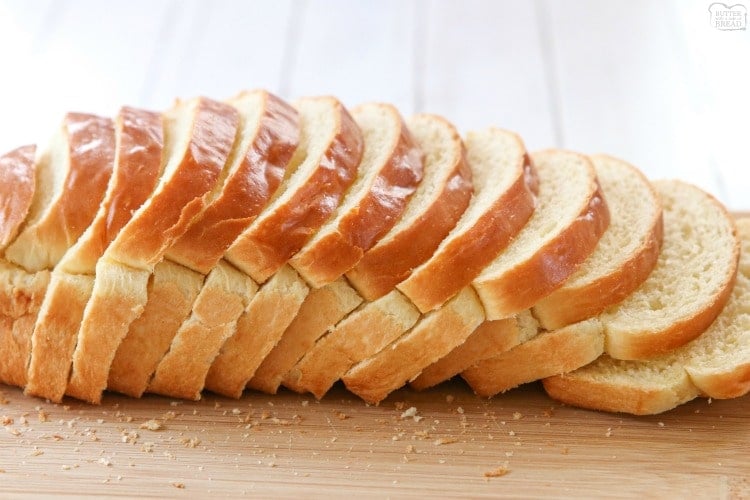
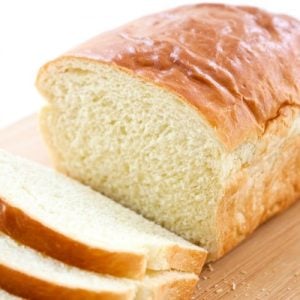
This white bread recipe can be used for literally anything. It makes great toast, great sandwich bread, anything! It’s tremendously soft and has the best texture. It’s even fabulous DAYS later, which is tough to achieve with homemade bread.
What makes bread soft and fluffy?
Ingredients and preparation method combine in this bread recipe to give the bread a super soft and fluffy texture. Don’t leave out or replace the egg and oil in the recipe. They are imperative to the chewy, feathery texture of this white bread. Also, be sure to knead for the full 5 minutes. Giving the dough enough time in both the first and second rise will also help the overall texture.
White Bread Recipe Ingredients
- Warm Water
- Granulated Sugar
- Instant/Active dry yeast
- Canola oil – you can also use vegetable oil or light olive oil
- 1 egg
- Salt
- Flour
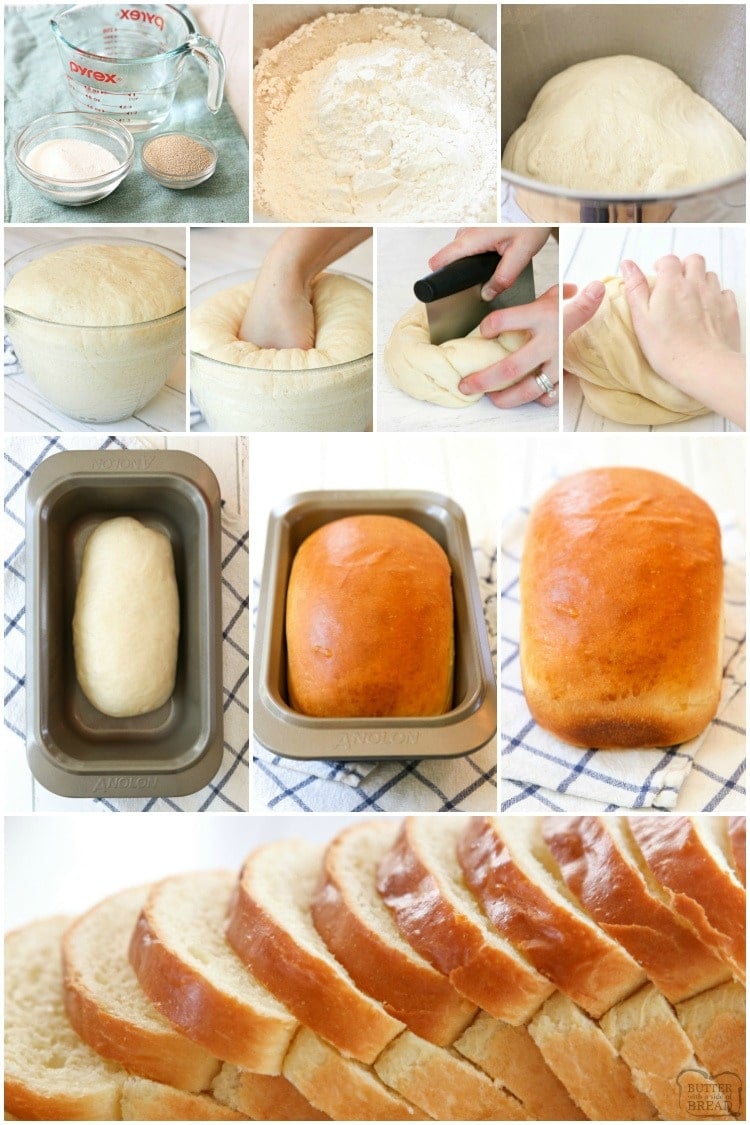
How to Make White Bread
If you’ve never made bread before, here is the basic formula for making your own at home. It really is an easy process and you’ll be thrilled with the results. Plus your entire house will smell like freshly baked bread which is amazing.
Step 1: Assemble Bread Ingredients
You’ll need warm water, granulated sugar, instant OR active dry yeast, 1 egg, canola oil, salt and flour. That’s it!
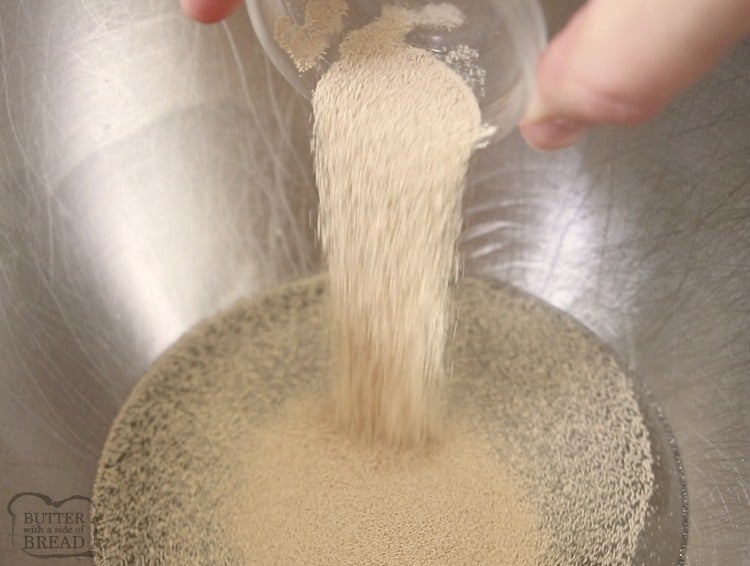
Step 2: Dissolve the yeast and activate it by Proofing
This is a simple process that takes about 5 minutes. You can watch the video above to see what yeast looks like when it’s proofed. It’s possible to kill yeast if you use too hot of water, so aim for slightly warmer than luke-warm, or about 105°F. Combine warm water and the sugar, then stir to dissolve. Add in the yeast, give it a quick stir and then let it sit for 5 minutes. You’ll begin to see the yeast puff up until it covers the entire surface of the water.

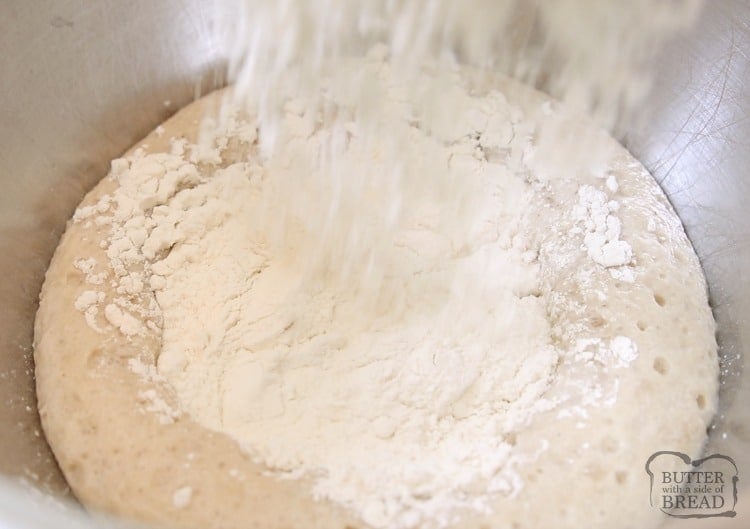
Step 3: Add remaining ingredients and mix
Add the egg, the oil, salt and flour, then mix using an electric stand mixer until it’s well combined, about 2 minutes. You can mix by hand but it will take longer.
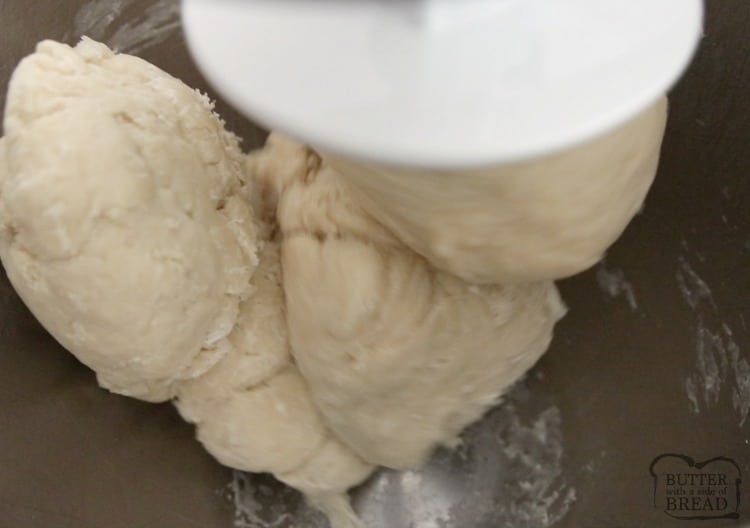
Step 4: Knead the Bread
Trust me, taking an extra 5 minutes to let your mixer knead the bread is worth it! Going through the process of kneading bread dough is crucial for bread with great texture. Kneading dough allows gluten to form which enables dough to rise better, be lighter and fluffier. You can knead by hand or with a mixer. I use the dough hook on my mixer to knead bread dough. If you knead by hand, you’ll want to knead for 7-8 minutes, depending on how consistent you are.
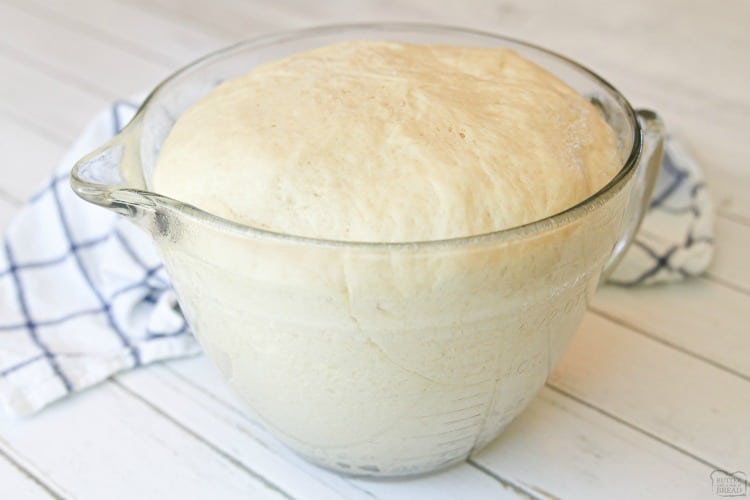
Step 5: First Rise
Place your lovely smooth, elastic bread dough in an oiled bowl and cover it with plastic wrap or a clean towel. I think plastic wrap works better because it traps hot air inside and thus, my dough requires a shorter first rise. Be sure to spray the side of the plastic wrap that will touch the dough, so that it doesn’t stick.
If your house is cool, your bread will take longer to rise. In the wintertime when my house is cooler than normal, I like to turn the oven on for 2-3 minutes, then turn it off and let the bowl of dough rise in there. The oven traps the heat for a longtime and it’s the perfect atmosphere for rising dough.
This White Bread recipe only needs to rise for 15 minutes.
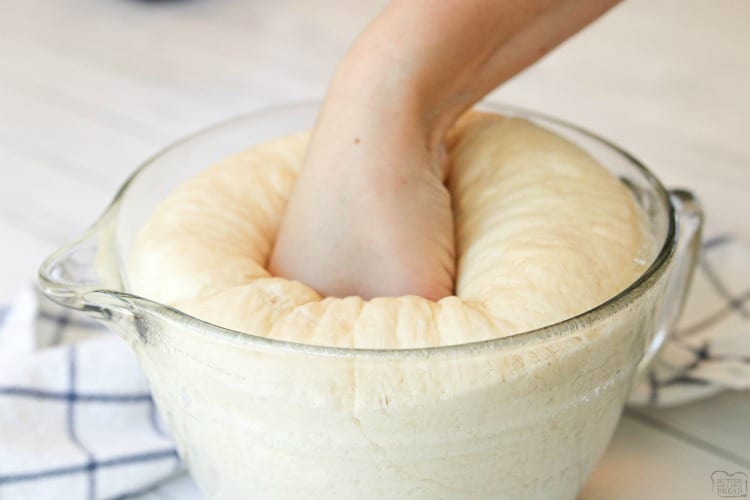
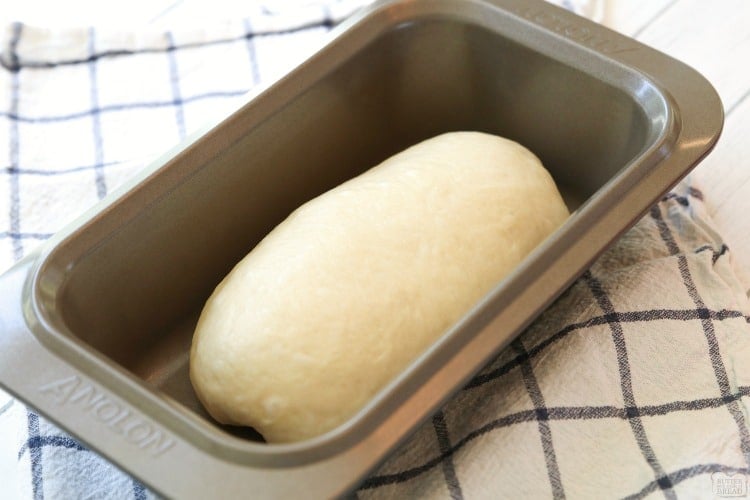
Step 6: Punch Dough and Shape it
Punching the dough down quickly releases any air pockets that have developed and helps your bread have a more consistent texture.
Shape dough by rolling it gently into a ball and rolling it 2 or 3 times on the counter top so that the ball is more oblong. Tuck the ends underneath so that the loaf looks smooth.
Place in the pan. It doesn’t need to be touching the sides of the pan.
I like to brush an egg wash on the top of this bread to give it that smooth, shiny crust. It’s still soft and it ends up having incredible flavor. Just whisk together 1 whole egg and 1 TBSP water, then brush all over the outside of the dough, making sure to cover the entire surface of the dough.
Step 7: Second Rise
This White Bread only has a 10 minute second rise. I just place the pan on the stove near the oven while it preheats.
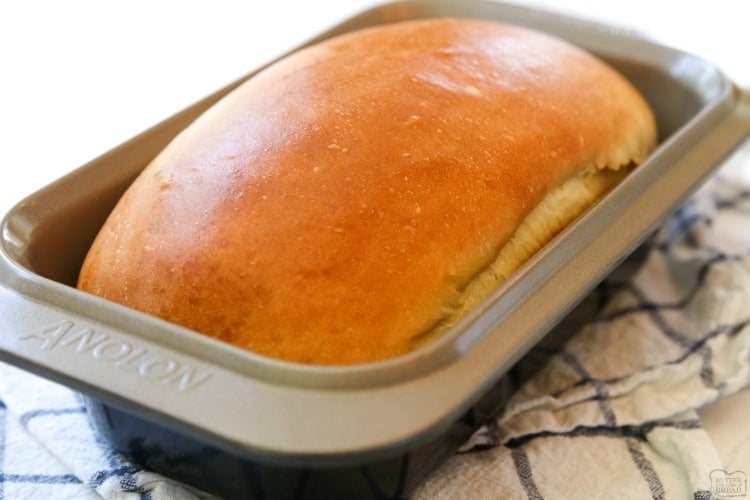
Step 8: Bake the Bread
You’re nearly there! This sandwich bread bakes for about 35-40 minutes. It bakes at a higher temp than other bread recipes- 400° F. Make sure your oven rack is on a lower setting so that the top doesn’t burn! I use a digital cooking thermometer near the end of the baking time to make sure the bread is fully cooked. Fully cooked bread will be 190-200 degrees F. Bread recipes that include milk will need to cook until 200 degrees, but since this one doesn’t, I take it out once it reaches 190 degrees. The top will be golden brown.
My all-time favorite cooking thermometer is the Thermapen. It’s super fast and incredibly durable. Another great thermometer is the ThermoPop which is a more basic version that works just as well!
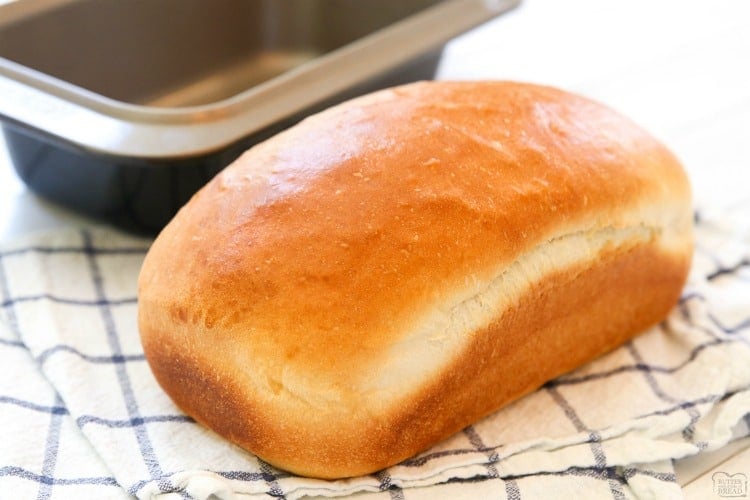
Step 9: Cool the Bread
Let the bread cool in the pan it cooked in so it can maintain it’s shape. Once it’s cooled you can transfer it to a cooling rack.
I prefer to cool it for at least 20 minutes. If you try and slice it while it’s too hot, the loaf will get smashed- it’s a soft bread!
AVOID SUNKEN BREAD
The easiest and best way to avoid sunken bread is to use a cooking thermometer to check the inside of the loaf. Fully cooked bread will register 200°F on a thermometer. My all-time favorite thermometer is the Thermapen. It’s super fast and incredibly durable. Another great cooking thermometer is the ThermoPop which is a more basic version that works just as well!
White Bread
Ingredients
Ingredients
- 1 cup warm water
- 1/4 cup granulated sugar
- 2 TBSP yeast
- 1/3 cup canola oil
- 1 egg
- 1 1/2 tsp salt
- 3 to 3 1/2 cups flour
- 1 egg whisked with 1 TBSP water to brush on top
Instructions
Instructions
- In a large bowl, dissolve sugar in warm water. Add yeast; let stand for 5 minutes.
- Add the canola oil, egg, salt and enough flour to form a soft dough. Knead for 5 minutes.
- Form dough into a smooth ball. Keeping the dough in the bowl, spray with non-stick spray and cover bowl with plastic wrap. Let rise in a warm place for 15 minutes.
- Punch down dough. Knead for 1 minute.
- Form loaf by rolling ball into an oblong shape then tucking and pinching the ends under the loaf.
- Place loaf in a bread pan. Brush thoroughly with egg mixture.
- Let loaf sit while oven is preheating to 400 degrees F, or about 10 minutes. It bakes at a higher temp than other bread recipes. Make sure your oven rack is on a lower setting so that the top doesn't burn!
- Bake for 30-40 minutes, until outside is golden brown and internal temperature of loaf registers 195-200 degrees.
- Let cool. Slice & enjoy with butter!
Video
Notes
Nutrition
📫 Save this recipe! Send it to your email! 📩
I consent to receiving emails from this site.
Instant or Active Dry Yeast for Making Bread
If you use instant yeast, you can add it directly to your other dry ingredients when making bread. If you use active dry yeast, you’ll need to first dissolve it in warm water before using it in a recipe. I buy my yeast in bulk from Costco and it’s active dry yeast.
BEST BREAD PAN?
I bake a lot of bread and the pans I prefer are either ceramic, glass or cast iron. These pans will bake bread more evenly and release the bread more easily after baking. I don’t like using dark or nonstick pans because the bread cooks unevenly. It darkens on the outside before the bread is cooked on the inside, so the coloring is uneven. Read more about which bread pan is the best here!
How to Store Homemade White Sandwich Bread
Homemade bread needs to be stored in an airtight container. We like to use these bread bags because they’re the perfect size and shape.

White Sandwich Bread Recipe FAQ
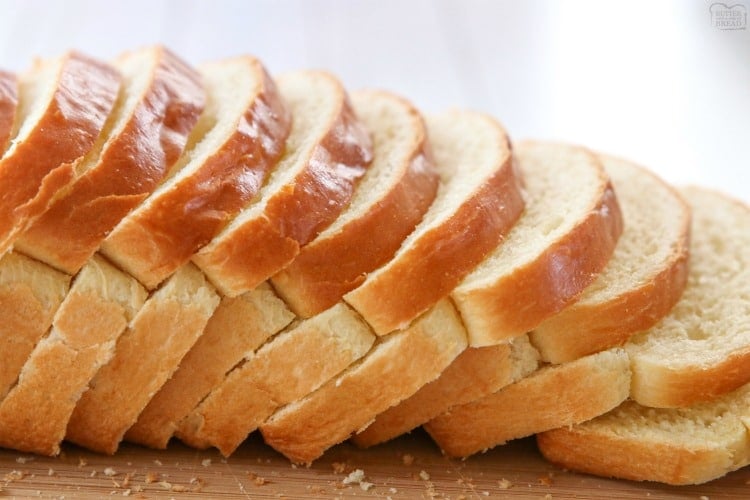
There are so many different types of sandwich bread! The two most basic varieties are white and wheat. This is a white loaf, which is a soft, feathery classic bread.
Store-bought white bread can contain trace amounts of benzoyl peroxide which is used to “bleach” the flour white. That’s why we make homemade bread, so that we can have control over the ingredients! So be sure to use “unbleached” white flour.
The egg and oil in this bread heavily contribute to the soft, spongy texture. You can replace canola oil with a light olive oil if you’d like. I find that using any other type of olive oil gives the bread a rather unique, unpleasant flavor.
Many bread recipes use both milk and water. Both are good! Using milk adds additional vitamins and protein. It’s also important to remember that breads that contain milk must be cooked to a full 200°F. That’s one of the reasons I use a cooking thermometer to test my bread for doneness before taking it out of the oven.
More incredible homemade bread recipes:
- Homemade Buttermilk Bread recipe
- Homemade Hawaiian Bread
- Honey Oat Bread recipe
- Cinnamon Raisin Bread
- Parmesan Garlic Dinner Rolls
- Fabulous French Bread
- Sweet Orange Dinner Rolls
- Easy Homemade Cheesy Breadsticks
- Tomato Parmesan Flatbread
- Potato Bread Recipe
- Soft Cornmeal Dinner Rolls
This white bread recipe is the best homemade bread. It’s great for sandwiches, toast, sides, anything! With only six ingredients it’s one of the easiest yeast bread recipes I’ve made!


Kat says
Was this using all purpose or self rising flour please?
Jessica says
You can use all purpose or bread flour.
Niez says
Just to make sure if using instant dry yeast also use 2 table spoon?
Jessica says
Yes, that is correct. It’s a quick loaf. You can use less, just know that you’ll have to increase rise times.
Jennifer says
Made this last week and it was perfectly golden on the outside and soft on the inside. I split the recipe in half to just make one loaf, because it’s just me and my husband in the house.
I would like to make the whole recipe. Can the dough freeze or be put in the fridge to be made another day?
Jessica says
Yes, you can freeze half!
Lisa says
Hello just made my first 2 loaves of your white bread recipe !! Delicious thank you !!! Do you have any idea on how to freeze a loaf?
Jessica says
You’ll store bread in an airtight container. I bought bread bags off Amazon. https://amzn.to/33GlGrm
Kiki says
LOOL
Olga Siril says
wow!! thanks for the recipes, i wasn’t confident to try to bake bread by myself, more over there are some good bread at the stores…, not till the quarantine lockdown… so far i have baked the honey oats and the classic white, test fantastic!! looking good too!! wow!! i can do it!!
Nellie says
Way to go Olga! Isn’t homemade bread the best?!
Carol says
I found thie bread didn’t rise well. Plus I didn’t grease the pans and it stuck. May try again because it’s easy but make a few changes
Jessica says
There are several reasons why your bread could have not risen.
1) Yeast is too old
2) Yeast was killed by using water that was too hot (I aim for 95-105 degrees F)
3) It initially rose for too long, then collapsed in the oven. Bread should first rise for 30 mins- an hour, then 2nd rise for about 15-30 minutes- longer isn’t necessarily better.
4) Ratio/ measurements of yeast to flour was off. Too much flour turns bread dense and crumbly. Make sure you dough is tacky- stop adding flour right when you achieve this consistency.
5) You house was too cool. Bread dough will rise in cool temps but it will take a LONG time. I like to do the 2nd rise in my oven. I simply turn it on 350° F for 1 minute, then turn it off. Place bread pan inside and let it rise. When it’s time to bake it, just preheat the oven with the pan inside and decrease bake time by 3-5 minutes.
Shea Son says
It is GREAT!!!!!😄👍👍👍♥️♥️ I’ve never tasted better bread!
Shea Son says
I ♥️♥️♥️♥️♥️♥️♥️♥️♥️ it!!!!!!!!
Nellie says
So glad you that you enjoyed it, there really is nothing better than homemade bread!
Kiki says
It tasted so yummy!
Kiki says
it tasted better then just buying bread at costco!
Shea Son says
Um…..is my yeast-water mix supposed to explode?!😲🤔
Jessica says
It’s supposed to bubble up, yes!! IT’S ALIVE!!! Means your yeast is good- keep going with the recipe!
Jenn says
I could only find instant yeast at a store 1.5 hours away. We are out in my hometown. Do I mix it with dry ingredients or still mix with the warm water and sugar?
Jessica says
You can simply use the instant yeast just as the printed directions state with no problems- I truly find that’s the easiest way. If you want to just mix the yeast in with the flour, mix it in with 3 cups.
Dawn says
My dough was extremely sticky. I added the 3 1/2 cups plus and still very sticky. Is that the consistency I should be looking for. It didn’t look like the picture you showed on the dough hook. Thanks.
Nellie says
Depending on altitude and humidity, sometimes you have to add a little bit of extra flour to the dough. It should be a little bit tacky, but not super sticky. I would add another 1/2 cup of flour and see if that helps. Even making the exact same recipe in the same location, sometimes I find that I need a little bit less or a little bit more flour to get the right dough consistency.
Kara says
This was my first ever attempt at making bread. The recipe was easy to follow and the bread is delicious. It didn’t rise much on the second rise and barely rose at all in the oven. However, the bread is still really tasty. Just a bit on the dense side. I had a little bit of dough left over after I made the loaf so I used it for rolls. They turned out a little overdone (because I overcooked them. LOL) but were still good. I had to use instant yeast because the stores are all out regular. Could this have been what caused the poor second rise? I would love to make this recipe again and see if I can get it just right. Any suggestions?
Jessica says
There are several reasons why your bread could have not risen.
1) Yeast is too old
2) Yeast was killed by using water that was too hot (I aim for 95-105 degrees F)
3) It initially rose for too long, then collapsed in the oven. Bread should first rise for 30 mins- an hour, then 2nd rise for about 15-30 minutes- longer isn’t necessarily better.
4) Ratio/ measurements of yeast to flour was off. Too much flour turns bread dense and crumbly. Make sure you dough is tacky- stop adding flour right when you achieve this consistency.
5) You house was too cool. Bread dough will rise in cool temps but it will take a LONG time. I like to do the 2nd rise in my oven. I simply turn it on 350° F for 1 minute, then turn it off. Place bread pan inside and let it rise. When it’s time to bake it, just preheat the oven with the pan inside and decrease bake time by 3-5 minutes.
Amanda says
The dough turned out perfectly! Was my first time ever making bread today! The taste of my bread was just like yeast…so I had to throw it out 😔 I’m not sure what went wrong there, but I’m going to try again tomorrow.
Jessica says
If you’re sensitive to the taste of yeast, halve the amount and let the dough rise longer. : )
Rebekah says
I’m in the same situation as the First Lady it’s been longer than 30 minutes and it hasn’t risen very much. Help me!! I’m literally making it right now!
Jessica says
There are several reasons why your bread could have not risen.
1) Yeast is too old
2) Yeast was killed by using water that was too hot (I aim for 95-105 degrees F)
3) It initially rose for too long, then collapsed in the oven.
4) Ratio/ measurements of yeast to flour was off. Too much flour turns bread dense and crumbly. Make sure you dough is tacky- stop adding flour right when you achieve this consistency.
5) You house was too cool. Bread dough will rise in cool temps but it will take a LONG time. I like to do the 2nd rise in my oven. I simply turn it on 350° F for 1 minute, then turn it off. Place bread pan inside and let it rise. When it’s time to bake it, just preheat the oven with the pan inside and decrease bake time by 3-5 minutes.
Roselle says
Hi. What can I replace yeast with?
Jessica says
There is no replacement for yeast.
C Black says
This looks awesome! I notice your recipe says to use 2 TBSP of yeast whereas most call for 2&1/4 teaspoons. Is this measurement accurate? It’s supposed to be 2 tablespoons?
Jessica says
2 TBSP is correct- it’s a quick loaf. You can use less, just know that you’ll have to increase rise times significantly.
Deborah says
Do you sift the flour before you measure it
Jessica says
I never do- but you’re welcome to!
Shania says
Hey this is an awesome recipe, tried different ways before this and it’s always yeast tasting this time I did not have that problem it was flawless. Also I am unsure of how much loaves this recipe gives so I doubled up the ingredients and got 2 loaves and 12 med size dinner rolls from it which was really AWESOME LOVE IT!!
Alison says
This is great to hear Shania! Glad it worked great for you!
Caroline says
If I freeze one loaf, at what point in the process do i freeze it and do I need to do anything g special after I’ve defrosted it?
Jessica says
I like to form the dough into a ball and then store in an air tight container to freeze. Then when I take it out, let it thaw a couple hours on the counter, then put it in your bread pan for the 2nd rise. The whole process takes 3 hours or so- depending on how warm you keep your house.
Shannon says
Can I freeze the second load for later use? If so, what’s the procedure? Thanks so much
Jessica says
Absolutely! I like to form the dough into a ball and then store in an air tight container to freeze. Then when I take it out, let it thaw a couple hours on the counter, then put it in your bread pan for the 2nd rise. The whole process takes 3 hours or so- depending on how warm you keep your house.
Sarah says
I always use SAF instant yeast. Do I still use warm water but add the instant yeast in with the flour instead of the water and waiting 5 minutes? Trying this tomorrow! Also, could I through one some of my starter for added flavor? Thanks!!
Jessica says
I always like to proof my yeast- just a personal preference! Not sure about the starter- let me know if you try it!
Maria says
Do you think I could add some whole wheat flour instead of all purpose to this recipe? If so, how much would you substitute so that it doesn’t affect the recipe?
Jessica says
I’d use 1/3 whole wheat flour. It will still affect the texture somewhat, but it will be delicious!
Lauren says
So if you are using instant yeast, do you eliminate the cup of warm water? Or just put that in the bowl and all the dry ingredients to it? Looking forward to making it this week!