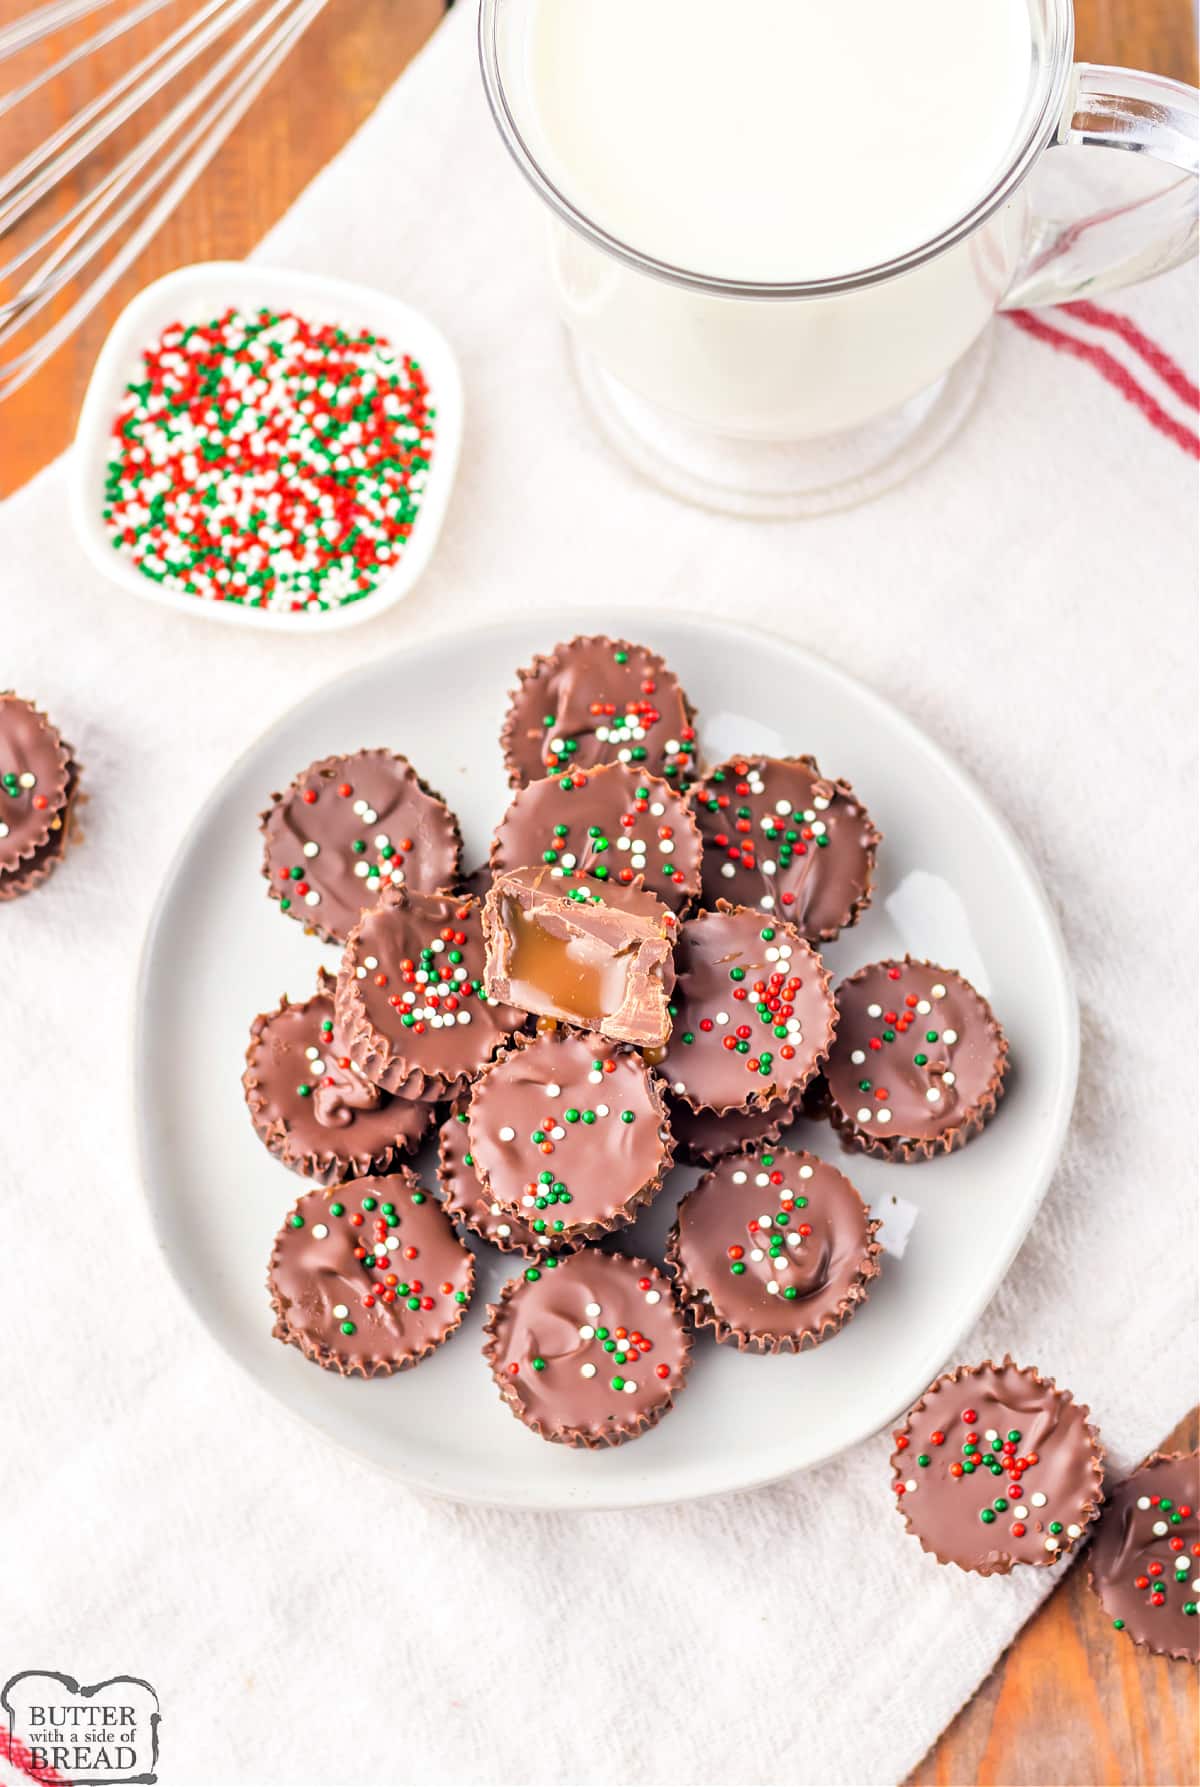
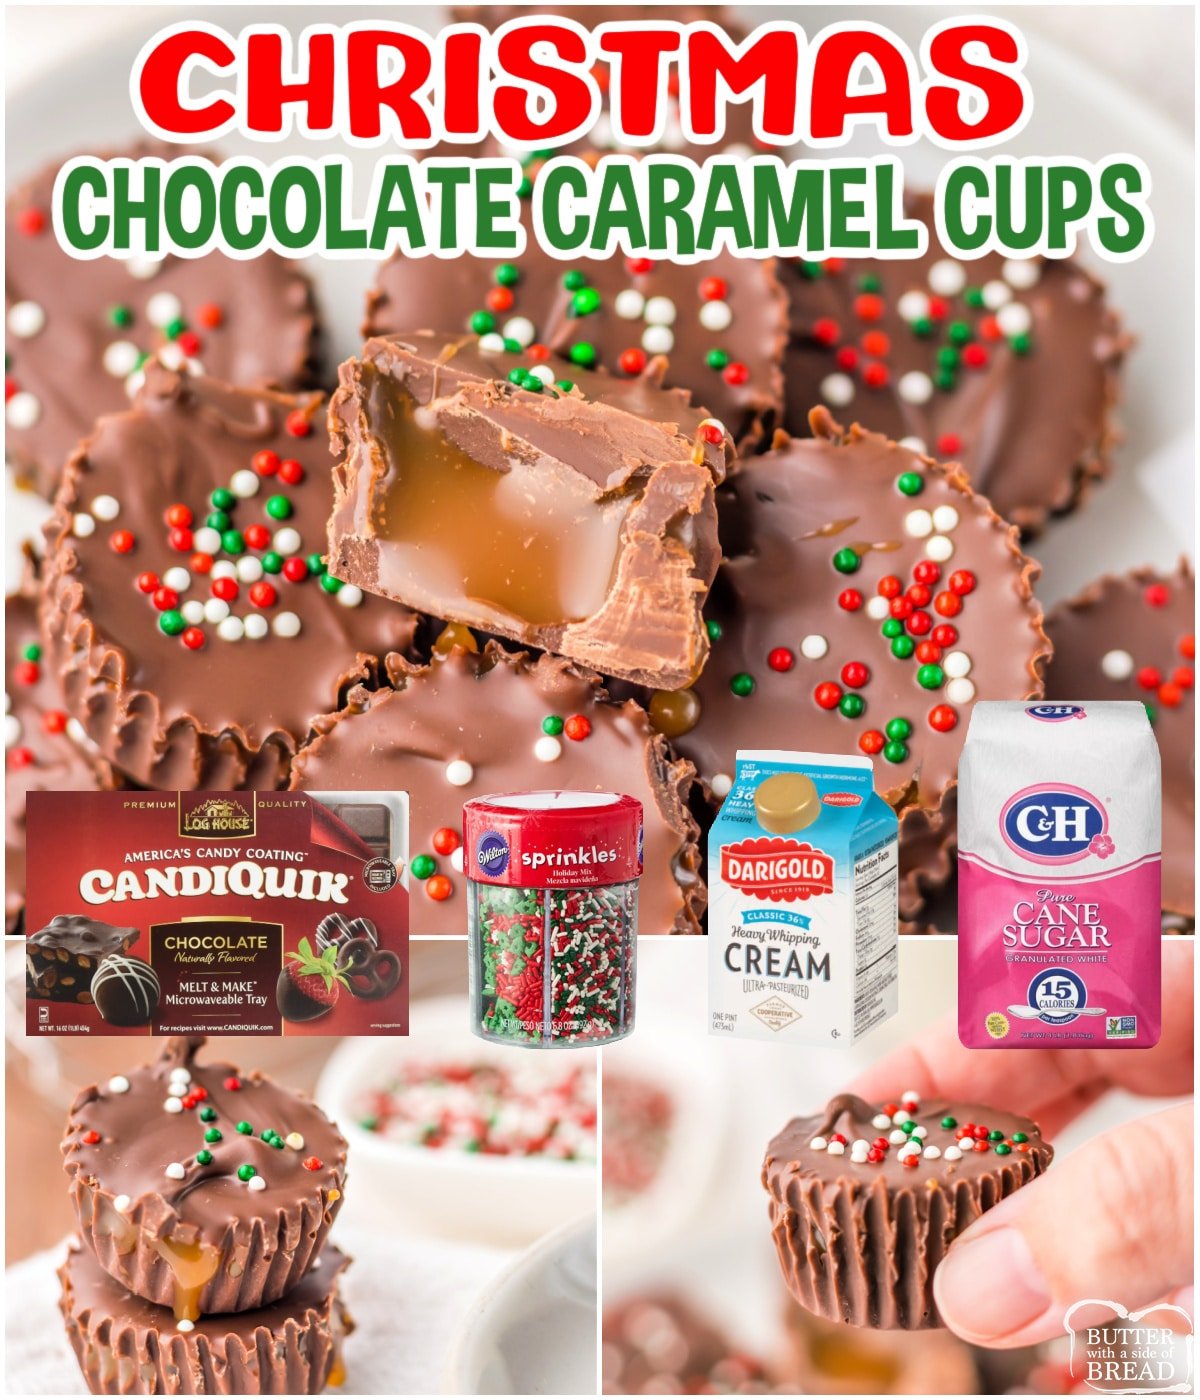
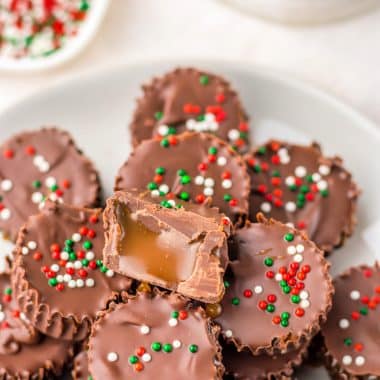
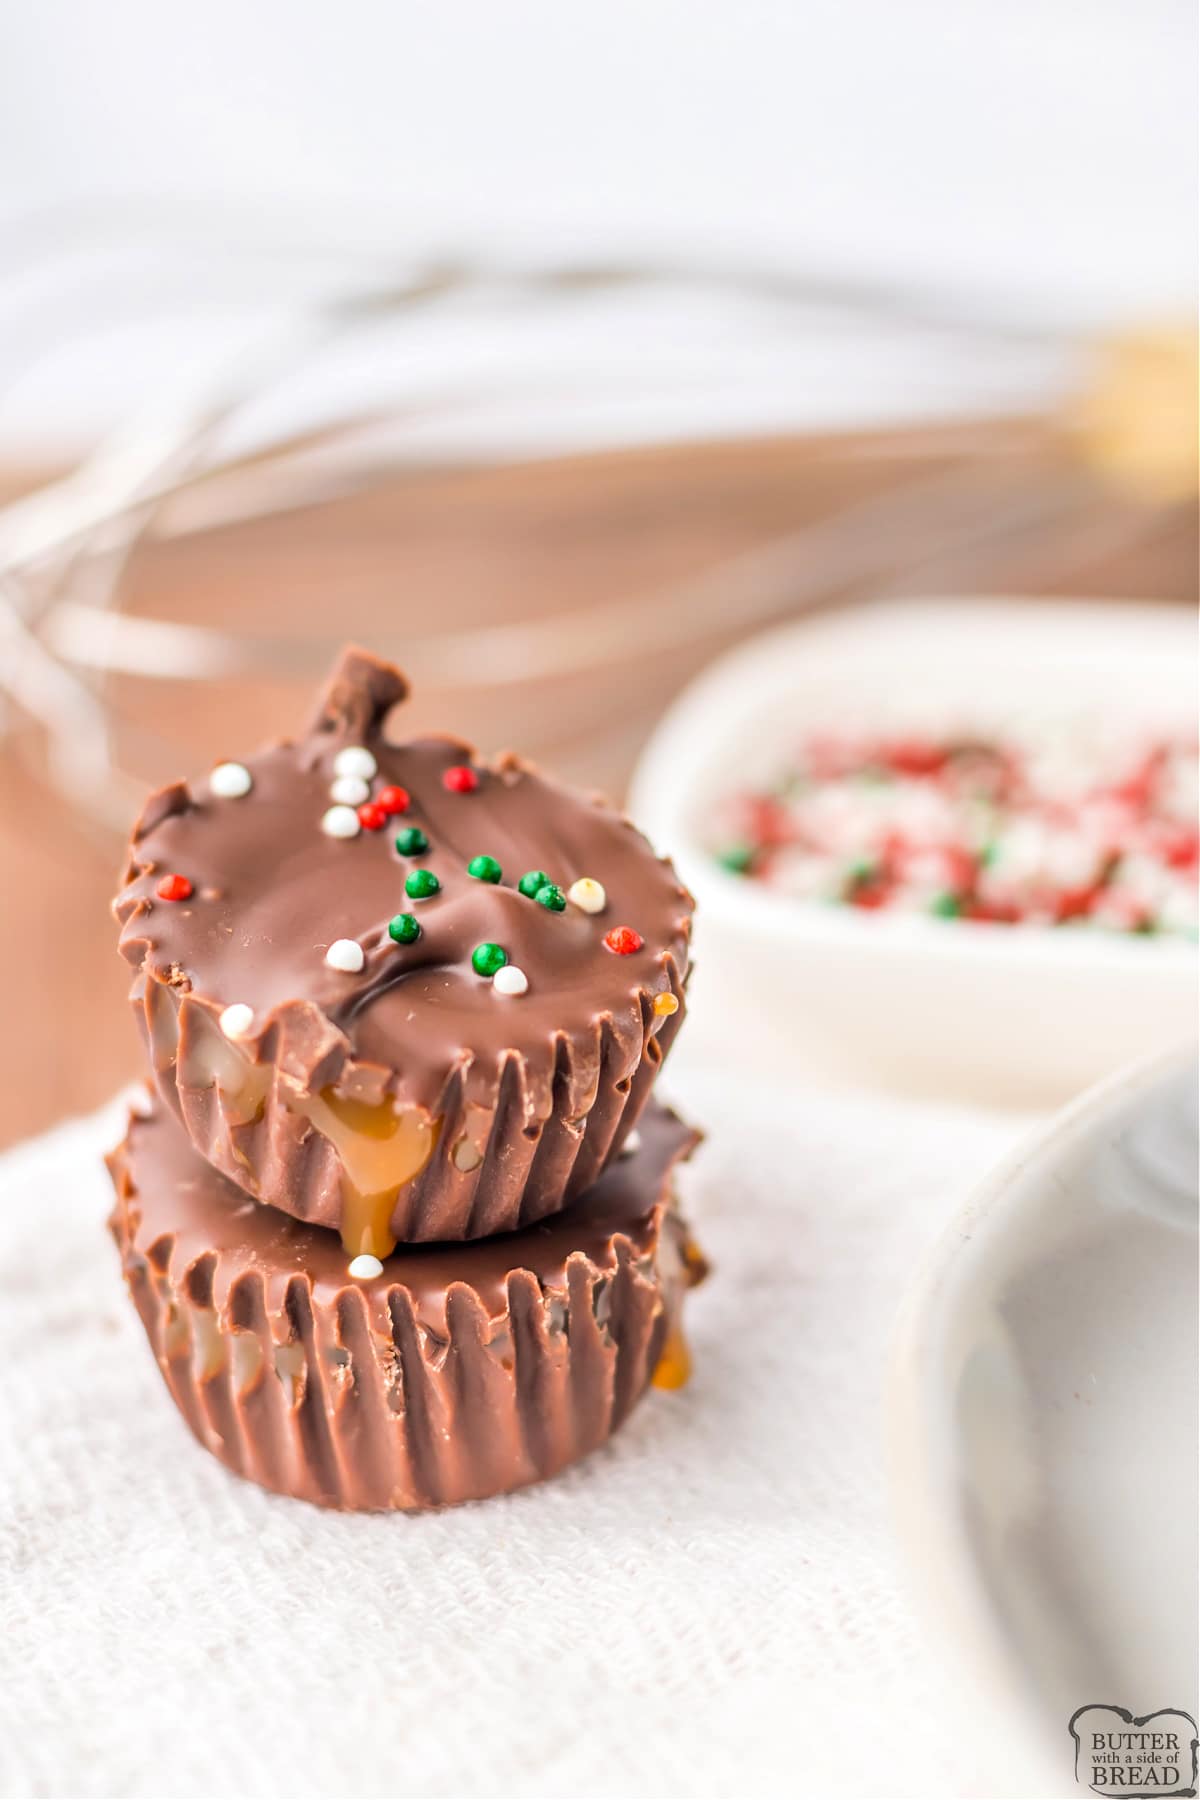
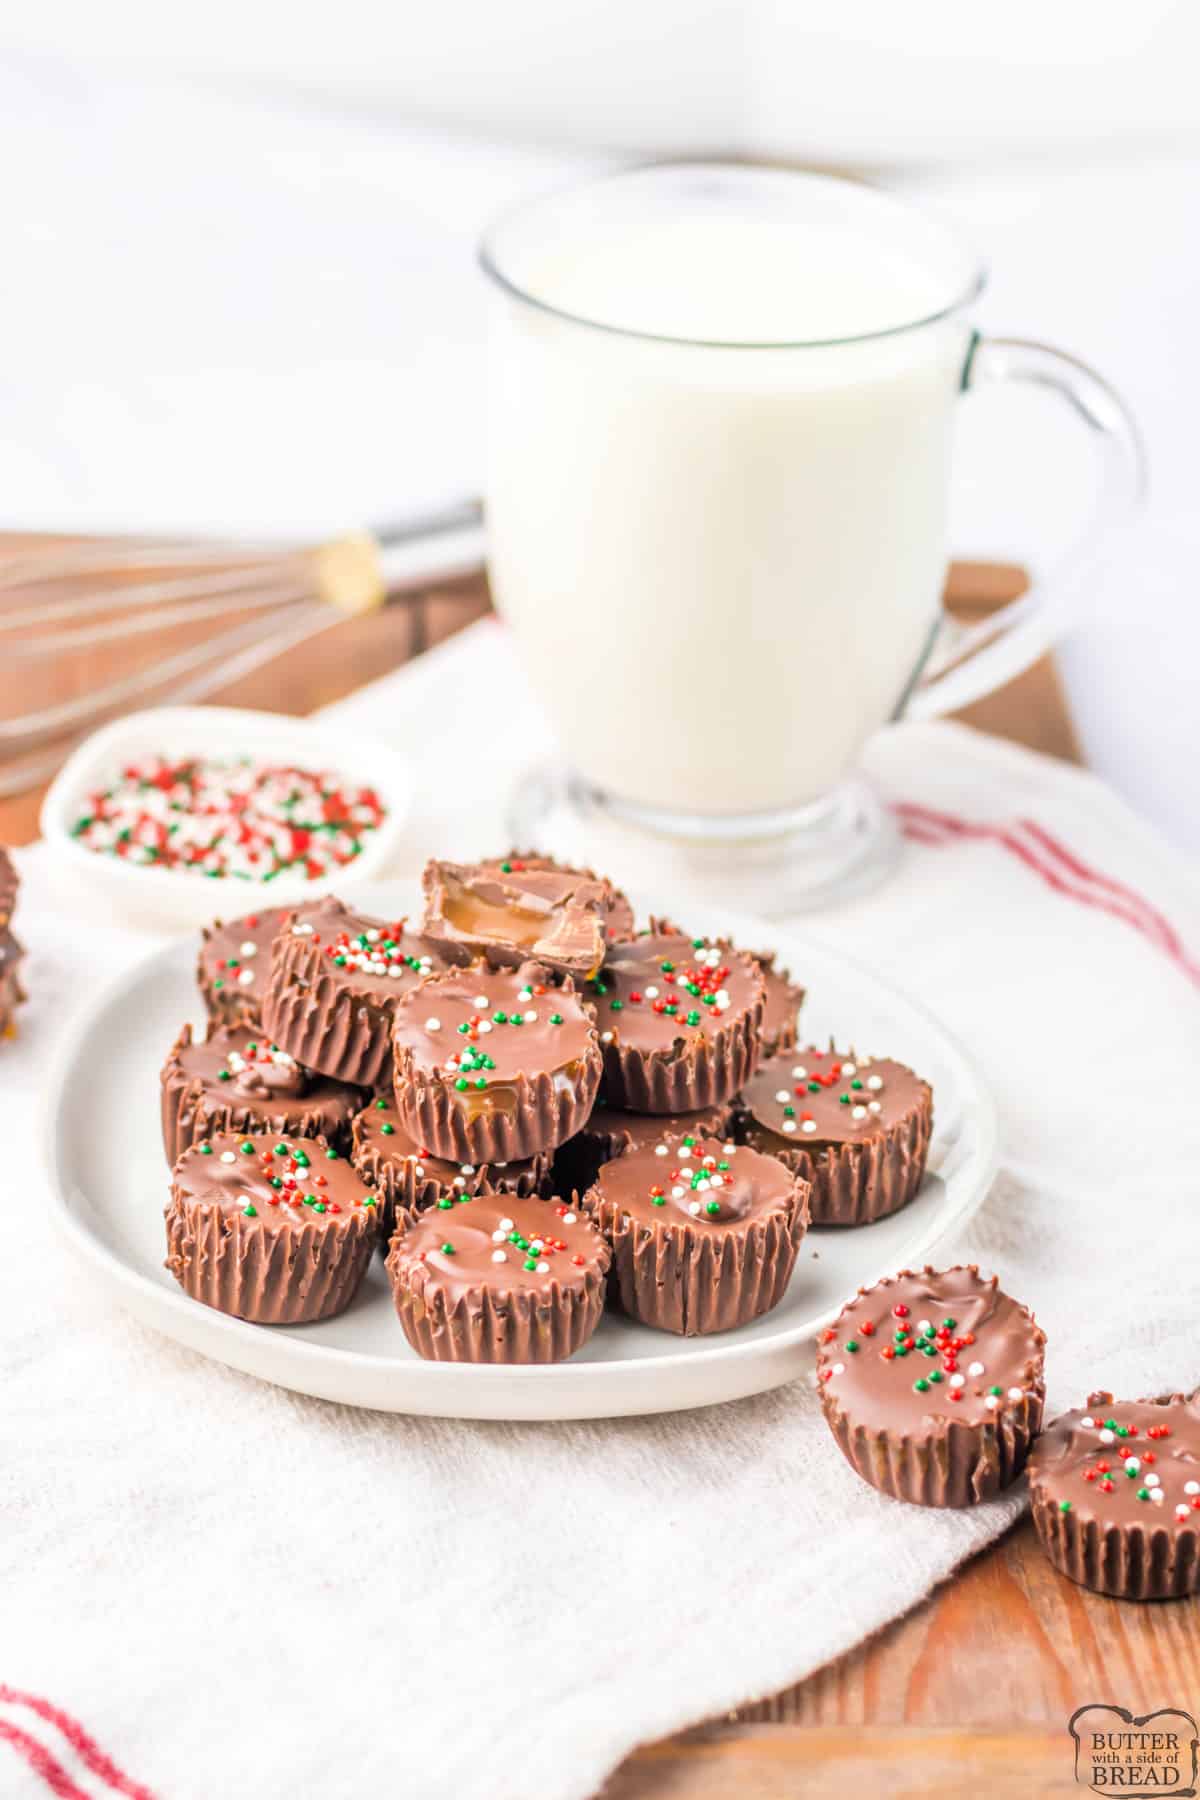
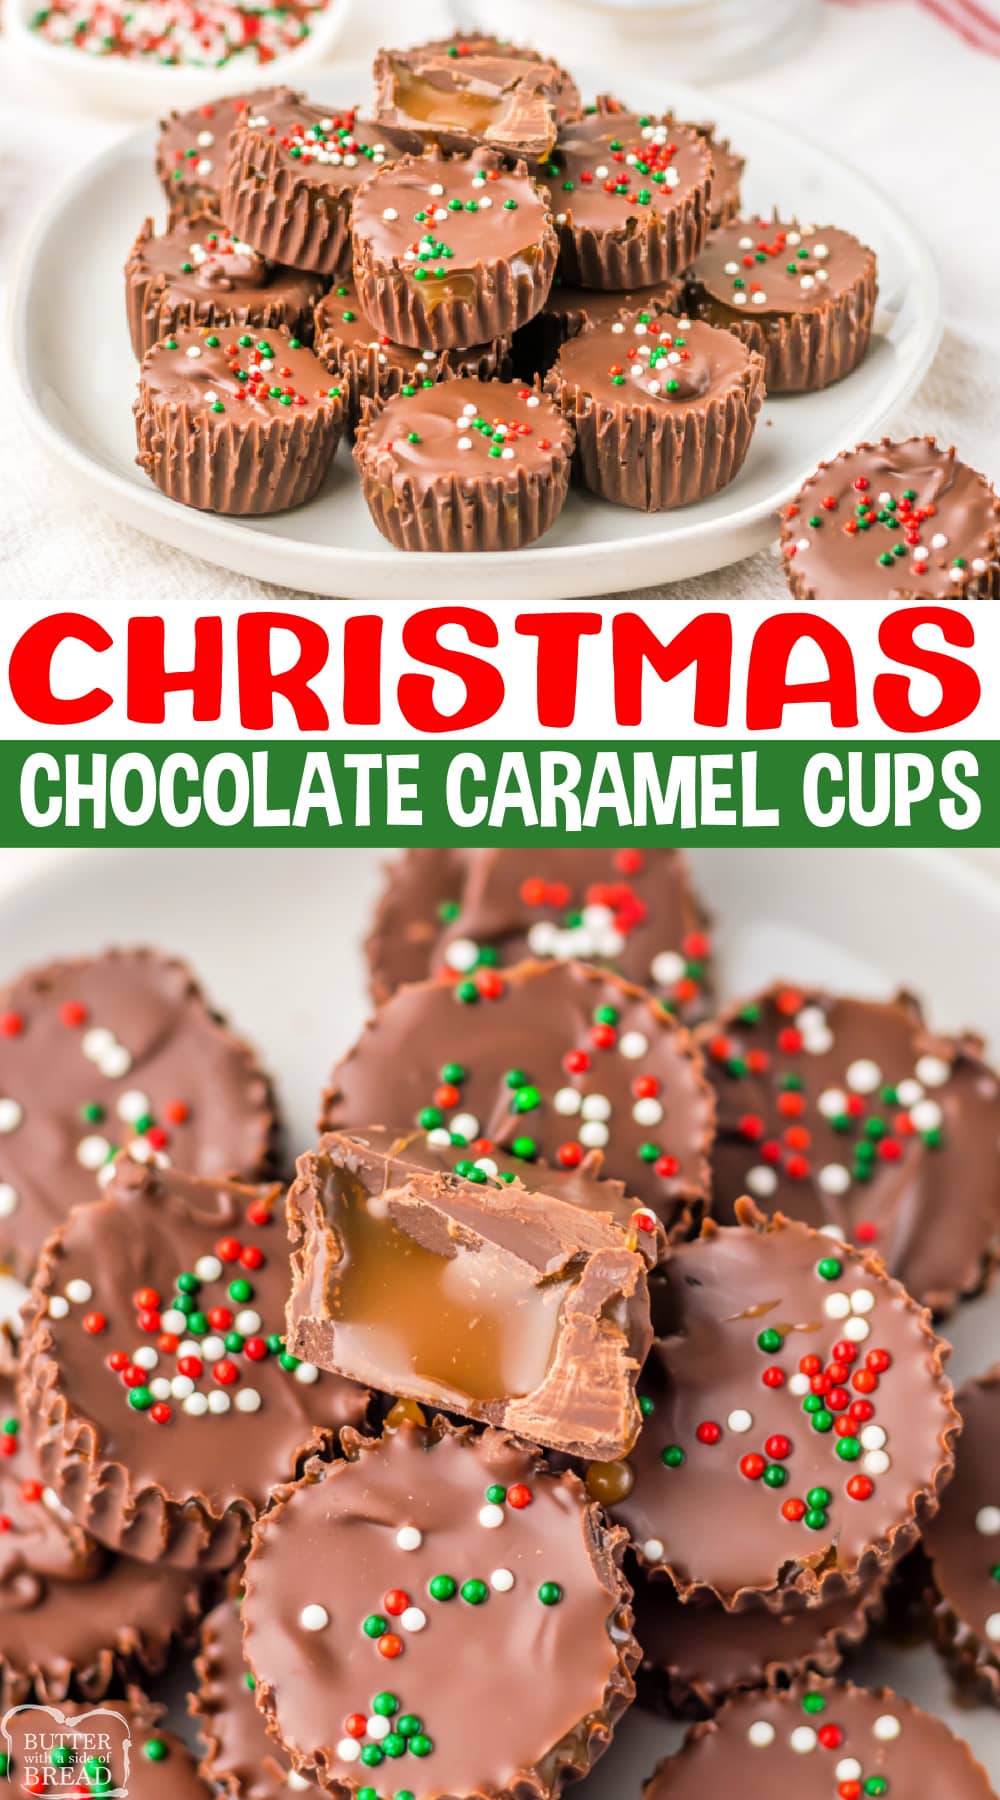
Christmas Chocolate Caramel Cups are the perfect gift or holiday treat for the season. Only 4 ingredients needed to make this easy candy recipe.
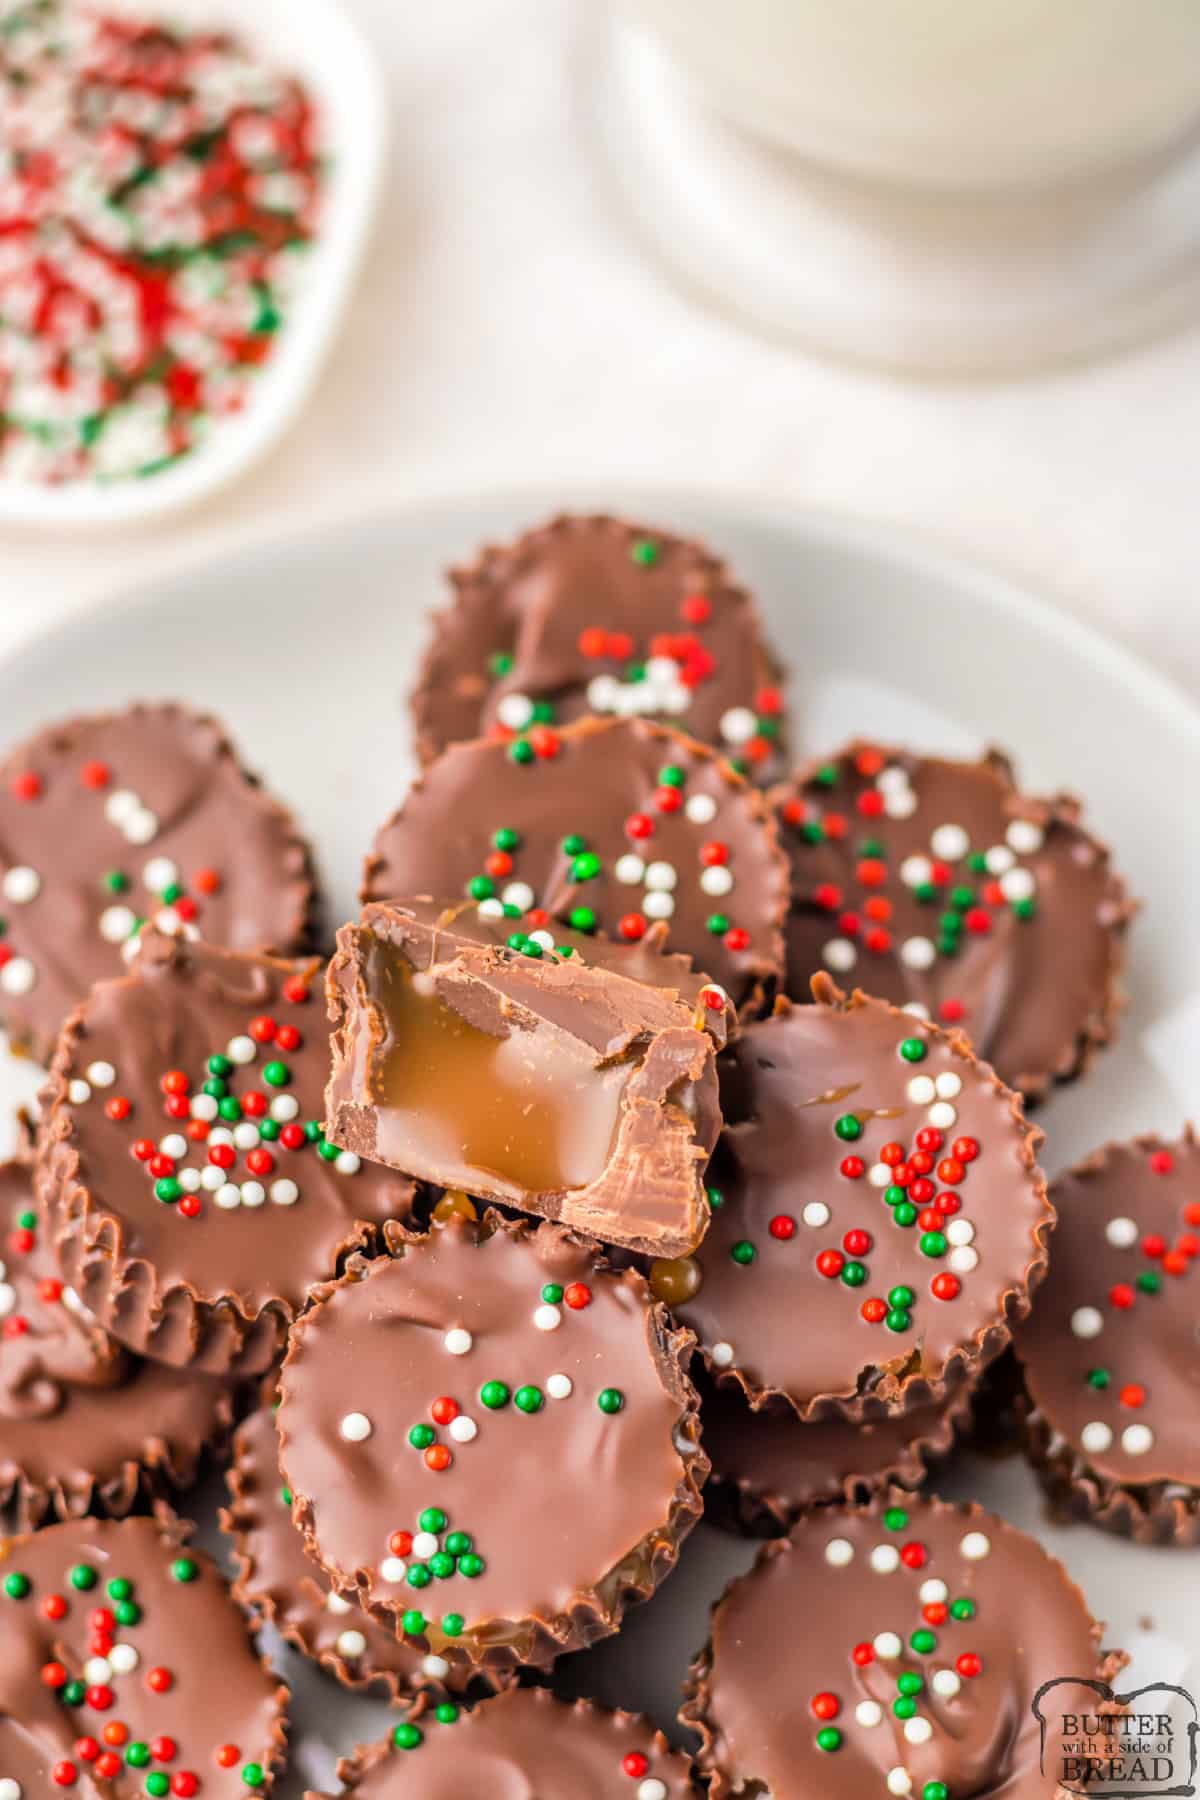
I love baking and making treats around the holidays, and just recently tried this recipe for chocolate caramel cups. I love how easy they are to make! Recipes with less than 5 ingredients are the best! Combining sugar and heavy cream creates a delicious homemade caramel that goes perfectly in the middle of the little chocolate cups. Add some festive sprinkles and you have an easy Christmas treat that everyone will love!
CHRISTMAS CHOCOLATE CARAMEL CUPS
Melt some chocolate almond bark or Candiquik (or whatever kind of chocolate you like best) and line the bottom of mini cupcake liners. Let them harden up while you make a homemade caramel out of sugar and whipping cream. The caramel will set up in the refrigerator for about 30 minutes before being scooped into the chocolate cups. Pour the rest of the melted chocolate on top of the caramel, add some sprinkles and let everything set up before serving or sharing with friends!
Ingredients in Christmas Chocolate Caramel Cups
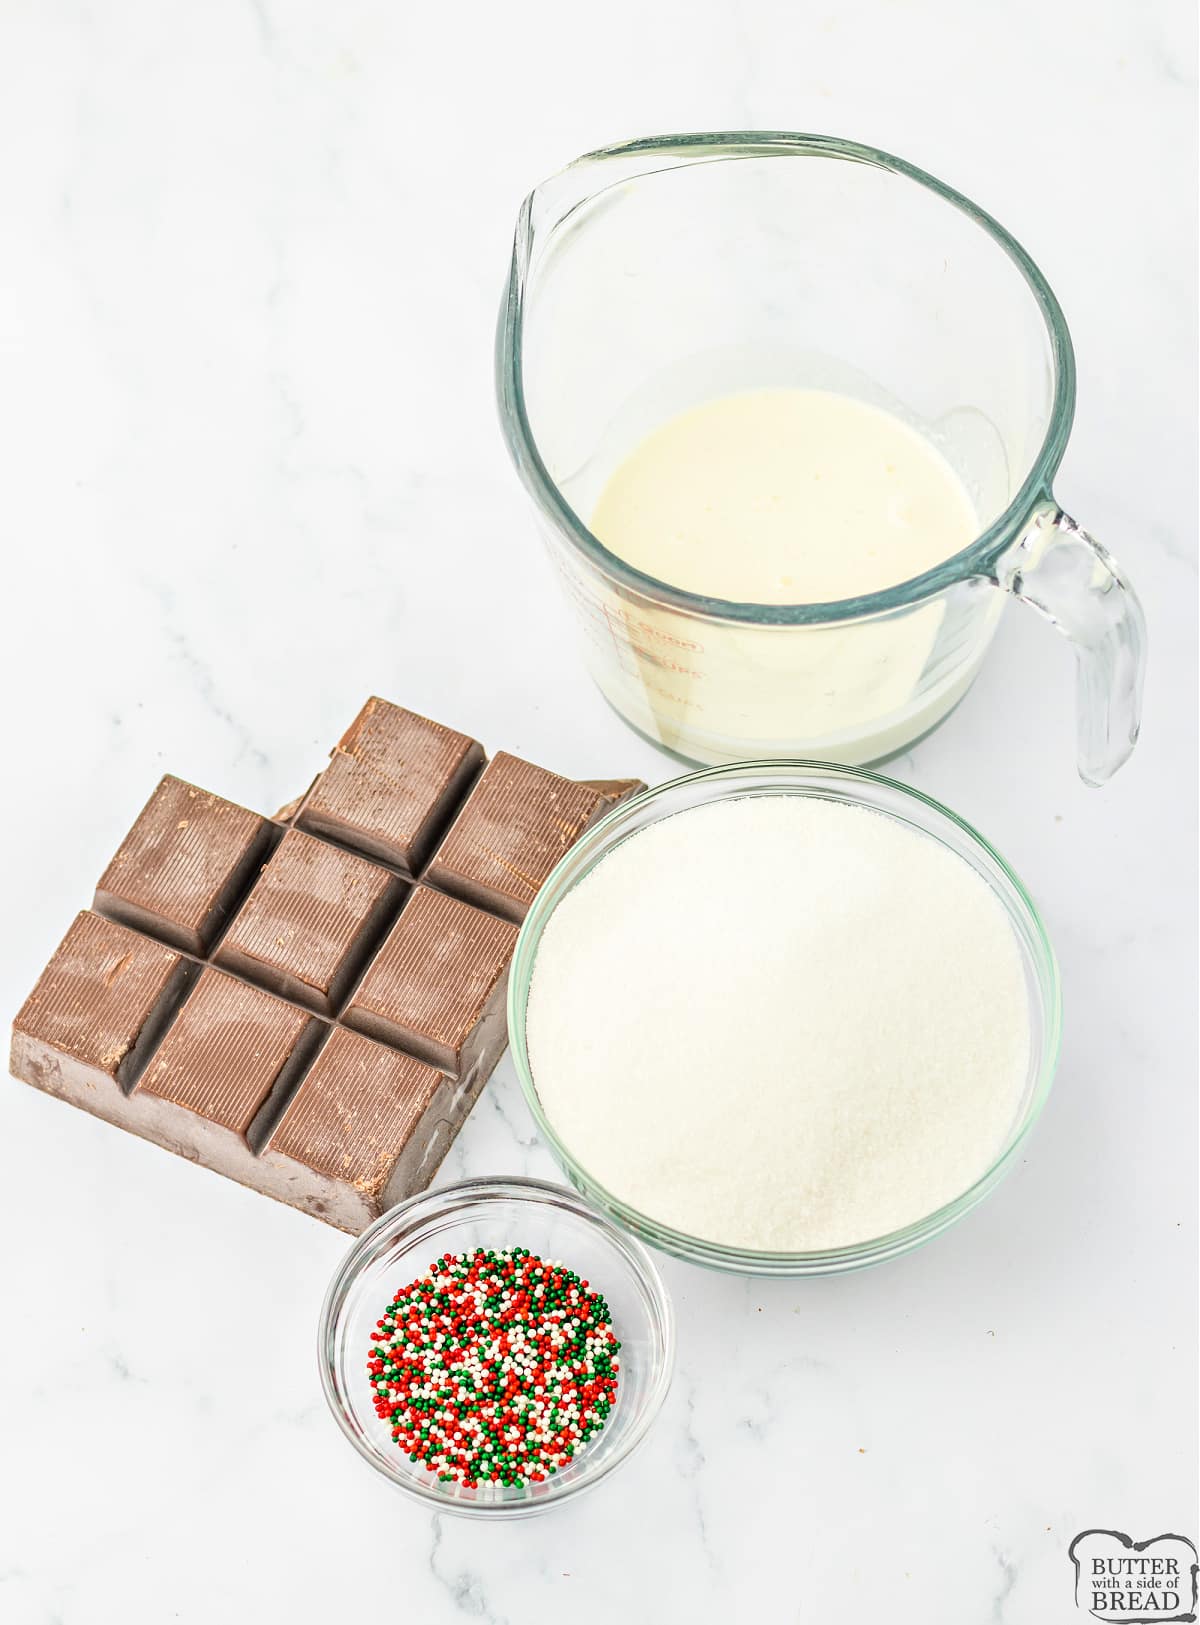
Sugar – You will need a cup of sugar to make the caramel filling. Be very careful when you melt the sugar so that you don’t burn it!
Heavy cream – The heavy cream helps to create the homemade caramel when you mix it with the melted sugar.
Chocolate – You need 16 ounces of chocolate almond bark or any other type of chocolate you have on hand. Regular milk chocolate is my favorite, but dark chocolate is also amazing, but white chocolate or white almond bark works too! Use whatever kind of chocolate you like best!
Holiday sprinkles – Use Christmas sprinkles to make these little treats festive for the holidays. If you are making these caramel cups for another occasion, use any color of sprinkle to fit the occasion. You don’t have to wait until Christmas to enjoy these little treats!
How to make Christmas Chocolate Caramel Cups
Place 36 mini cupcake liners in a mini cupcake tin. Set aside.
MAKE THE BOTTOM CHOCOLATE LAYER
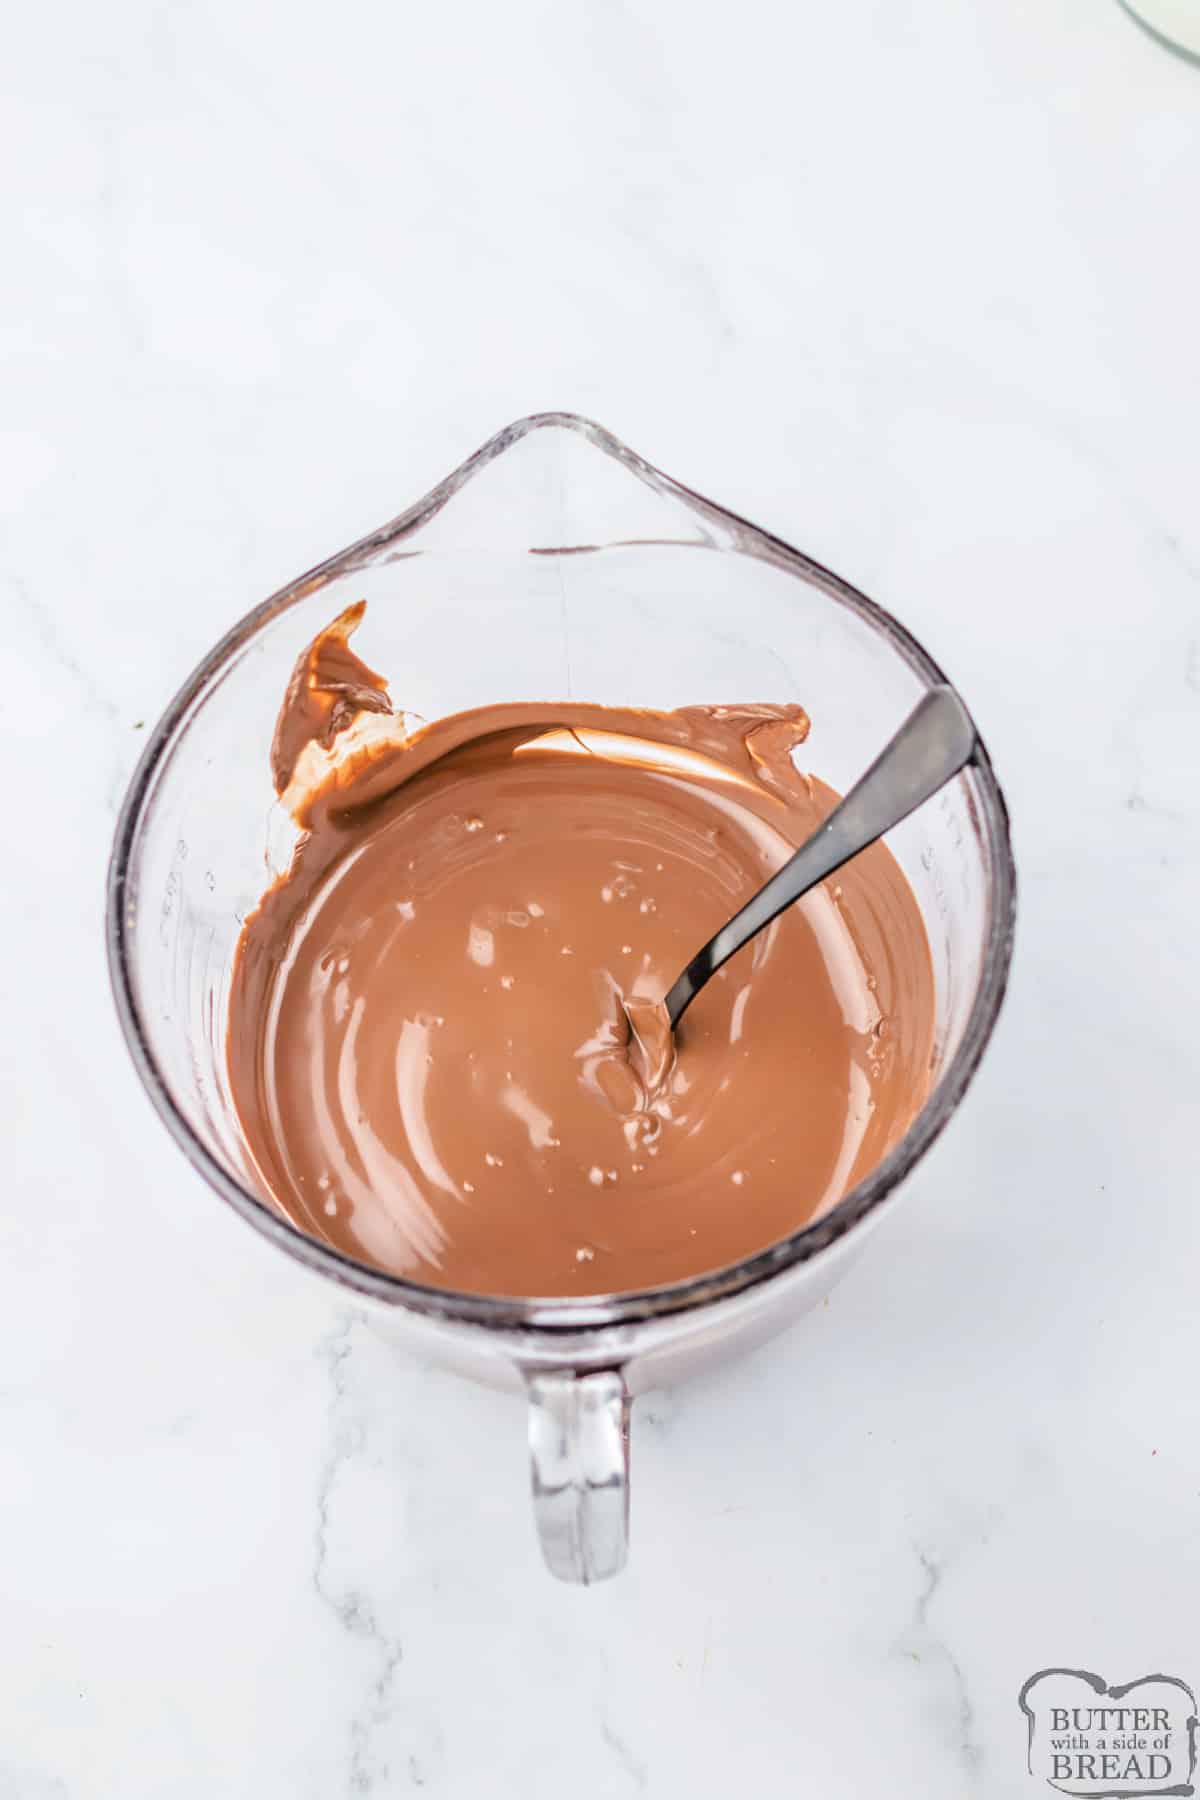
In a large bowl melt half of the chocolate almond bark in 30-second increments in the microwave until melted and smooth.
Spoon a little bit of the chocolate into each cupcake liner.
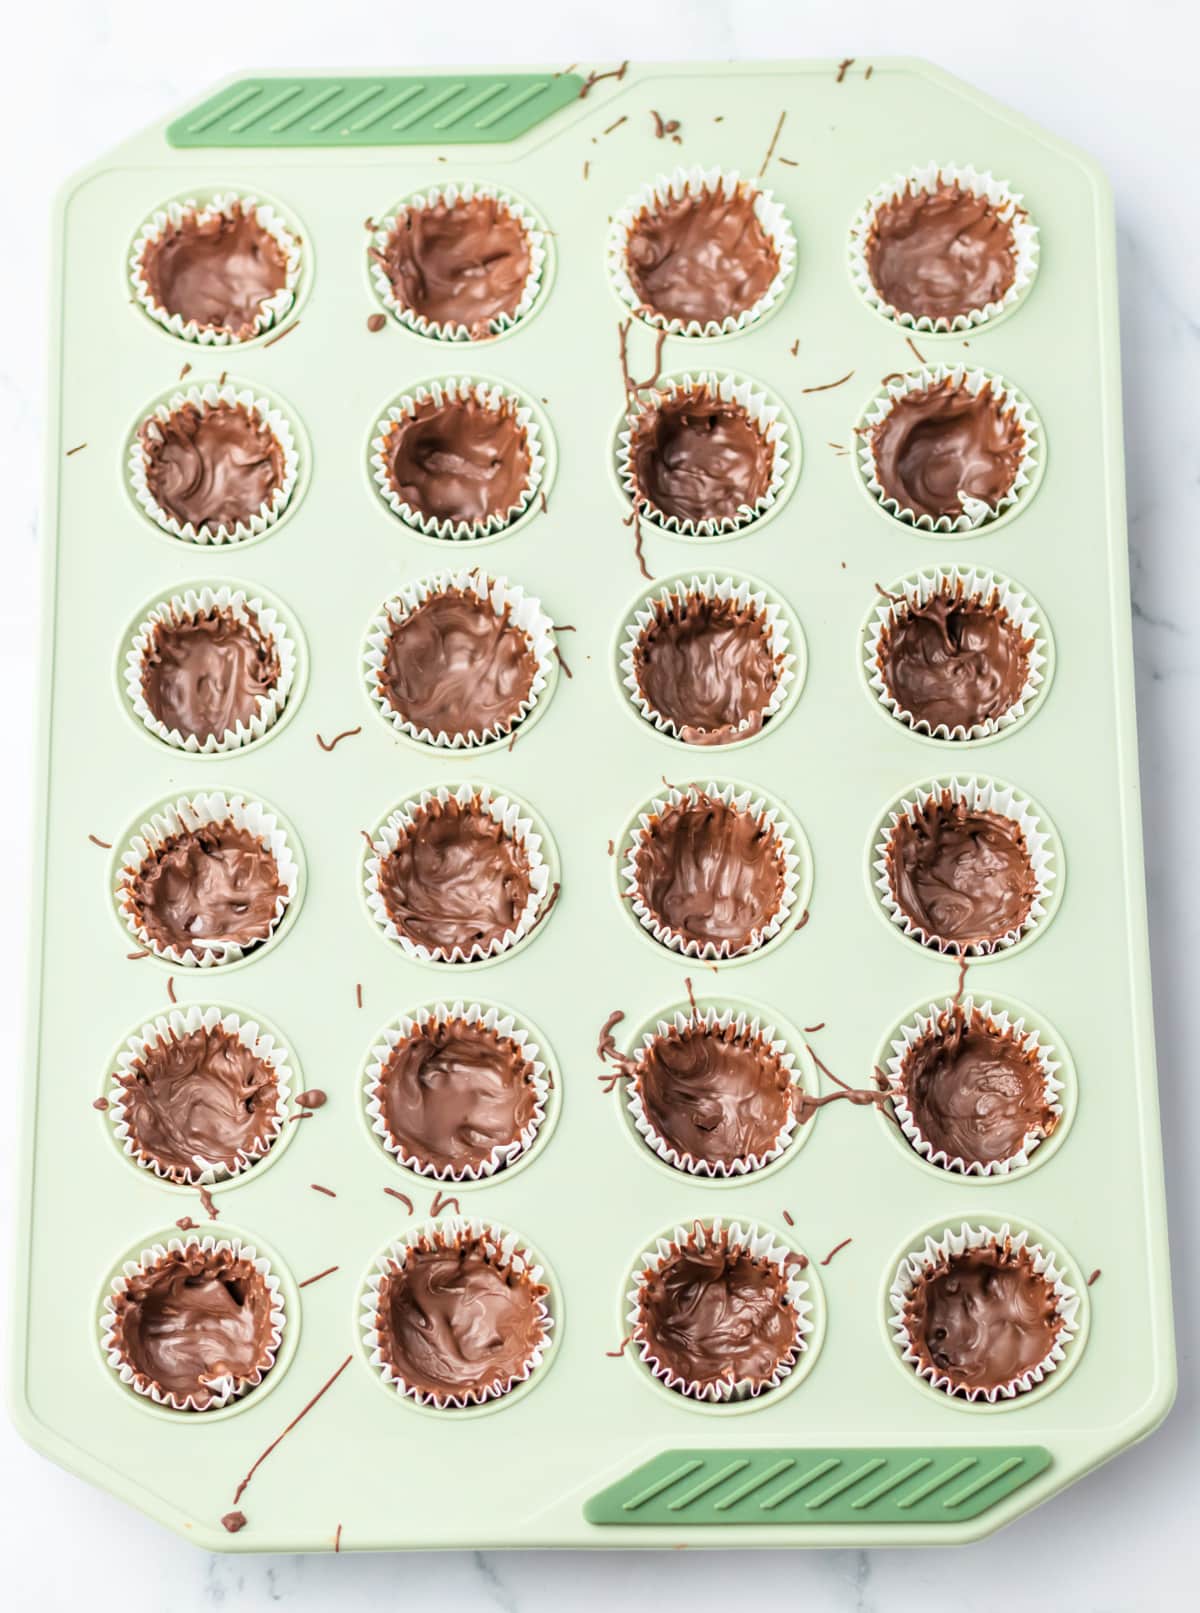
Using a small spoon or even a paintbrush spread the chocolate up the sides of the liners. If the chocolate layer seems too thin you can add a bit more chocolate to the cup and spread up the sides some more. You want to make sure you cannot see the bottom of the liner.
Set the chocolate cups aside to harden.
MAKE THE CARAMEL
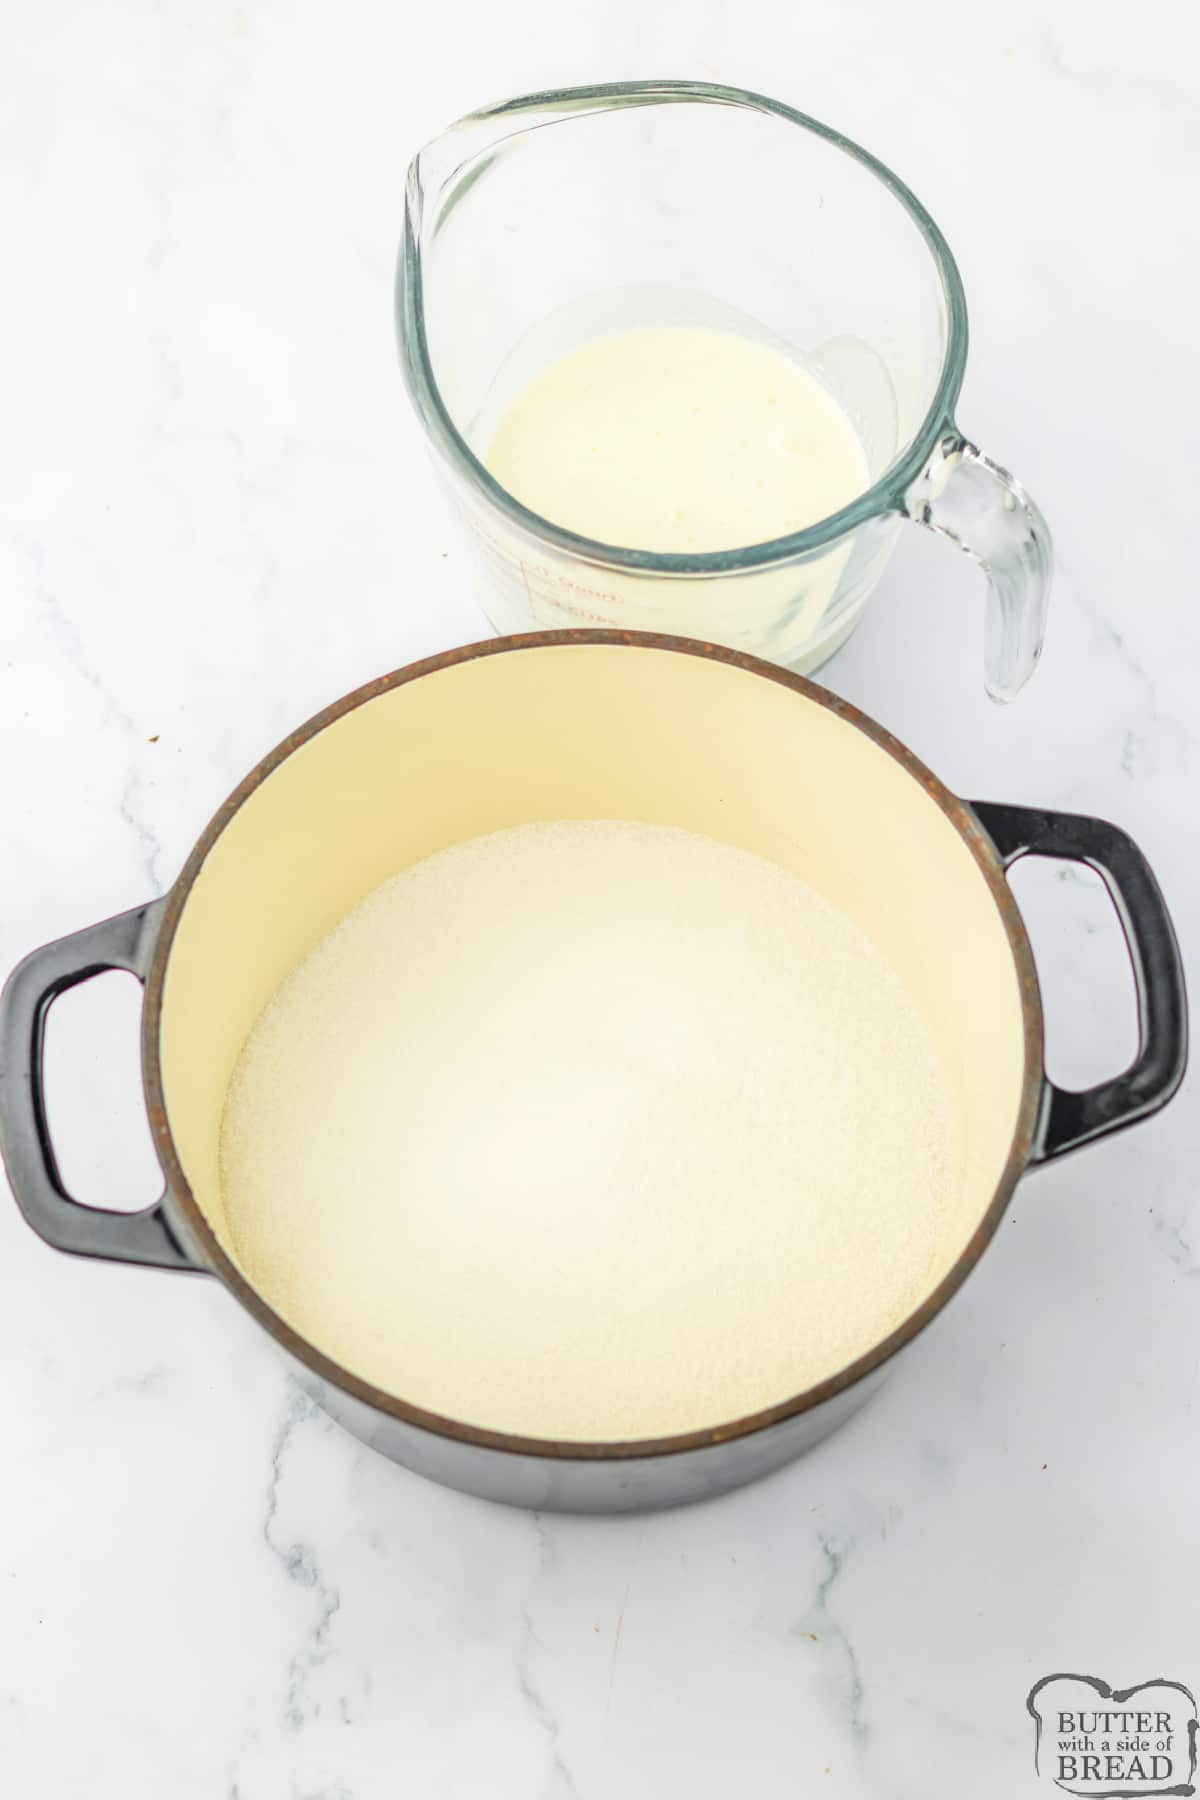
While the chocolate cups are setting up, add the sugar to a heavy bottomed pot over medium heat on the stove.
Let the sugar slowly melt, stirring as little as possible and very gently. The sugar will melt until there are no lumps and it is an amber color. This can burn and become bitter if you let it get too dark.
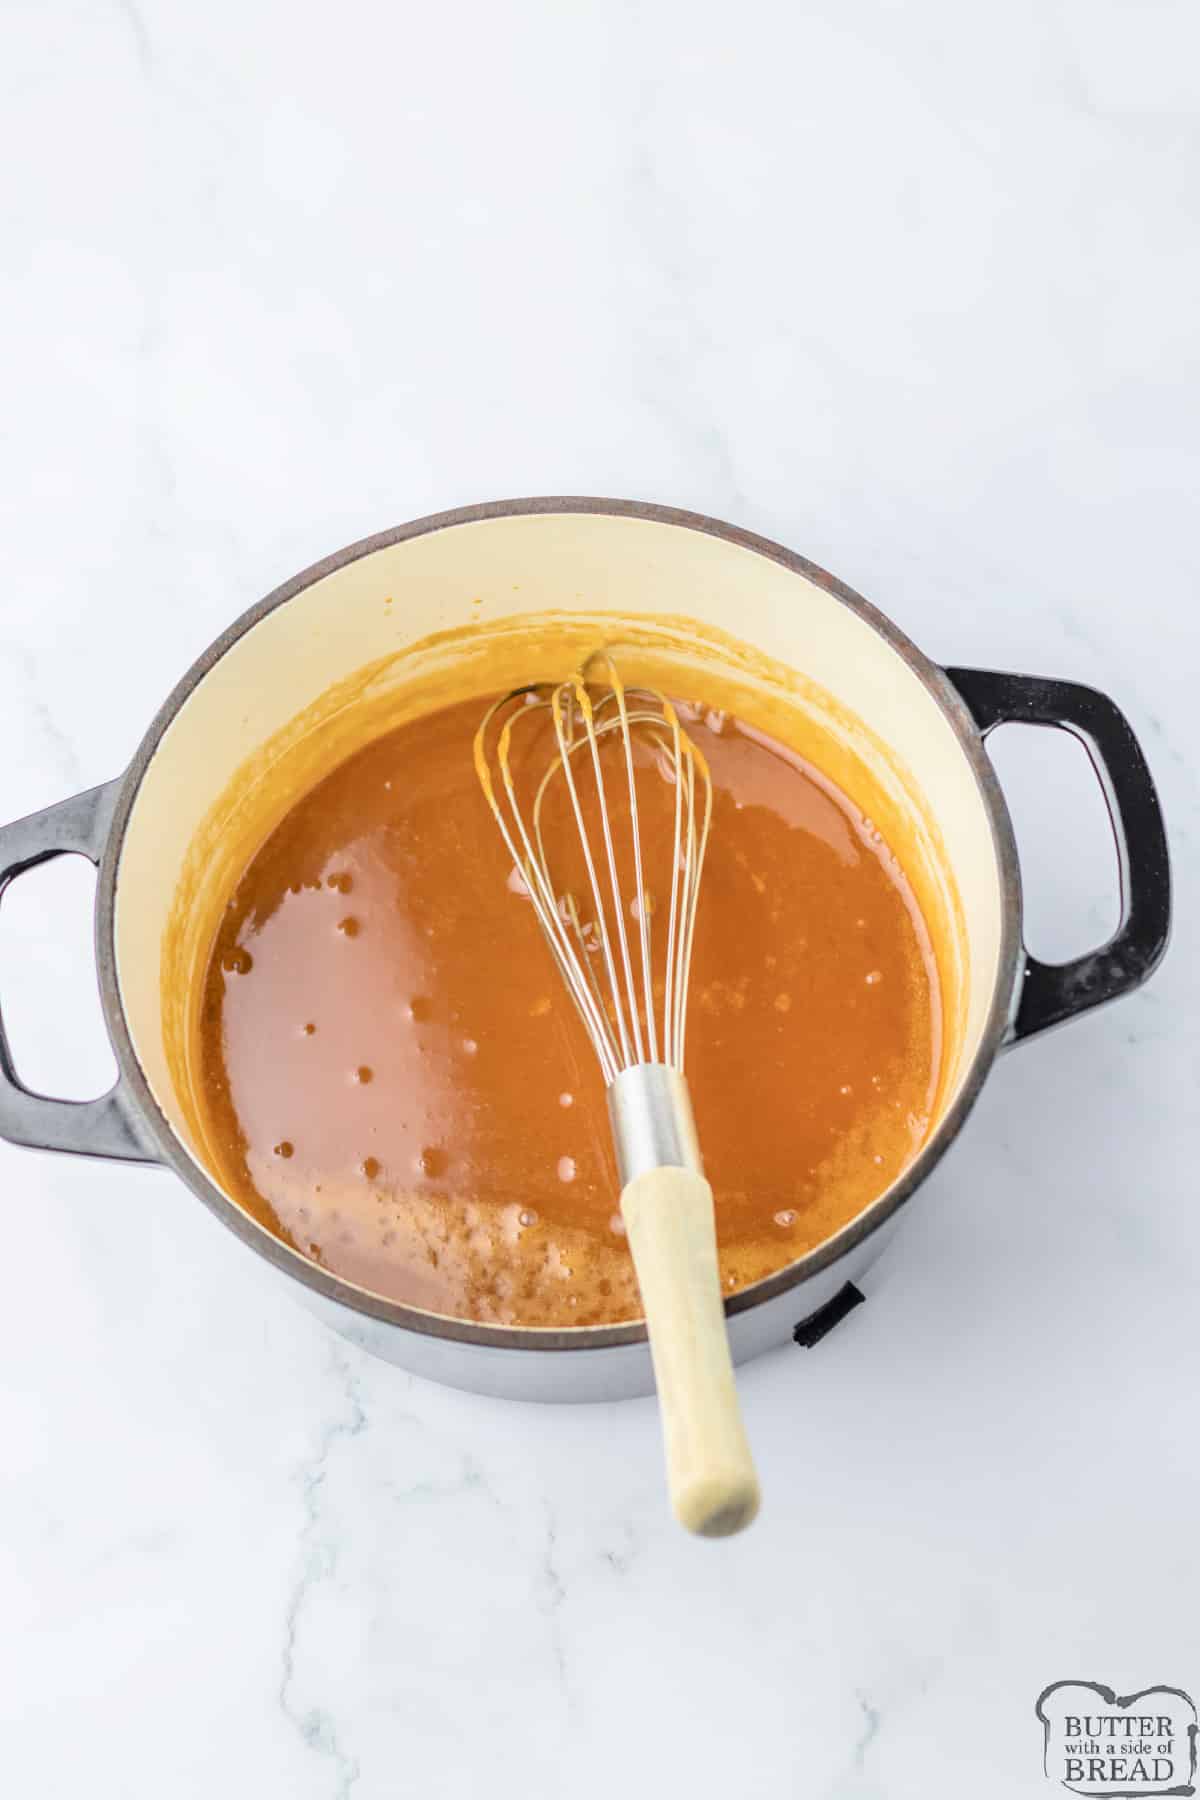
As soon as the sugar has reached the correct color, remove it from the heat and very slowly whisk in a thin stream of the heavy cream until it is all combined.
Pour the caramel carefully into a bowl and set in the fridge for 30 minutes to thicken up.
ADD THE CARAMEL TO THE CHOCOLATE CUPS
Once the caramel is thicker you can spoon it into the chocolate lined muffin liners.
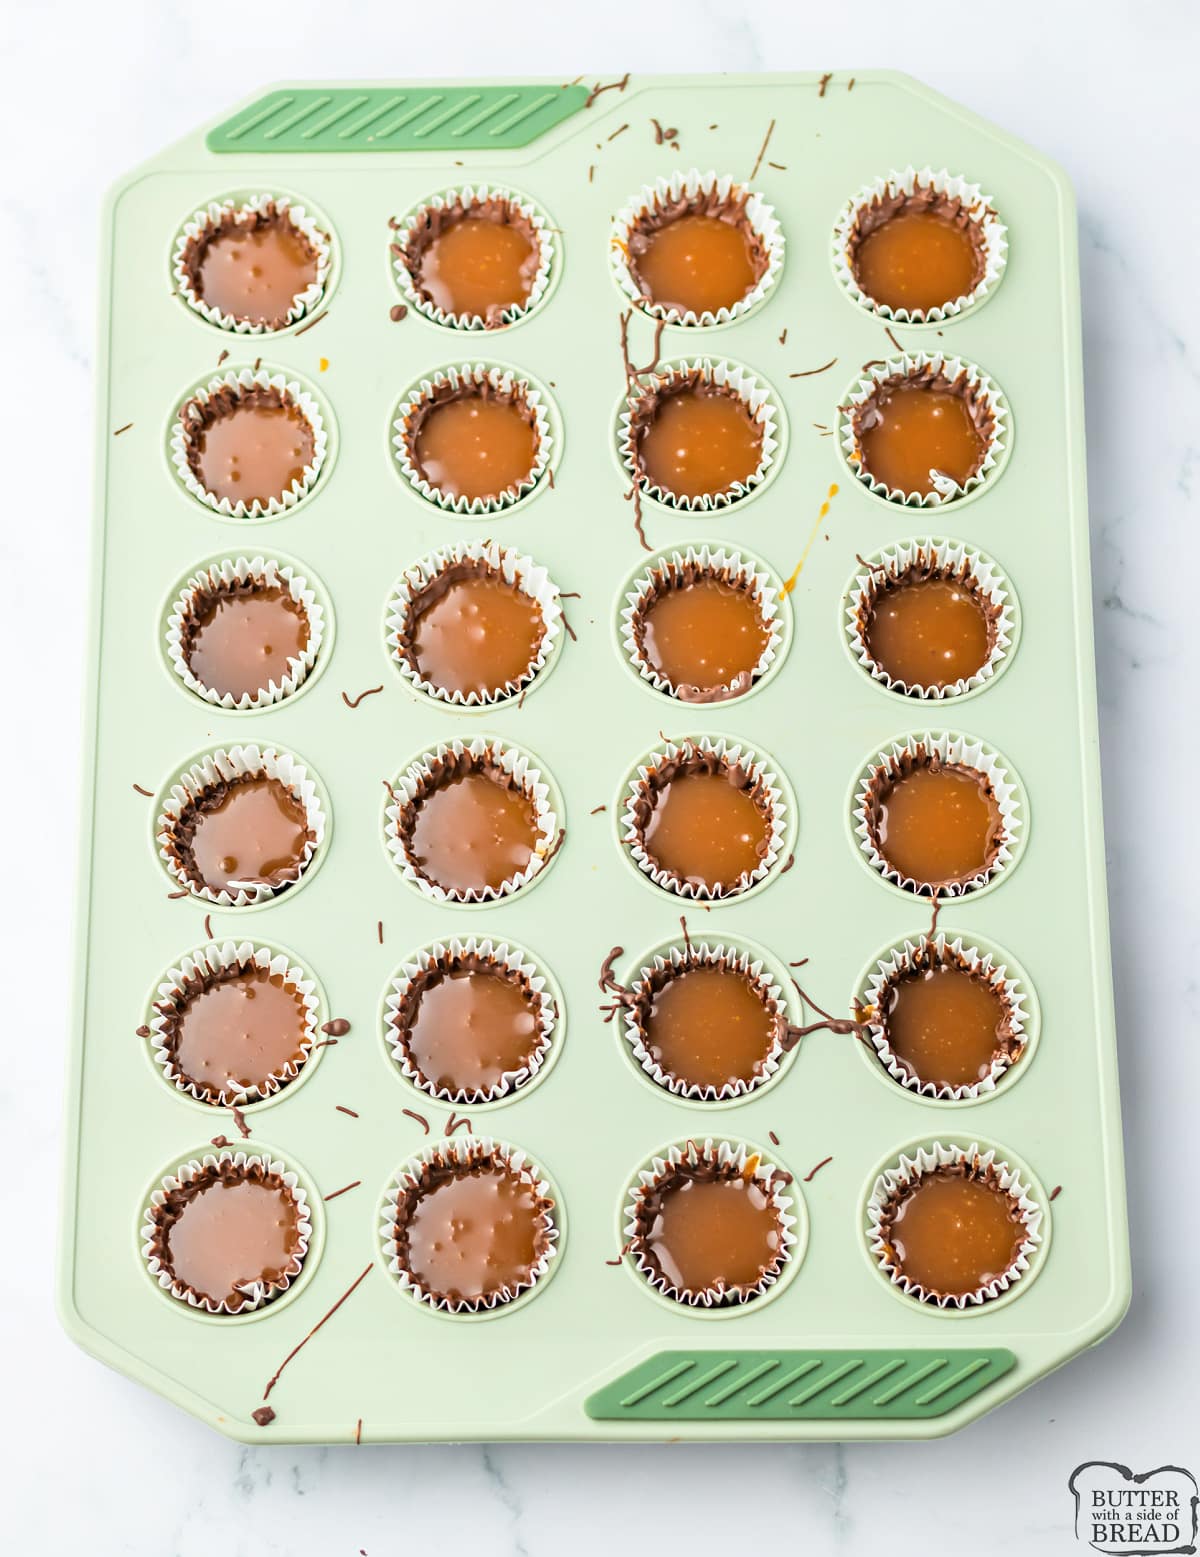
You want to fill the shells up almost to the the top of where the chocolate ends but not over it.
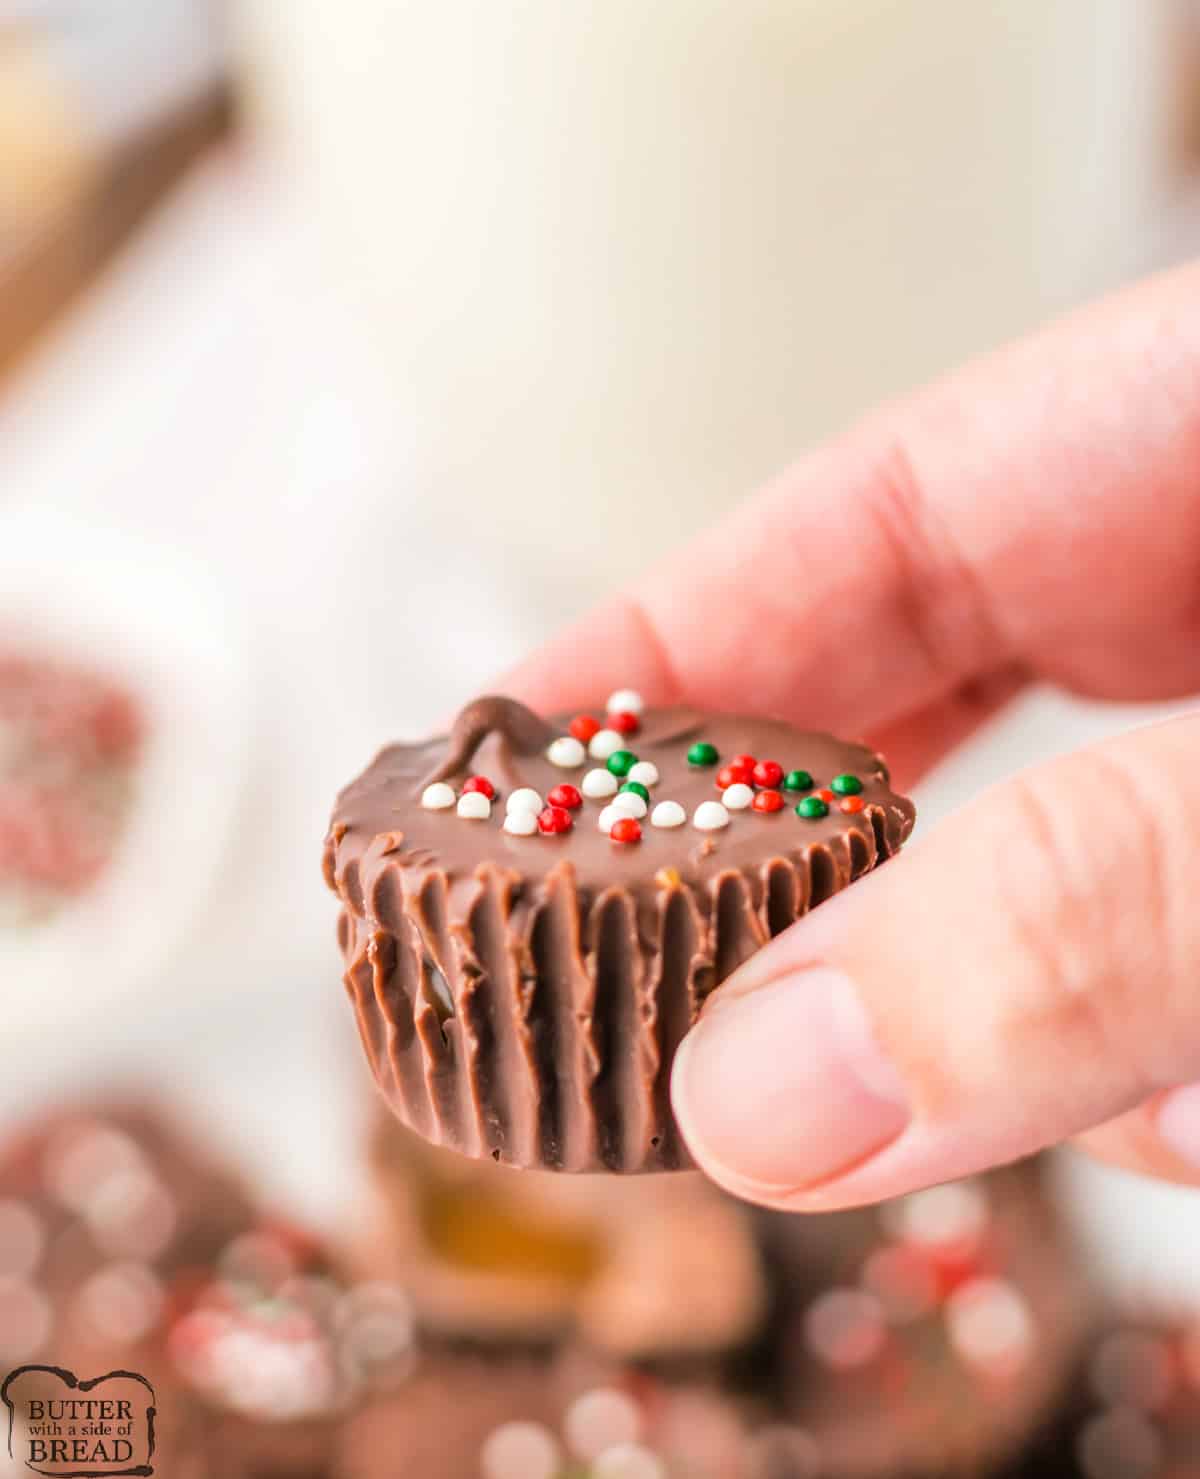
ADD THE TOP CHOCOLATE LAYER
Melt the remaining chocolate almond bark.
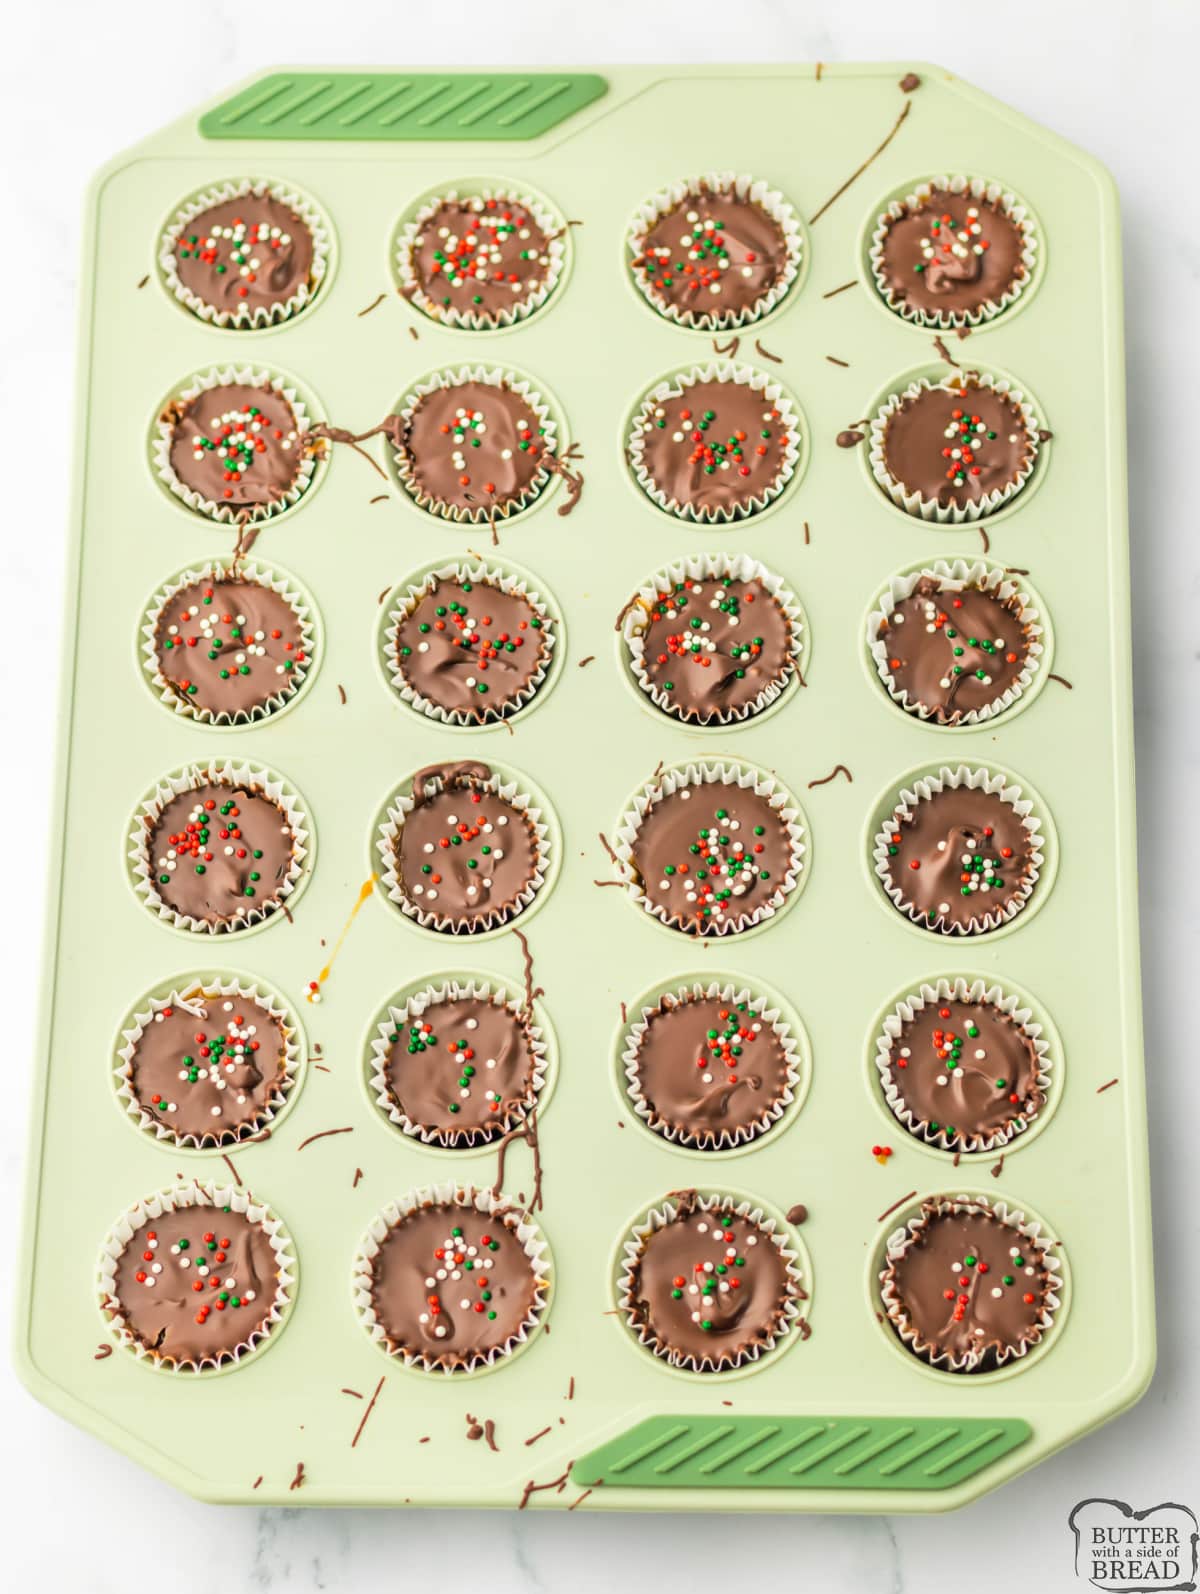
Spoon chocolate over the top of the caramel cups and gently spread it to the edges of the liners.
Sprinkle with the holiday sprinkles.
Place the cups into the fridge for another hour to completely set.
Christmas Chocolate Caramel Cups
Ingredients
- 1 cup sugar
- ⅔ cup heavy cream
- 1 pound chocolate almond bark
- holiday sprinkles
Instructions
- Place 36 mini cupcake liners in a mini cupcake tin. Set aside.
- MAKE THE BOTTOM CHOCOLATE LAYER: In a large bowl melt half of the chocolate almond bark in 30-second increments in the microwave until melted and smooth.
- Spoon a little bit of the chocolate into each cupcake liner.
- Using a small spoon or even a paintbrush spread the chocolate up the sides of the liners. If the chocolate layer seems too thin you can add a bit more chocolate to the cup and spread up the sides some more. You want to make sure you cannot see the bottom of the liner.
- Set the chocolate cups aside to harden.
- MAKE THE CARAMEL: While the chocolate cups are setting up, add the sugar to a heavy bottomed pot over medium heat on the stove.
- Let the sugar slowly melt, stirring as little as possible and very gently. The sugar will melt until there are no lumps and it is an amber color. This can burn and become bitter if you let it get too dark.
- As soon as the sugar has reached the correct color, remove it from the heat and very slowly whisk in a thin stream of the heavy cream until it is all combined.
- Pour the caramel carefully into a bowl and set in the fridge for 30 minutes to thicken up.
- ADD THE CARAMEL TO THE CHOCOLATE CUPS: Once the caramel is thicker you can spoon it into the chocolate lined muffin liners.
- You want to fill the shells up almost to the the top of where the chocolate ends but not over it.
- ADD THE TOP CHOCOLATE LAYER
- Melt the remaining chocolate almond bark.
- Spoon chocolate over the top of the caramel cups and gently spread it to the edges of the liners.
- Sprinkle with the holiday sprinkles.
- Place the cups into the fridge for another hour to completely set.
Nutrition
📫 Save this recipe! Send it to your email! 📩
I consent to receiving emails from this site.

How to store chocolate caramel cups
Store leftovers in an airtight container in the refrigerator for up to 1 week. You can serve these treats cold or let them come to room temperature before serving. Just make sure to refrigerate the leftovers.
What type of chocolate can you use to make chocolate caramel cups?
Any type of chocolate works! I usually use chocolate almond bark or Candiquik, but you can melt chocolate chips or melting wafers or whatever you have on hand. White almond bark works great too! You could also use milk chocolate or dark chocolate – it all tastes fantastic with the caramel filling.
WHY DOES CHOCOLATE SEIZE?
Melting chocolate can be a little frustrating if you’ve never done it before. The reason is because chocolate can seize easily if it gets too hot. If you use almond bark or Candiquik, the chances of the chocolate seizing are lower, but you still need to be careful. The most common culprits are water and overcooking. I don’t EVER use water to help chocolate melt. When chocolate seizes due to overcooking, it actually looks like it’s not melted yet, which prompts people to return it to the microwave and makes the whole thing worse. The result is a clumpy, grainy mess!
HOW TO PREVENT CHOCOLATE FROM SEIZING:
- The key is to melt the chocolate SLOWLY. Make sure to stir after each interval in the microwave. Sometimes the chocolate won’t look completely melted, but as you stir, it continues to melt.
- Add a small amount of shortening to the chocolate. This is completely optional and the chocolate will melt without it, but it does thin it out a little bit and the shortening helps to smooth it all out. If your chocolate is showing beginning signs of seizing, melt 1/2 tsp shortening in a separate bowl and gently stir into your chocolate. If it’s smoothing out, you can add another 1/2 tsp of shortening.
More delicious Christmas treat recipes to try:
- Old Fashioned Potato Candy
- Easy Oreo Balls
- Buckeye Balls Candy
- Saltine Cracker Toffee recipe
- Tiger Butter Fudge
- Easy Chocolate Peppermint Patties
- Chocolate Raspberry Sticks
- Raspberry Jelly Candy
- Easy Mint Chocolates
- Homemade Almond Joy Bars
- Microwave Pumpkin Spiced Caramels
- Chocolate Peppermint Truffles
- Martha Washington Candy (Coconut Pecan Truffles)
- Rolo Pretzel Turtles
- Peanut Clusters
- Cherry Jelly Hearts Candy
- Homemade Chocolate Orange Sticks
Christmas Chocolate Caramel Cups are the perfect gift or holiday treat for the season. Only 4 ingredients needed to make this easy candy recipe.


Leave a Reply