Homemade Strawberry Jam is a delicious and easy way to enjoy the sweet taste of fresh strawberries all year round. With just a few simple ingredients and some basic kitchen tools, anyone can make their own homemade fruit jam!
Whether you are a seasoned jam maker or a beginner, making this strawberry jelly recipe is a fun and rewarding activity. Not only does it taste delicious, but it also makes a great gift for friends and family. So why not give it a try and enjoy the sweet taste of summer all year round?
Homemade Jam that Tastes Great!
Making homemade jam is a great way to enjoy the delicious flavor of fresh strawberries all year round. Create a sweet and tangy spread that’s perfect for toast, biscuits, or even as a topping for ice cream.
To make homemade strawberry jam, you will need fresh strawberries, fruit juice or water, pectin, sugar, and mason jars with lids. The first step is to wash and hull the strawberries, then crush them with a potato masher. Next, mix in the fruit juice or water, pectin, and sugar, and bring the mixture to a boil. Once the jam has reached the desired consistency, it can be poured into the jars and sealed with the lids.
Making this homemade strawberry jam is an easy and rewarding process that anyone can do. With just a few ingredients and some basic kitchen tools, you can create a delicious spread that will impress your family and friends!
Why You’ll Love This Recipe
- Simple ingredients. This recipe uses only a few simple ingredients that are easy to find at any grocery store. You will need fresh strawberries, fruit juice or water, pectin, sugar or a sugar substitute, and mason jars with fitted lids and bands. The recipe is flexible, so you can adjust the ingredients to suit your taste.
- Customizable. This recipe is highly customizable, so you can adjust the sweetness and consistency of the jam to your liking. You can also experiment with different fruit combinations, such as adding raspberries or blueberries to the mix.
- Great gifts! Handing out a jar of homemade jam is like handing out little jars of love. The time and effort that went into the gifts are heartfelt and always appreciated.
Strawberry Jam Ingredients
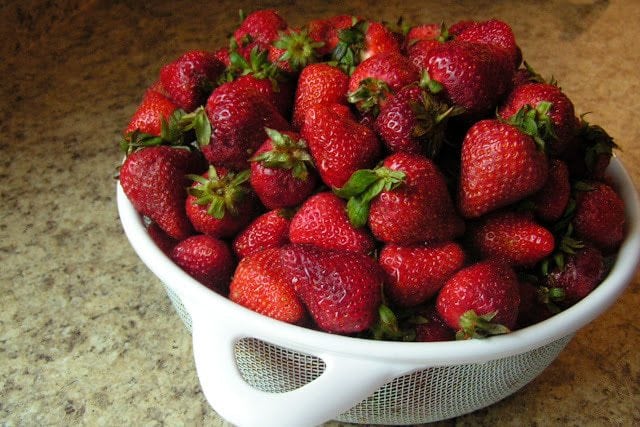
Strawberries– You will need 1 ⅓ cups of crushed strawberries that have been washed, hulled, and smashed with a potato masher.
Fruit Juice- Use ⅓ cup of flavored unsweetened fruit juice, like frozen juice concentrate, or water will work as well.
Pectin– This is what gives us the consistency we want with our jam. Add 1 ½ tablespoons of Ball® Real Fruit™ Low or No-Sugar Needed Pectin.
Sugar– Sweeten the jam by adding ½ cup of granulated sugar, a sugar substitute, or even honey, to make this recipe.
Jars and lids- To have a container to place your strawberry jam into, you’ll need 2 mason jars with fitted lids and bands.
How to make Homemade Strawberry Jam
Prep
Start with preparing the strawberries. They need to be washed, hulled, and cut in half or quarters depending on their size.
After that, get all your jars ready. This means getting them cleaned well with soap and water and having them warmed as well so that the hot jam mixture doesn’t enter cold glass jars (this can cause them to break).

I like to fill up a sink full of soapy hot water, clean the jars and lids, then replace the soapy water with just hot water, rinsing the jars, then re-filling the sink and letting them sit.
Next mash the strawberries with a potato masher or use the “low” setting on a food processor. I like to use the food processor because we like our jam less chunky. But either way will work great!

Assemble
Proceed to combine the prepared fruit with the fruit juice in a large saucepan, gradually stir in the pectin. Bring this mixture to a low boil.
Then add in the sugar, stir to combine. Return the mixture to a full rolling boil. Boil hard for 1 minute, stirring constantly. Then remove the jam from the heat and skim foam if necessary.

Now ladle the hot jam into the hot jars, one at a time, leaving ¼ inch headspace. Then wipe the rims, center the lids on the jars, apply the bands and adjust to tight.
Inversion method
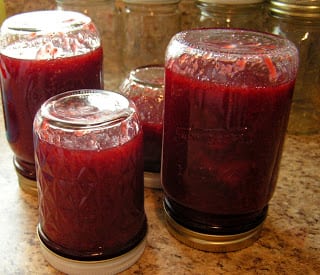
Proceed to turn the jars over upside down, on top of a clean dishcloth. Do not move the jars for 24 hours. Be aware you will begin to hear lids popping & sealing within an hour or two.
Once the 24 hours have passed, turn the jars right side up and then store them in a cold storage or refrigerator. They’re not technically “processed and sealed” but I find my jam stays fresh for about a year using this inversion method.
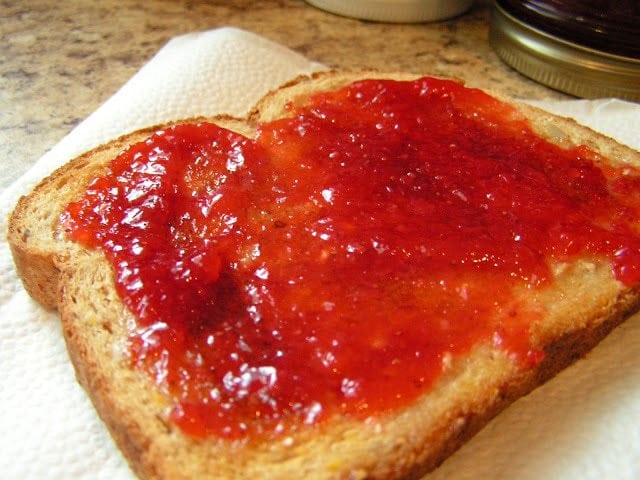
Spread your homemade jam on toast, rolls, waffles, and so much more! Enjoy!

Unique variations of this Homemade Jam Recipe
There are many ways to customize this homemade strawberry jam recipe to suit your taste preferences. Here are a few unique variations to try:
Add Some Spice: For a unique twist, try adding a pinch of cinnamon or nutmeg to the recipe. These warm spices will complement the sweetness of the strawberries and add a cozy, comforting flavor to the jam.
Infuse with Herbs: Adding fresh herbs like basil, thyme, or rosemary to the jam can give it a subtle, sophisticated flavor. Simply chop the herbs finely and add them to the mixture before cooking.
Mix in Other Fruits: While this recipe is specifically for strawberry jam, you can easily mix in other fruits to create a unique blend. Try adding raspberries, blueberries, or even peaches for a delicious twist.
Reduce the Sugar: For a healthier option, you can reduce the amount of sugar in the recipe or substitute it with a natural sweetener like honey or maple syrup. Keep in mind that this will affect the consistency of the jam, so you may need to experiment with the amount of pectin used.
Homemade Strawberry Jam
Ingredients
- 1 ⅓ cups strawberries washed, hulled, then crushed
- ⅓ cup unsweetened fruit juice thawed fruit juice concentrate, or water
- 1 ½ TBSP Ball® RealFruit™ Low or No-Sugar Needed Pectin
- ½ cup granulated sugar sugar substitute, or honey
- 2 Ball® or Kerr® Half-pint 8 oz Jars with lids and bands
Instructions
- Prep: Prepare the strawberries, they need to be washed, hulled, and cut in half or quarters depending on their size.
- Get all your jars ready. This means getting them cleaned well with soap and water and having them warmed as well so that the hot jam mixture doesn't enter cold glass jars (this can cause them to break). I like to fill up a sink full of soapy hot water, clean the jars and lids, then replace the soapy water with just hot water, rinsing the jars, then re-filling the sink and letting them sit.
- Mash the strawberries with a potato masher or use the "low" setting on a food processor. I like to use the food processor because we like our jam less chunky. But either way will work great!
- Assemble: Combine the prepared fruit with the fruit juice in a large saucepan, gradually stir in the pectin. Bring this mixture to a low boil.
- Add in the sugar, stir to combine. Return the mixture to a full rolling boil. Boil hard for 1 minute, stirring constantly. Remove the jam from the heat and skim foam if necessary.
- Ladle the hot jam into the hot jars, one at a time, leaving ¼ inch headspace. Then wipe the rims, center the lids on the jars, apply the bands and adjust to tight.
- Inversion method: Turn the jars over upside down, on top of a clean dishcloth. Do not move the jars for 24 hours. Be aware you will begin to hear lids popping & sealing within an hour or two.
- Once the 24 hours have passed, turn the jars right side up and then store them in a cold storage or refrigerator. They’re not technically “processed and sealed” but I find my jam stays fresh for about a year using this inversion method. Spread your homemade jam on toast, rolls, waffles, and so much more! Enjoy!
Notes
Nutrition
📫 Save this recipe! Send it to your email! 📩
I consent to receiving emails from this site.
Is making homemade jam cheaper than buying store-bought?
This is how much a double batch yielded- about 136 oz. My jam cost me about .11/oz. I figured a bottle of Smucker’s on sale would be about .14/oz, so I did save some money. Overall, this is not a recipe to save money, but to have control over the ingredients used and something to be proud of too!
Is it possible to use frozen strawberries for making jam?
Yes, you can use frozen strawberries to make jam. Simply thaw the strawberries completely before crushing them. Frozen strawberries may produce more liquid than fresh strawberries, so you may need to adjust the amount of fruit juice or pectin in your recipe to achieve the desired consistency.
Is pectin needed for strawberry jam?
Yes, if you don’t use the pectin your strawberry jam will be much more like strawberry syrup. This is because strawberries are naturally low in pectin, which is a thickening agent needed to get the jam to set up. Using the pectin means we get a thicker, spreadable consistency (like jam).
How long does homemade strawberry jam last?
Once your homemade strawberry jam has cooled completely, store it in an airtight container in the refrigerator for up to 3 weeks. If you want to store it for a longer period, you can freeze it for up to 6 months. Make sure to label your container with the date of preparation.
Health and Safety Tips for preparing homemade Jam
When making strawberry jam, it is important to follow proper food safety guidelines to prevent contamination. Make sure to wash your hands and equipment thoroughly before starting. Use clean jars and lids that have been sterilized by boiling them in water for 10 minutes. After filling the jars with jam, wipe the rims clean with a damp cloth before sealing them with the lids.

How to Water Bath Can this Recipe
Water bath canning is a popular method used to preserve homemade jams and jellies. The process involves boiling filled jars of jam in a large pot of water for a specified period of time. Here are the steps to water bath can this homemade strawberry jam recipe:
- Prepare the jars and lids: Place the jars and lids in a large pot of water and bring to a simmer. Keep the jars and lids in the hot water until ready to use.
- Fill the jars: Using a ladle, fill each jar with the hot strawberry jam, leaving about ¼ inch of headspace at the top of the jar.
- Wipe the rims: Use a clean, damp cloth to wipe the rims of the jars, removing any excess jam or debris.
- Apply the lids: Place the lids on top of the jars and screw on the bands until they are fingertip tight.
- Place the jars in the canner: Using a jar lifter, carefully place the filled jars into the canner, making sure they are not touching each other or the sides of the pot.
- Process the jars: Bring the water in the canner to a rolling boil and process the jars for 10 minutes. Adjust the processing time based on your altitude, as specified in the recipe.
- Remove the jars: Using a jar lifter, carefully remove the jars from the canner and place them on a towel-lined surface to cool.
- Check the seals: Once the jars have cooled, check the seals by pressing down on the center of each lid. If the lid does not flex, the jar is properly sealed. If the lid flexes, the jar did not seal properly and should be refrigerated and consumed within a few weeks.
Check out these other delicious jam recipes
- RASPBERRY PEACH FREEZER JAM
- KOOL-AID STRAWBERRY JAM
- APRICOT CHERRY JAM
- LEMON BLUEBERRY JAM
- SPICED PEACH JAM
- EASY BLUEBERRY JAM
- STRAWBERRY JAM WITHOUT PECTIN
- CROCKPOT PUMPKIN APPLE BUTTER RECIPE
Making Homemade Strawberry Jam is a seasonal pastime in our house. We love everything from picking the berries to canning them into jam. Try this easy strawberry jelly recipe and see why you’ll never want to buy store-bought again!




Elaine Pytel says
Thanks for so many yummy recipes.
patricia says
how much sugar in this recipe? there is no amount shown.