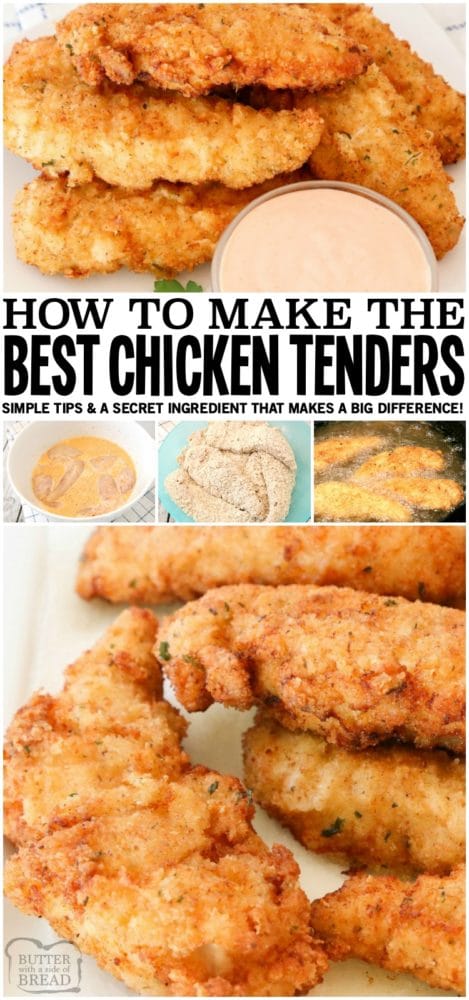
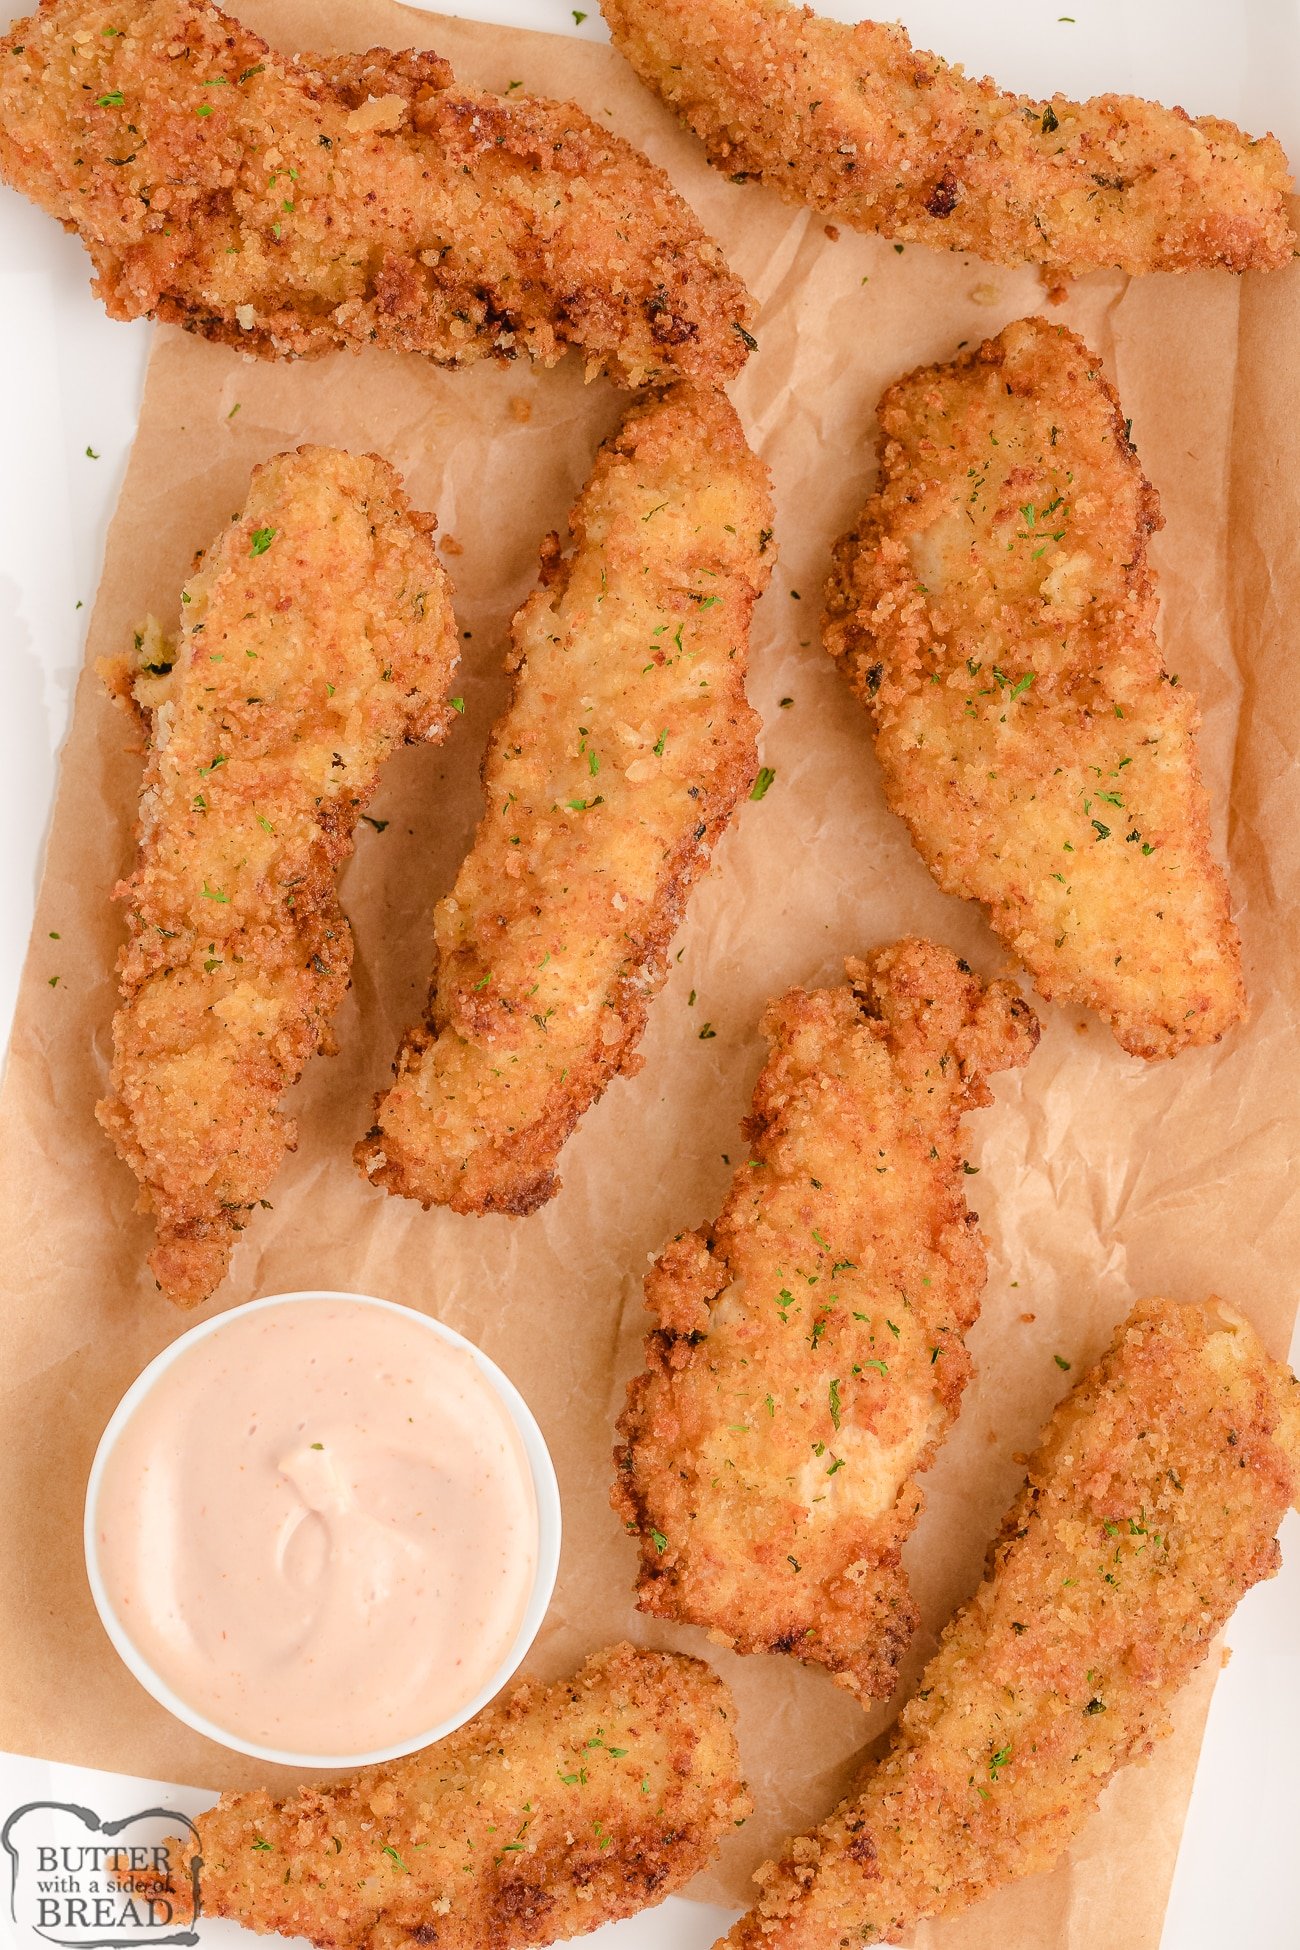
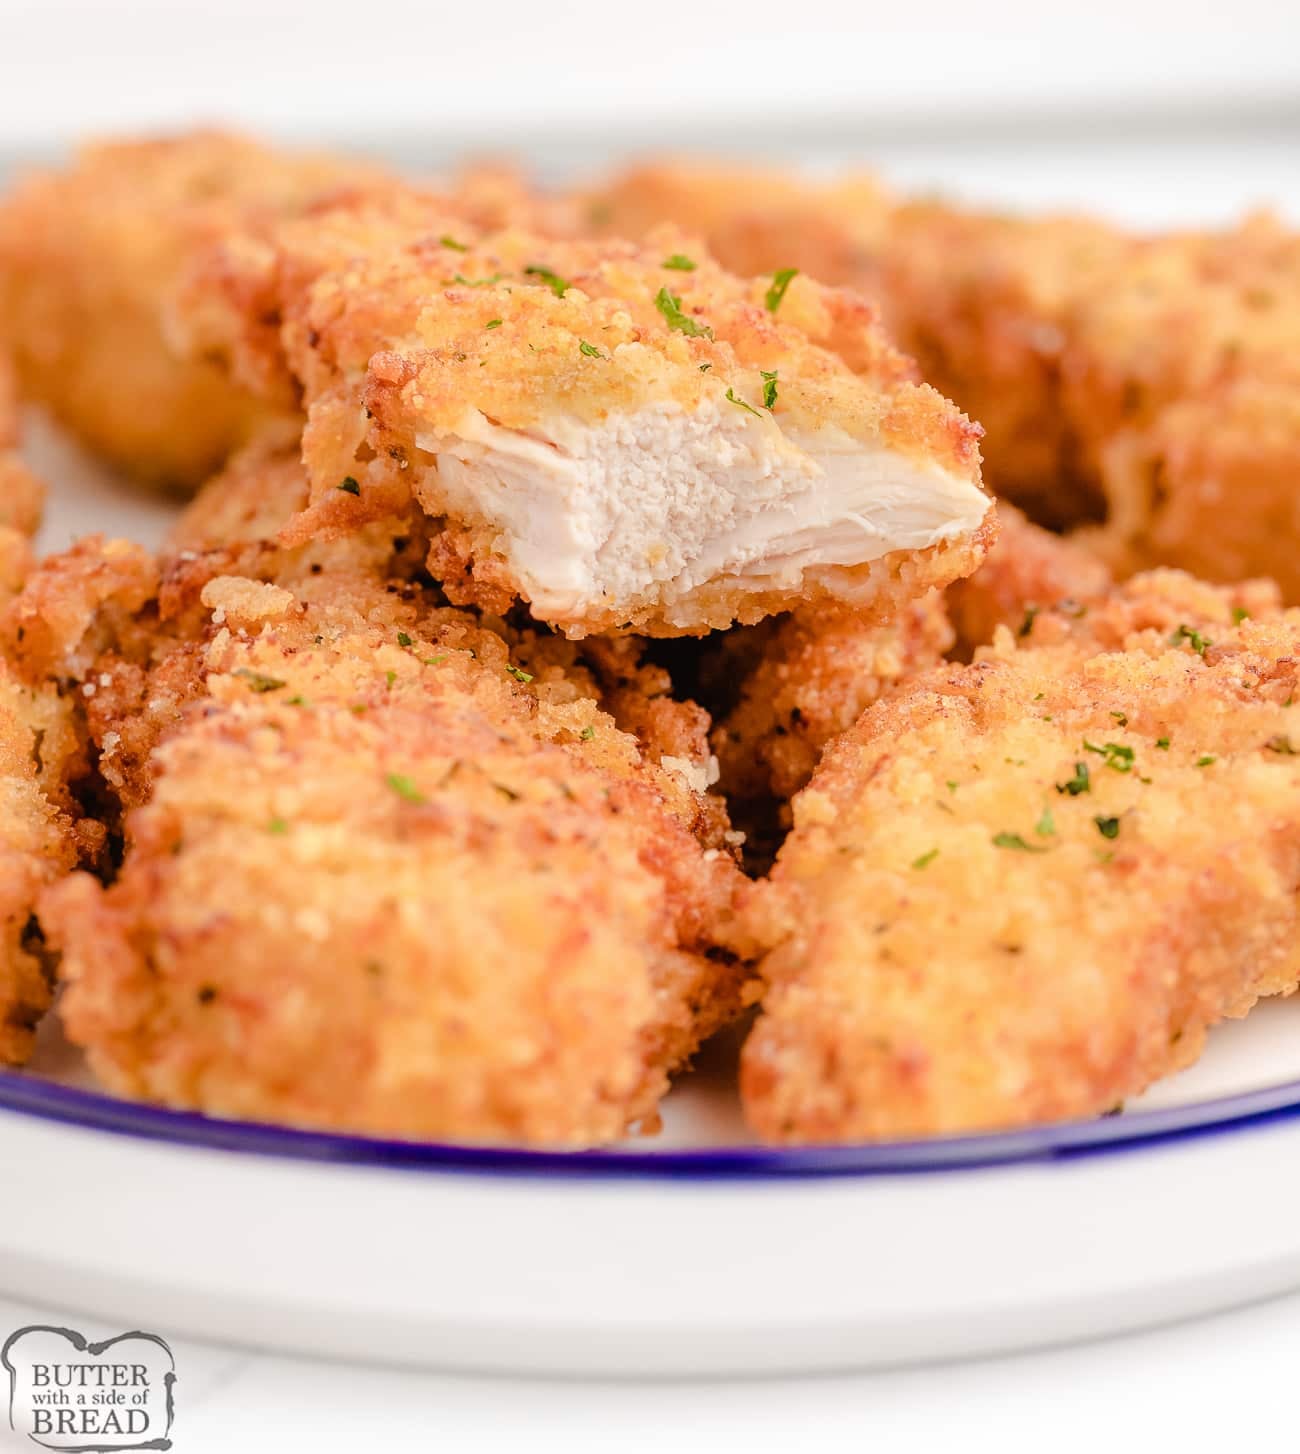
Make the Best Chicken Strips at home for the most tender, flavorful chicken dinner! Two simple tips to take your chicken tenders from good to great- simple marinade and method.
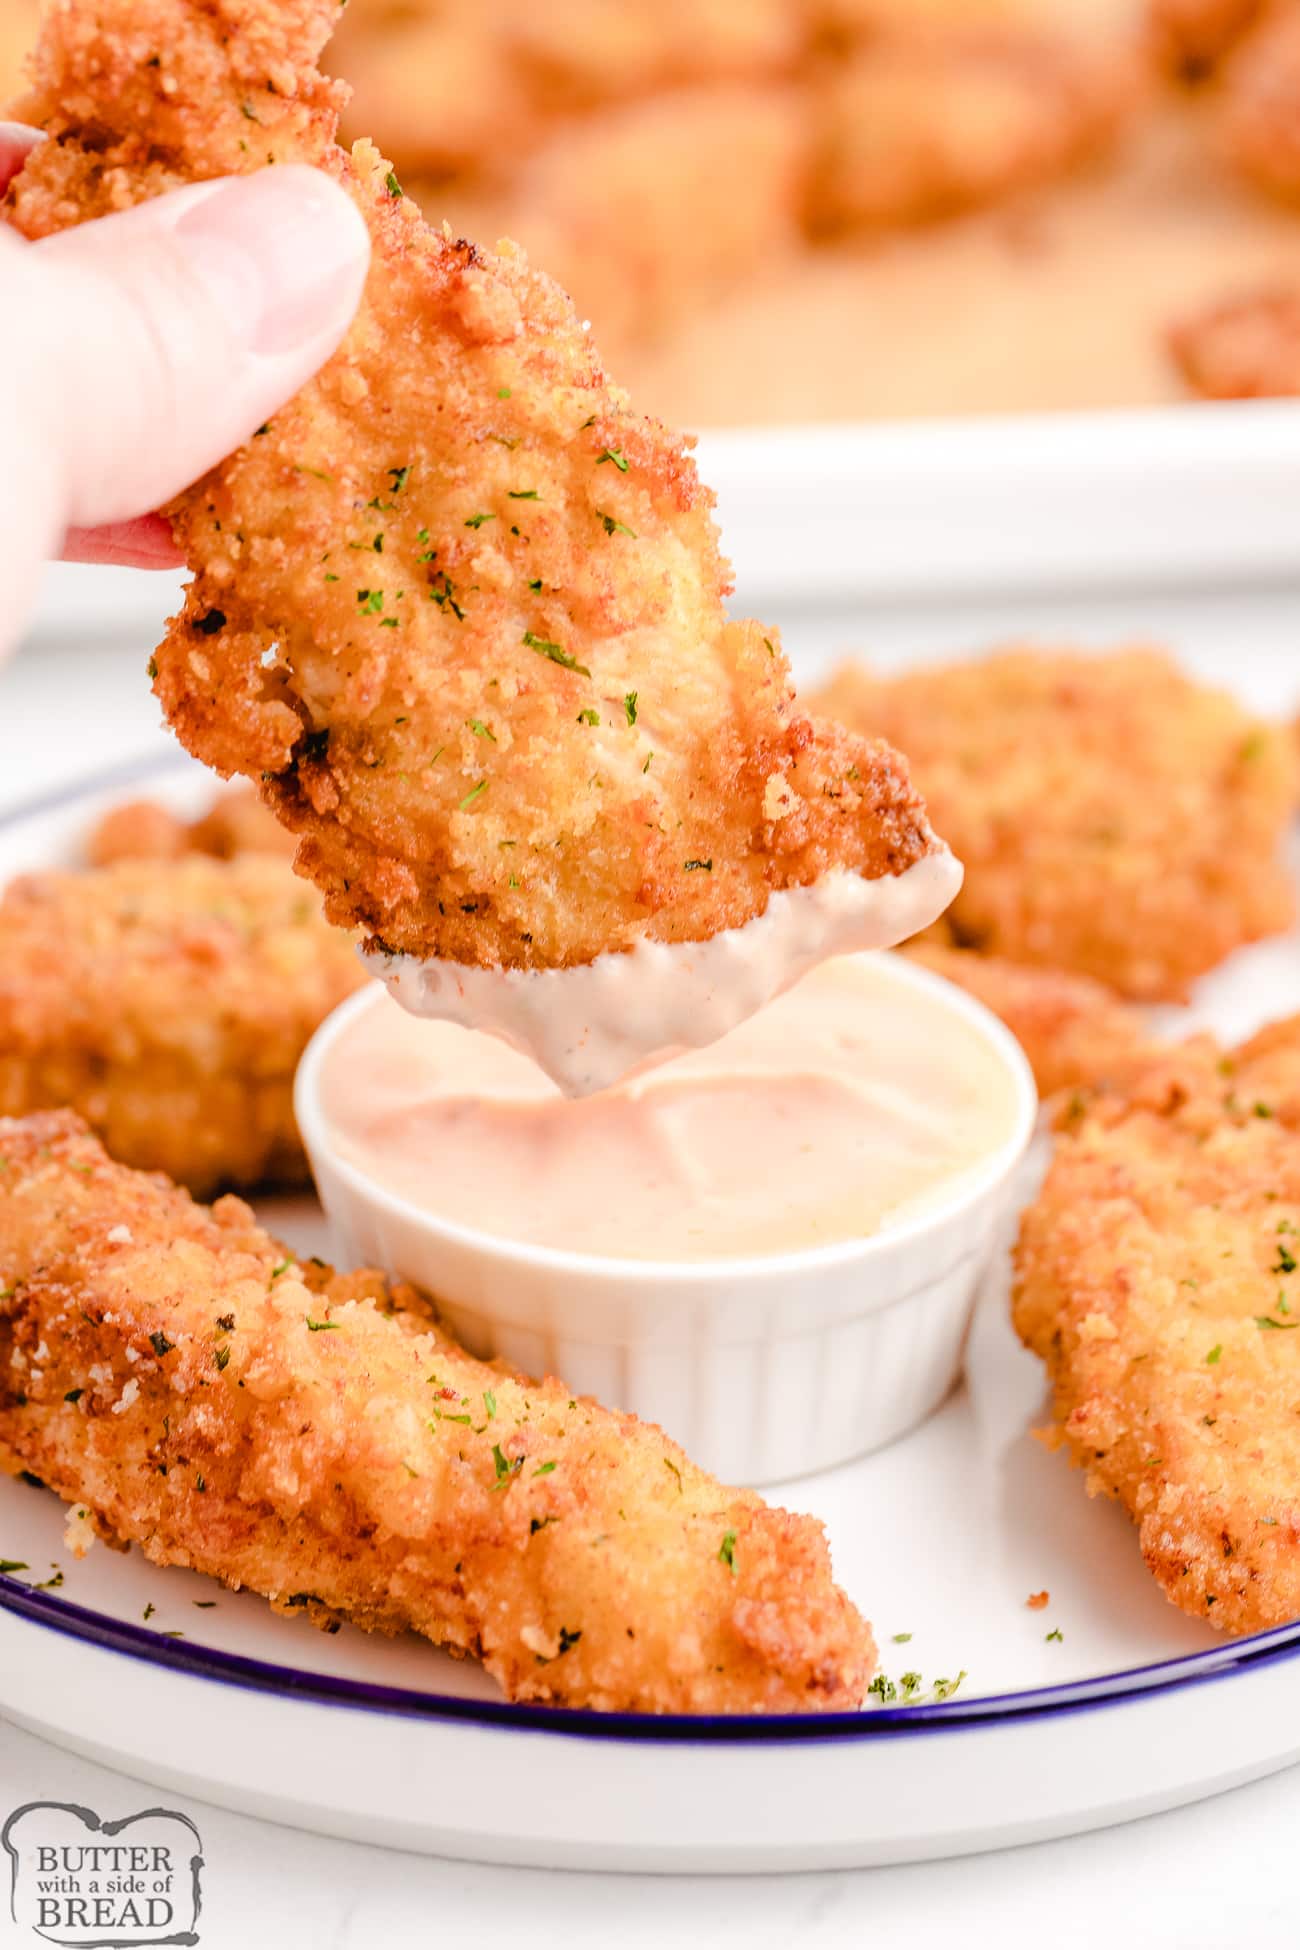
Chicken Fingers are a favorite at our house! I’ve made homemade chicken strips many, many times over the years ~there are 2 small things you can do that really take homemade chicken up a notch or two. Add in some homemade fry sauce and you’ve got yourself an incredible batch of tender, juicy chicken!
Making the Best Chicken Tenders
It’s really simple! You start with some fresh chicken. I used boneless, skinless chicken breasts but you’re welcome to use boneless thighs instead. Getting super tender, juicy chicken strips comes down to a couple of easy steps- cutting the chicken across the grain and adding in cornstarch to the quick marinade. Yep- corn starch! Trust me it works. Follow the recipe below and you’ll see for yourself.

Chicken Tender Ingredients
To make the quick chicken marinade you’ll need:
Boneless skinless chicken: You can use what you have on hand- chicken tenders work well (I like to remove the small tendon first!) as do chicken thighs or breasts.
Milk + Lemon juice: this combination mimics buttermilk and helps to add moisture and flavor to the chicken. You can use buttermilk if you have it, but otherwise, the milk and lemon juice works great.
Sugar: balance flavors with just a tsp of sugar.
Cornstarch: Using just 2 tsp cornstarch assists in “velveting” the chicken, which means it tenderizes it very quickly. Just don’t leave it in the marinade too long or it almost breaks down the fibers too much.
Frank’s Red Hot Sauce: optional! It doesn’t add HEAT, just flavor, unless you want to add more!
salt & pepper: adds flavor!
Chicken Tender coating
Panko breadcrumbs & regular breadcrumbs: I love the textures of both, so I mix them!
All-purpose flour: adds a more finer coating to the chicken. Between the 3 main ingredients in the breading, you’ve established a thorough, crispy, flavorful coating.
Seasonings: We use onion powder, salt or garlic salt & pepper to add more flavor to the chicken.
Shortening or oil, for frying: Omit if baking, of course! Use a neutral oil with a high smoke point — vegetable oil, canola oil, or peanut oil all work well. Avoid olive oil for frying since its lower smoke point means it can start to burn before your oil reaches the right temperature.
You need enough oil to come about an inch up the side of the pan — enough to fry the strips without deep frying, but enough that they’re not just sitting in a thin puddle. Shortening (or even lard!) yields the tastiest, crispiest chicken!
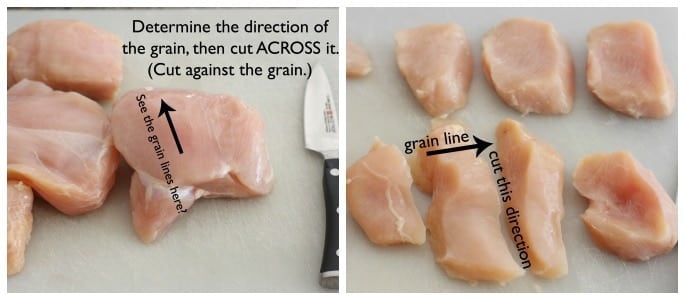
How to correctly cut chicken for chicken strips
To cut chicken into strips: This is one of the tips behind better chicken strips! To get a more tender strip, you need to cut against the grain of the chicken. Don’t just cut the chicken any way you like- notice where the grain lines are and be sure to cut opposite them. This makes the cooked fibers of the chicken shorter, so they tear apart easier. Cut strips as big or small as you’d like, just cut against the grain! Place chicken in a ziplock bag and set aside.
Coat the chicken with simple breading
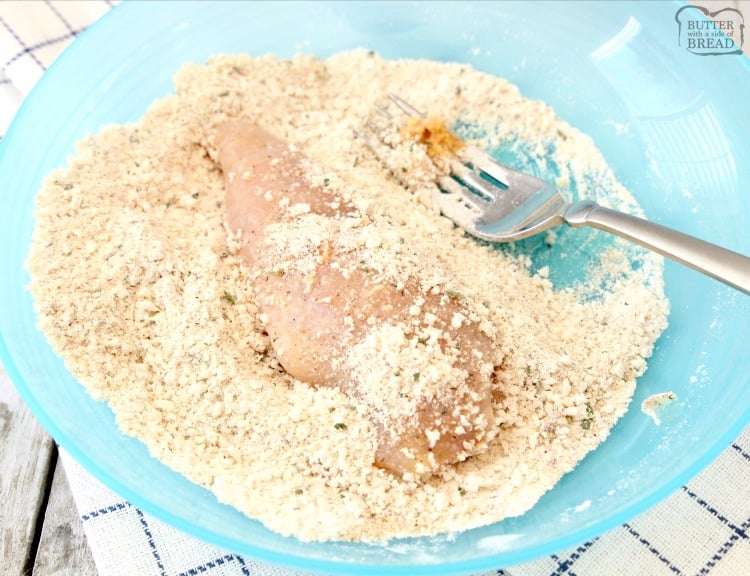
While the oil is heating, combine all ingredients for the coating in a shallow bowl. Remove chicken pieces from bag a few at a time and thoroughly coat them in the breadcrumb mixture. I like to place them in the breadcrumbs, then spoon some on the top of the chicken, then press the chicken down- then flip and repeat the process. Repeat until all chicken is coated.
Ways to Cook Homemade Chicken Strips
The base recipe works beautifully no matter how you cook it — here’s how to adapt it to whatever method works best for you:
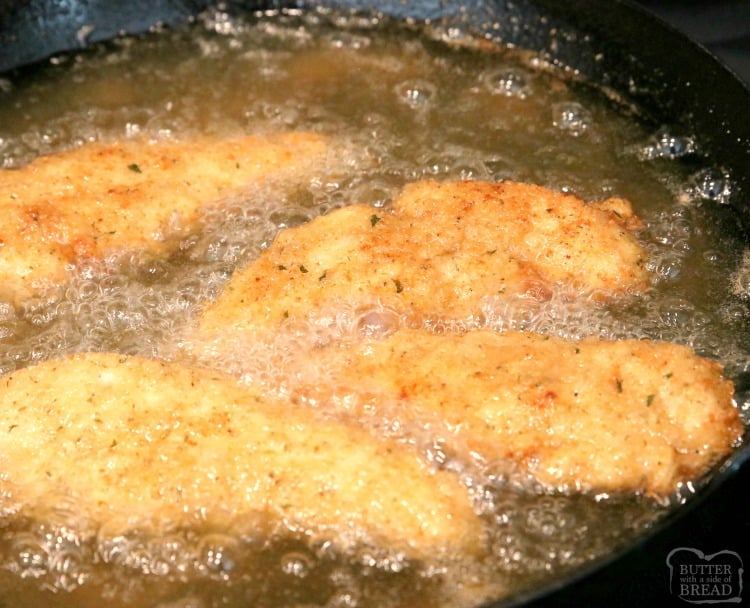
Pan-Fried (the classic method) Add about an inch of vegetable or canola oil to a heavy skillet — cast iron works best — and heat to 350°F before adding the chicken. Cook 3-4 minutes per side until golden brown and the internal temperature reaches 165°F. Don’t overcrowd the pan or the oil temperature drops and you end up with greasy rather than crispy strips. Cook in batches and keep finished strips warm in a 200°F oven while you work through the rest.
Baked For a lighter version, arrange breaded strips in a single layer on a wire rack set over a rimmed baking sheet — the rack lets hot air circulate underneath so the bottom gets crispy instead of soggy. Spray generously with cooking spray and bake at 400°F for 18-20 minutes, flipping once halfway through. They won’t be quite as crispy as pan-fried but they’re genuinely delicious and significantly less hands-on.
Air Fryer The air fryer gets surprisingly close to pan-fried results with a fraction of the oil. Spray the basket and the breaded strips with cooking spray, arrange in a single layer without overlapping, and cook at 375°F for 10-12 minutes, flipping halfway through. Work in batches — overcrowding the basket is the number one reason air fryer chicken strips come out soft instead of crispy. Spray once more after flipping for the best color and crunch.
A note on oil temperature for frying Regardless of method, oil temperature matters more than almost anything else. Oil that isn’t hot enough means the breading absorbs oil before it crisps — resulting in greasy, heavy strips. An instant-read thermometer is the most reliable way to check, but if you don’t have one, drop a small pinch of breading into the oil — if it sizzles immediately and floats, you’re ready to go.
Dipping Sauce Ideas
Chicken strips are only as good as what you dip them in. Here are our favorites:
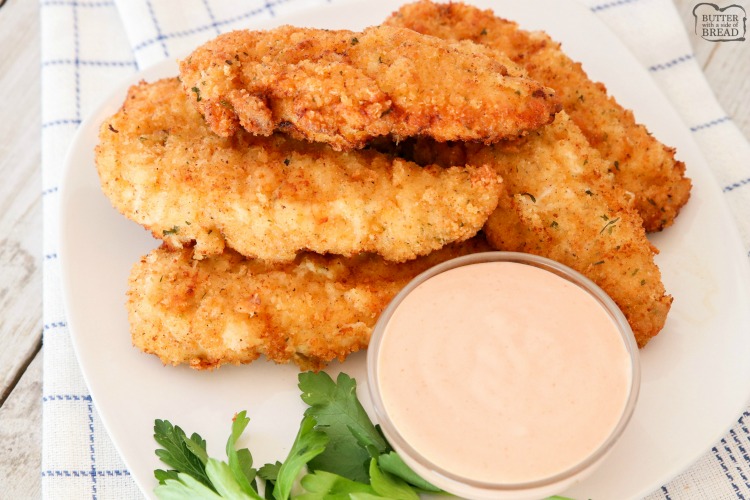
Homemade Fry Sauce — our absolute go-to and a Utah staple. Whisk together ¼ cup mayo, 2 tablespoons ketchup, ¼ teaspoon garlic powder, a dash of Worcestershire sauce, and salt and pepper to taste. It takes two minutes to make and it’s better than anything you’ll find in a bottle. Once you try it you’ll put it on everything.
Honey Mustard — mix equal parts honey and Dijon mustard with a spoonful of mayo for a creamy, tangy dip that pairs perfectly with the cornstarch-marinated strips.
Chick-fil-A Style Sauce — combine mayo, yellow mustard, honey, BBQ sauce, and a splash of lemon juice. It tastes shockingly close to the real thing and takes less than five minutes.
Ranch Dressing — the classic for a reason. Homemade ranch made with buttermilk and fresh dill is worth the extra five minutes if you have it, but store-bought works just fine on a weeknight.
BBQ Sauce — smoky and sweet against the savory breading. Your favorite store-bought brand works great, or try dipping in our slow cooker BBQ pulled pork sauce for something extra special.
Chipotle Ranch — stir a teaspoon of chipotle in adobo sauce into your ranch dressing for a smoky, spicy kick that’s especially good with kids who like a little heat.
Honey Sriracha — whisk together 2 tablespoons honey, 1 tablespoon Sriracha, and a squeeze of lime. Quick, spicy, and completely addictive.
Gravy — don’t overlook this one. Chicken strips dipped in a simple white gravy or peppered country gravy is pure comfort food and a great option when you want something more substantial than a cold dipping sauce.
How to Reheat Chicken Strips Without Losing the Crispiness
Leftover chicken strips deserve better than a soggy microwave reheat. Here’s how to bring them back to life:
Oven (best results): Place strips on a wire rack over a rimmed baking sheet — the rack is the key, because it lets hot air circulate underneath instead of steaming the bottom into sogginess. Reheat at 425°F for 12-15 minutes until heated through and crispy again. This method takes a little longer but the results are genuinely close to fresh.
Air fryer (fastest): Arrange in a single layer at 375°F for 4-5 minutes. The air fryer is actually the best tool for reheating fried foods — it re-crisps the exterior beautifully without drying out the chicken inside. This is the method we use most often for leftovers.
Skillet: Heat a dry skillet over medium heat and warm strips for 2-3 minutes per side. No oil needed — there’s enough residual oil in the breading to crisp back up. Watch closely because they can go from perfectly reheated to overdone quickly.
Microwave (when you’re in a hurry): Quick and easy but the breading will soften. If you’re going the microwave route, reheat in 30-second intervals on medium power rather than full blast, and place a paper towel underneath to absorb some of the steam. They won’t be crispy but they’ll still taste great.
From frozen: If you froze cooked strips, let them thaw in the refrigerator overnight before reheating. Bake at 425°F on a wire rack for 15-18 minutes — they’ll come out crispier than you’d expect.
Best Homemade Chicken Tenders
Ingredients
- 1 lb chicken boneless, skinless tenders, thighs or breasts – sliced
Quick Marinade
- 1 cup milk
- 1 tsp lemon juice
- 1 tsp sugar
- 2 tsp cornstarch
- 1 TBSP Frank’s Red Hot Sauce
- ½ tsp salt or season salt
- ¼ tsp pepper
Crispy Chicken Tender Coating
- ½ cup Panko breadcrumbs
- ½ cup regular breadcrumbs or Italian
- ½ cup all-purpose flour
- 1 TBSP onion powder
- ½ tsp garlic salt
- ½ tsp pepper
- 2 cups shortening or oil for frying (omit if baking)
Instructions
- To cut chicken into strips: To get a more tender strip, you need to cut against the grain of the chicken. Notice where the grain lines are and be sure to cut opposite them. Place chicken in a ziplock bag and set aside.
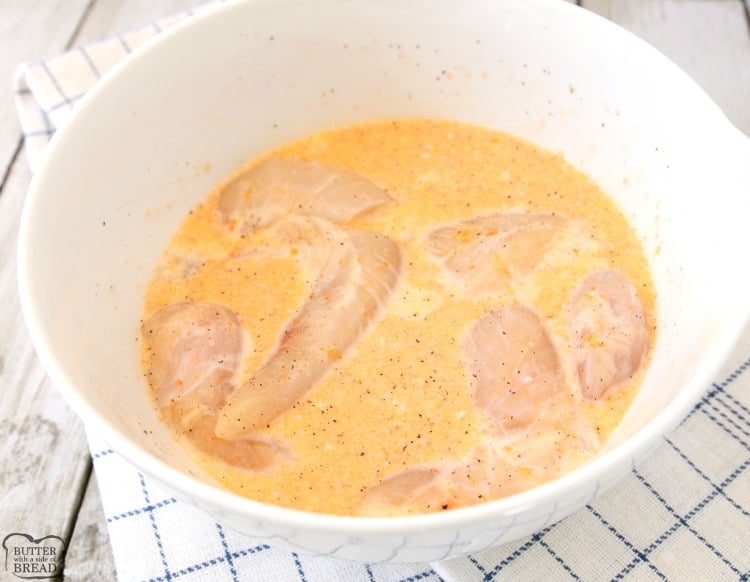
- Next, combine milk, lemon juice and sugar in a small bowl or 2-cup measuring cup. Whisk in the cornstarch. Add in the hot sauce (feel free to add more if you'd like!) and the salt & pepper and whisk to combine.
- Pour marinade in the ziplock with the chicken and gently shake until chicken is coated. Place bag in the fridge and let marinate for at least 20 minutes, but no longer than 1 hour.
- Heat about 2 cups of oil to 365°F in a frying pan. Frying the chicken in Crisco (plain shortening) yields the crispiest tenders!
- While the oil is heating, combine all ingredients for the coating in a shallow bowl. Remove chicken pieces from bag a few at a time and thoroughly coat them in the breadcrumb mixture. I like to place them in the breadcrumbs, then spoon some on the top of the chicken, then press the chicken down- then flip and repeat the process. Repeat until all chicken is coated.
- Once oil is hot, fry chicken pieces for anywhere from 2-4 minutes per side, depending on how big they are. The small pieces cook quickly! If you're unsure if the chicken is done, use a meat thermometer. It should register 165°F. Remove cooked chicken and place on a plate lined with a paper towel. Repeat until all chicken is cooked. Serve hot, with Homemade Fry Sauce!
- To Bake Chicken Strips: Heat oven to 400°F. Spray a cookie sheet with non-stick spray and arrange chicken tenders. Spray the tenders with additional cooking spray. Cook 12-15 minutes, until tenders register 165°F on a meat thermometer. (Cooking time varies depending on the size of your chicken tenders! Pay attention and check often as to not overcook them!)
Video
Notes
Nutrition
📫 Save this recipe! Send it to your email! 📩
I consent to receiving emails from this site.
Why marinade chicken with cornstarch?
This is the secret ingredient that sets this recipe apart from every other chicken strip recipe out there! Adding cornstarch to the marinade breaks down the proteins in the chicken and tenderizes it from the inside out, giving you that restaurant-quality juicy texture that’s nearly impossible to get without it. Don’t skip it and don’t substitute flour — cornstarch does something flour simply can’t.
What’s the Difference Between Chicken Tenders, Chicken Strips, and Chicken Fingers?
If you’ve ever wondered whether chicken tenders, chicken strips, and chicken fingers are actually different things — you’re not alone. It comes up constantly in recipe comments and the answer is both simple and a little surprising.
Chicken tenders are technically a specific cut of meat. The chicken tenderloin is a small, narrow strip of muscle that runs along the underside of each chicken breast, attached but separate from the main breast meat. It’s naturally tender — hence the name — and is already the perfect size and shape for cooking without any cutting required. When a recipe calls for chicken tenders, it usually means this specific cut, which you can buy pre-separated at the grocery store labeled as chicken tenderloins or chicken tenders.
Chicken strips are breast meat that has been sliced into strips. Same idea, slightly different starting point — instead of using the naturally occurring tenderloin, you’re cutting chicken breast into similar-sized pieces. The texture is very slightly different since breast meat has a bit more structure than the tenderloin, which is why cutting against the grain is so important when making chicken strips from breast meat. Cut with the grain and you get chewy, tough strips. Cut against the grain and you get something that rivals the tenderloin in tenderness.
Chicken fingers is simply another name for the same concept — breaded, cooked strips of chicken. The term is mostly a menu name rather than a description of a specific cut or preparation method. You’ll see all three terms used interchangeably in recipes, restaurants, and grocery stores, and in practice they all cook the same way and taste essentially identical.
The bottom line: for this recipe, you can use actual chicken tenderloins for the easiest prep, or chicken breast cut into strips for the most budget-friendly option. Both will give you incredible results — especially with the cornstarch trick that makes the chicken so much more tender than standard recipes.
More fantastic chicken dinner ideas:
Into making your own chicken? You’ll want to grab some ground chicken from the store and make these Copycat McDonald’s Chicken Nuggets!
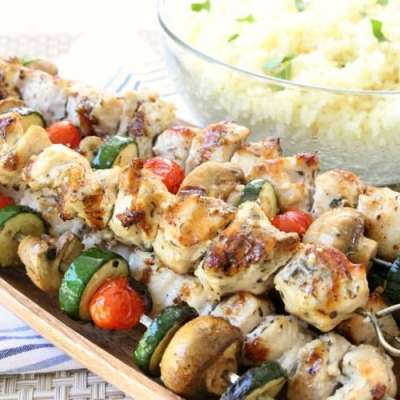
Add more flavor to your chicken with these Baked Chicken Strips or our Bacon Chicken Strips! These Garlic Parmesan Chicken Skewers are incredible.
Go bigger and make our Crispy Fried Chicken without Buttermilk – you won’t regret it.
Need something simpler? We adore casseroles! You can’t go wrong with our Chicken Poppy Seed casserole, or this classic Ritz Chicken and Rice casserole.
Homemade Chicken Strips made with simple, pantry ingredients for the most tender, flavorful chicken tenders you’ll ever make at home!






Jami says
I made these yesterday and can only assume they were a hit since my family ate them all while I went to the gym. I had all of the ingredients on hand other than the Panko. They were easy to put together and I look forward to making them again, with the sauce nect time.
Jessica says
I’m glad your family liked them Jami! Next time make sure to stick around so you get one or two as well! The sauce is so good- you’ve got to try it!
Brady says
I hate these they are so bad they are like eating raw meat
Jessica says
did you cook them?
Jessica says
Did you cook them fully Brady?
Kelly says
Lol- Brady is a troll! and Brooke! Really? I love when people don’t follow the directions, sub ingredients and then give bad reviews! What the heck people? Jessica, I can’t wait to make these tonight!
Jessica says
I hope you like them Kelly! 🙂
Bud says
Fry sauce is not a Utah thing…but your strip recipe is good if you have good hot sauce.
Germans have been breading meats and frying them before America was formed.
Fry sauce has been around before Utah was a state. I lived in Logan when I went to school, and that’s all I heard was fry sauce is a Utah thing. Fortunately I visited France in the military and saw fry sauce used commonly throughout towns, and depending on the mustard they used depended on the taste.
Not to be a negative nanny, thank you for the recipe because it was a go to to help guide me in making delicious strips.
Renee says
I made these tonight. They were excellent! Perfect ratio for breading the chicken. Great instructions on how slicing the chicken and making the marinade help to keep it moist. I put them on wax paper once they were fried. I didn’t make the dipping sauce, but I will next time! There will definitely be a next time, I loved them and so did my family.
Jessica says
So glad you like them Renee! Oooh- you’ve got to try the sauce next time! We love it! IT’s actually sold in stores where I live!
Laura says
Always a favorite for big kids and small!
Ally's Sweet & Savory Eats says
Making for my kids soon!
Jessica says
Hope everyone enjoys it Ally!
Carolyn says
These look so yummy!
Richa Gupta says
These Chicken Tenders looks amazing and love that yummy dip too!
Megan says
I just made and am eating these now…OMG I am in chicken finger heaven!!
Jessica says
So glad you liked them Megan!
Abeer Rizvi says
Just looking at this is making my mouth water! This needs to happen very soon!
Jessica says
I hope you like them Abeer! 😉
Amy Nash says
Those are some good lookin’ chicken strips! My husband is a big fan of chicken strips so I’m going to have to make these for him!
Jessica says
I hope everyone enjoys them Amy!
Tanya says
Just wondering why you should not let marinate for longer than an hr?
I’ve made these a few times now and I literally can no longer get my kids to eat any other type or brand of chicken strips. Sooooo good.
Jessica says
The cornstarch in the chicken marinade works fast- and it will continue to work until literally your cooked chicken has an odd texture to it, hence the recommendation to not marinate longer than an hour. I’m so glad your kids love them!!
Danielle in Nashville says
Hi Jessica! I’m going to make this over the weekend in an effort to get my kids on board with chicken tenders not made of ground chicken! I have 2 pounds of tenders I plan to use. Should I just double all the measurements? Thank you!
Jessica says
Yes- doubling all the ingredients should be just fine! Hope everyone enjoys them!
Domenicq says
Hey, so I did the recipe down to a “T”. With two exceptions. Instead of Cornstarch, I used Flour (I had no Cornstarch) and we had no breadcrumbs. I’ve made tenders without breadcrumbs so I thought it would be fine. I also have oven cooked it beforehand and it’s been fine. However when I put it in the oven at 400 and set it for 15 minutes, it wasn’t brown at all. It still kind of looked soggy and you could see some bits of flour. The bits with the flour were nice and crispy, but the rest of the skin was basically unbatable (I must add that I put it in the oven for another 10-15 minutes and the chicken itself was good and cooked). I have no doubt that this is a good recipe because I see so much praise for it, So I am convinced I did something wrong, but I just can’t tell what I did wrong. I would like to try to make it right next time because I really want to taste it, so is it possible that you can tell me what went wrong?
Jessica says
So, the cornstarch in the marinade is a tenderizer and isn’t part of the chicken tender coating. It will not work to replace it with flour. Essentially, you created a gummy coating on the chicken, hence the “soggy” texture on the outside. It’s a pretty simple recipe, so making any variations will make a difference! So… add some cornstarch and breadcrumbs to the grocery list! 😉
Kristal Melbye says
Perfect as is! We baked them and they were amazing.
Jessica says
I’m so glad you enjoyed them Kristal! 🙂
Alyssa says
LOVE the hot sauce in here. And the cornstarch! Thanks for the tips and tricks on making these the best chicken strips ever. 🙂
michele says
These were so tasty! I was hesitant using both panko and bread crumbs but I was so glad I followed your recipe, I LOVED the two textures it gave in every bite! Cutting them across the grain as you suggested was so easy to follow- and made them so tender!!
Joanie says
I have to say that the title of this recipe is very accurate – these are some of the best homemade chicken strips I’ve tasted! I loved that you included instructions on baking them. They were wonderful!
Jessica says
I’m so glad you enjoyed them Joanie! 🙂
Jenn L says
Love this easy to follow recipe! Delicious!