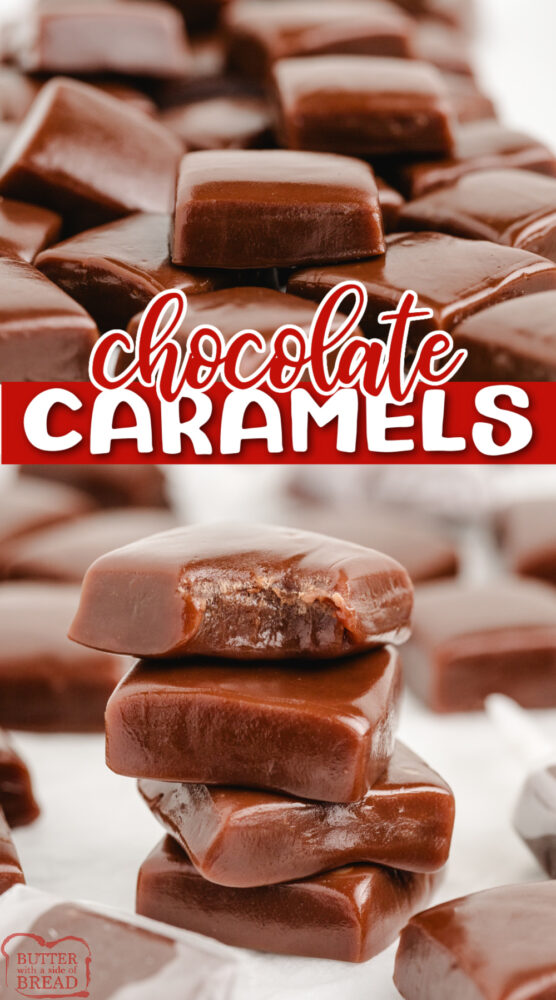
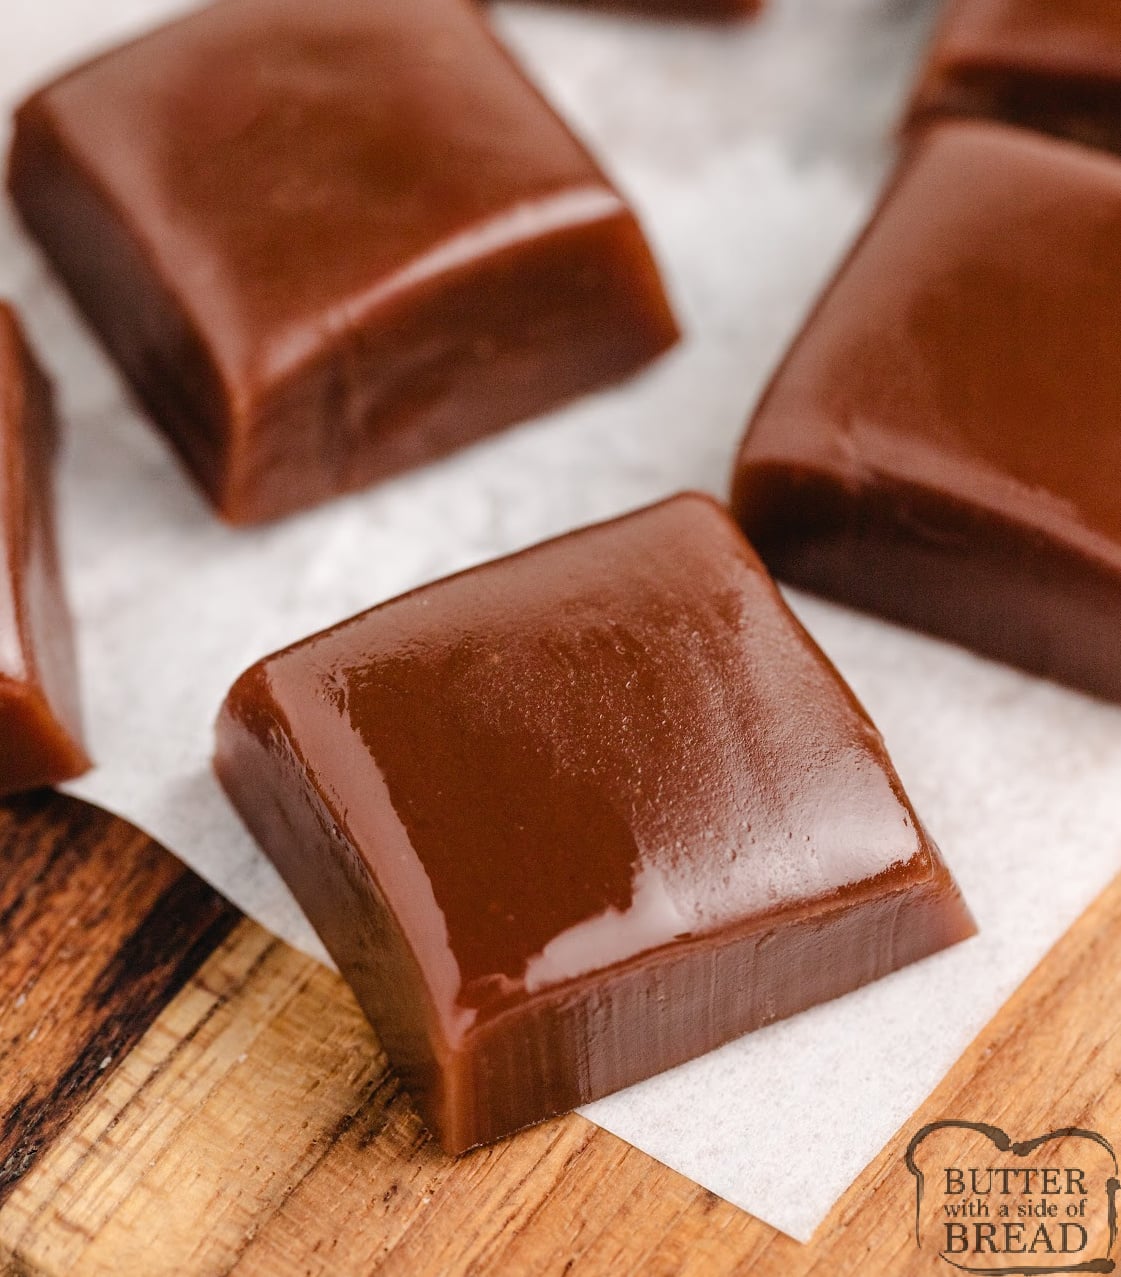
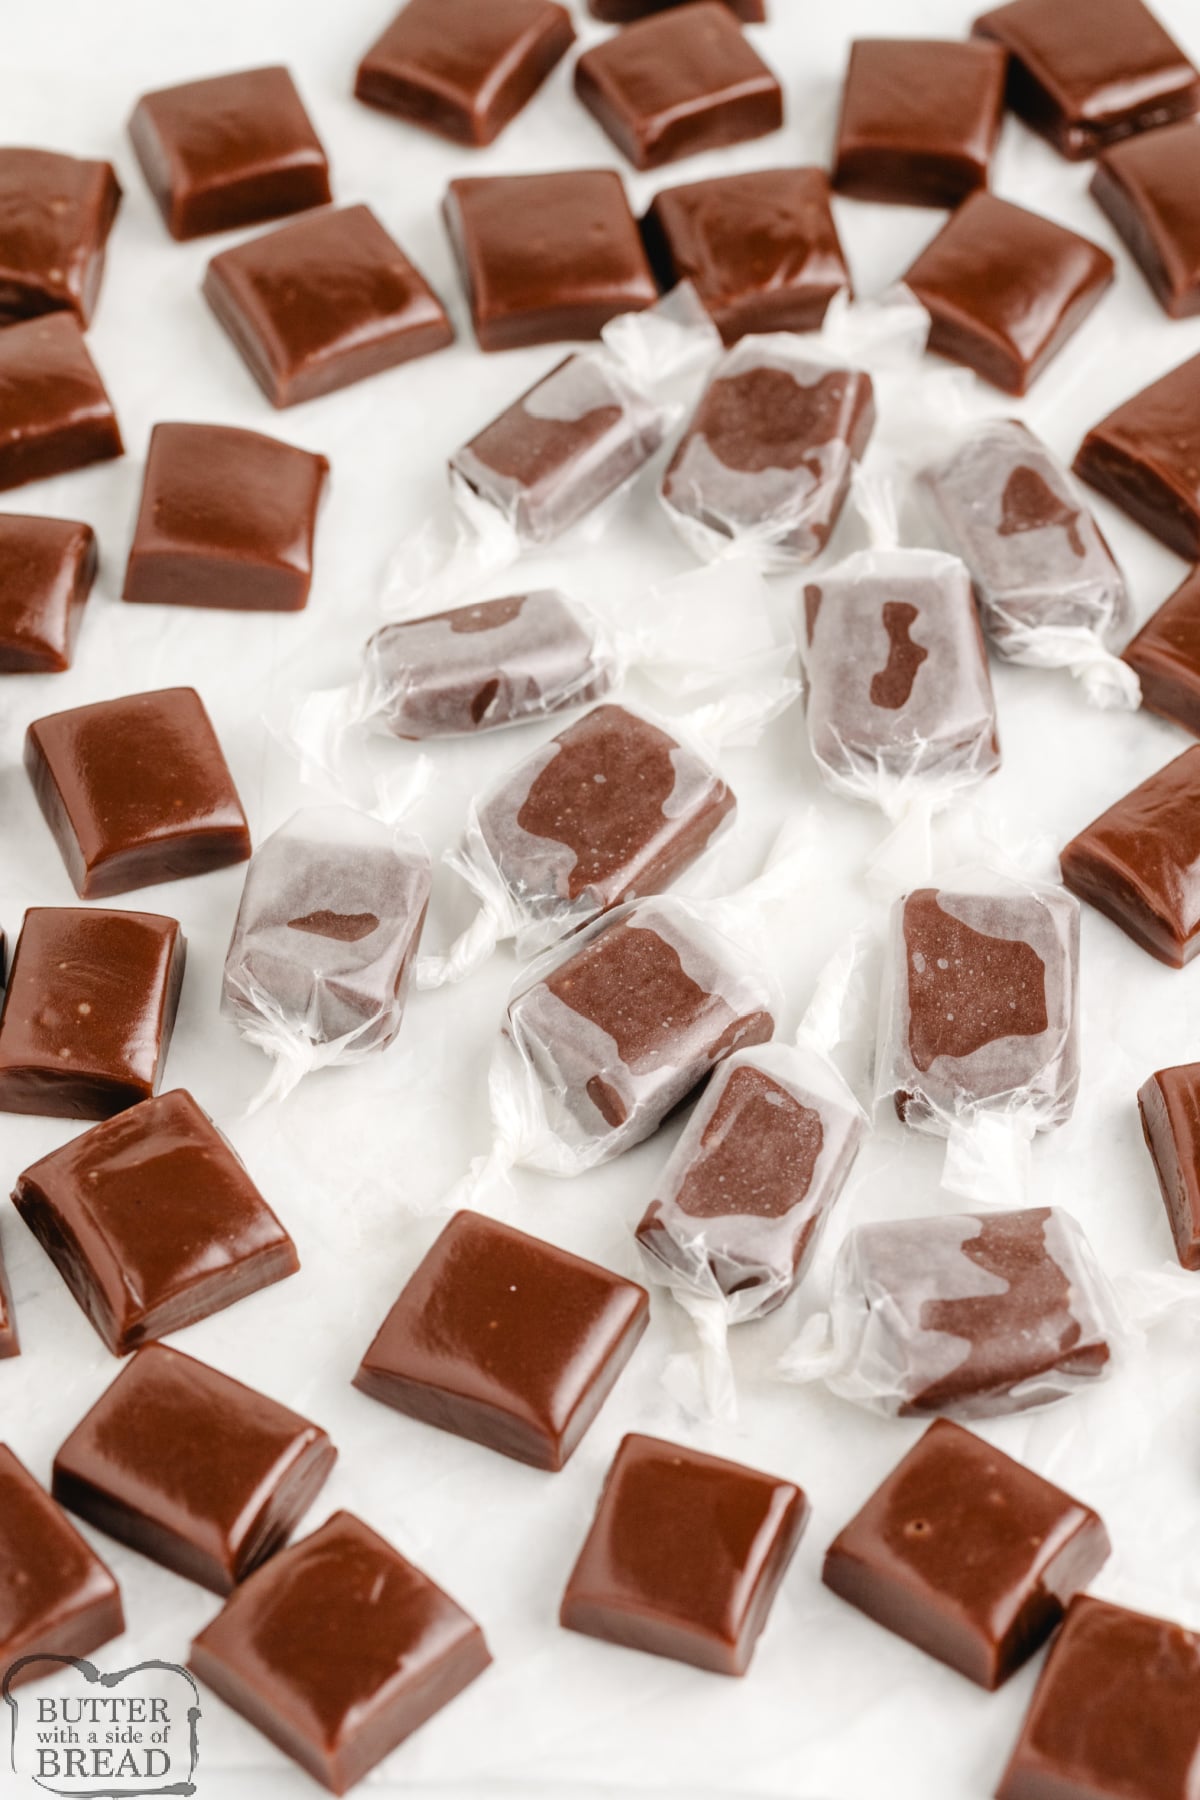
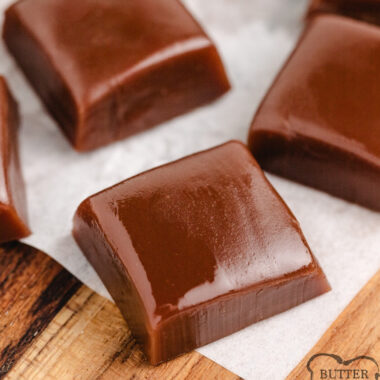
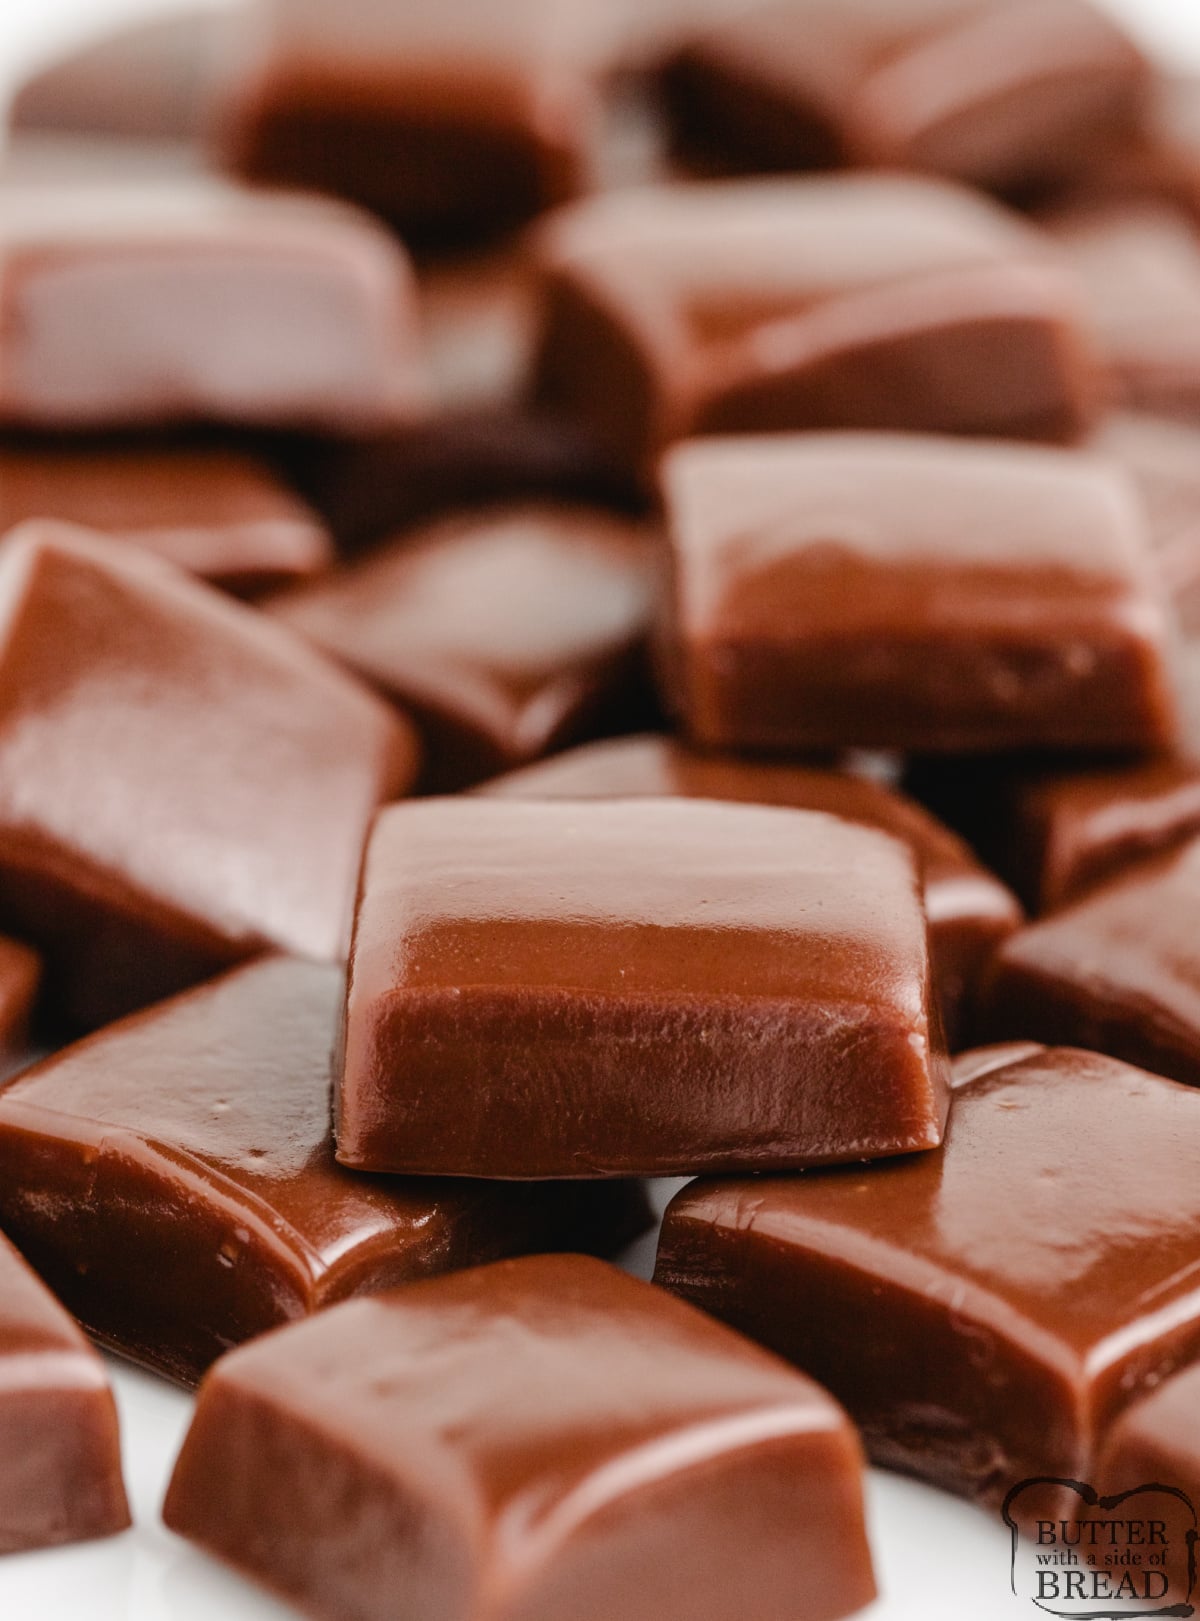
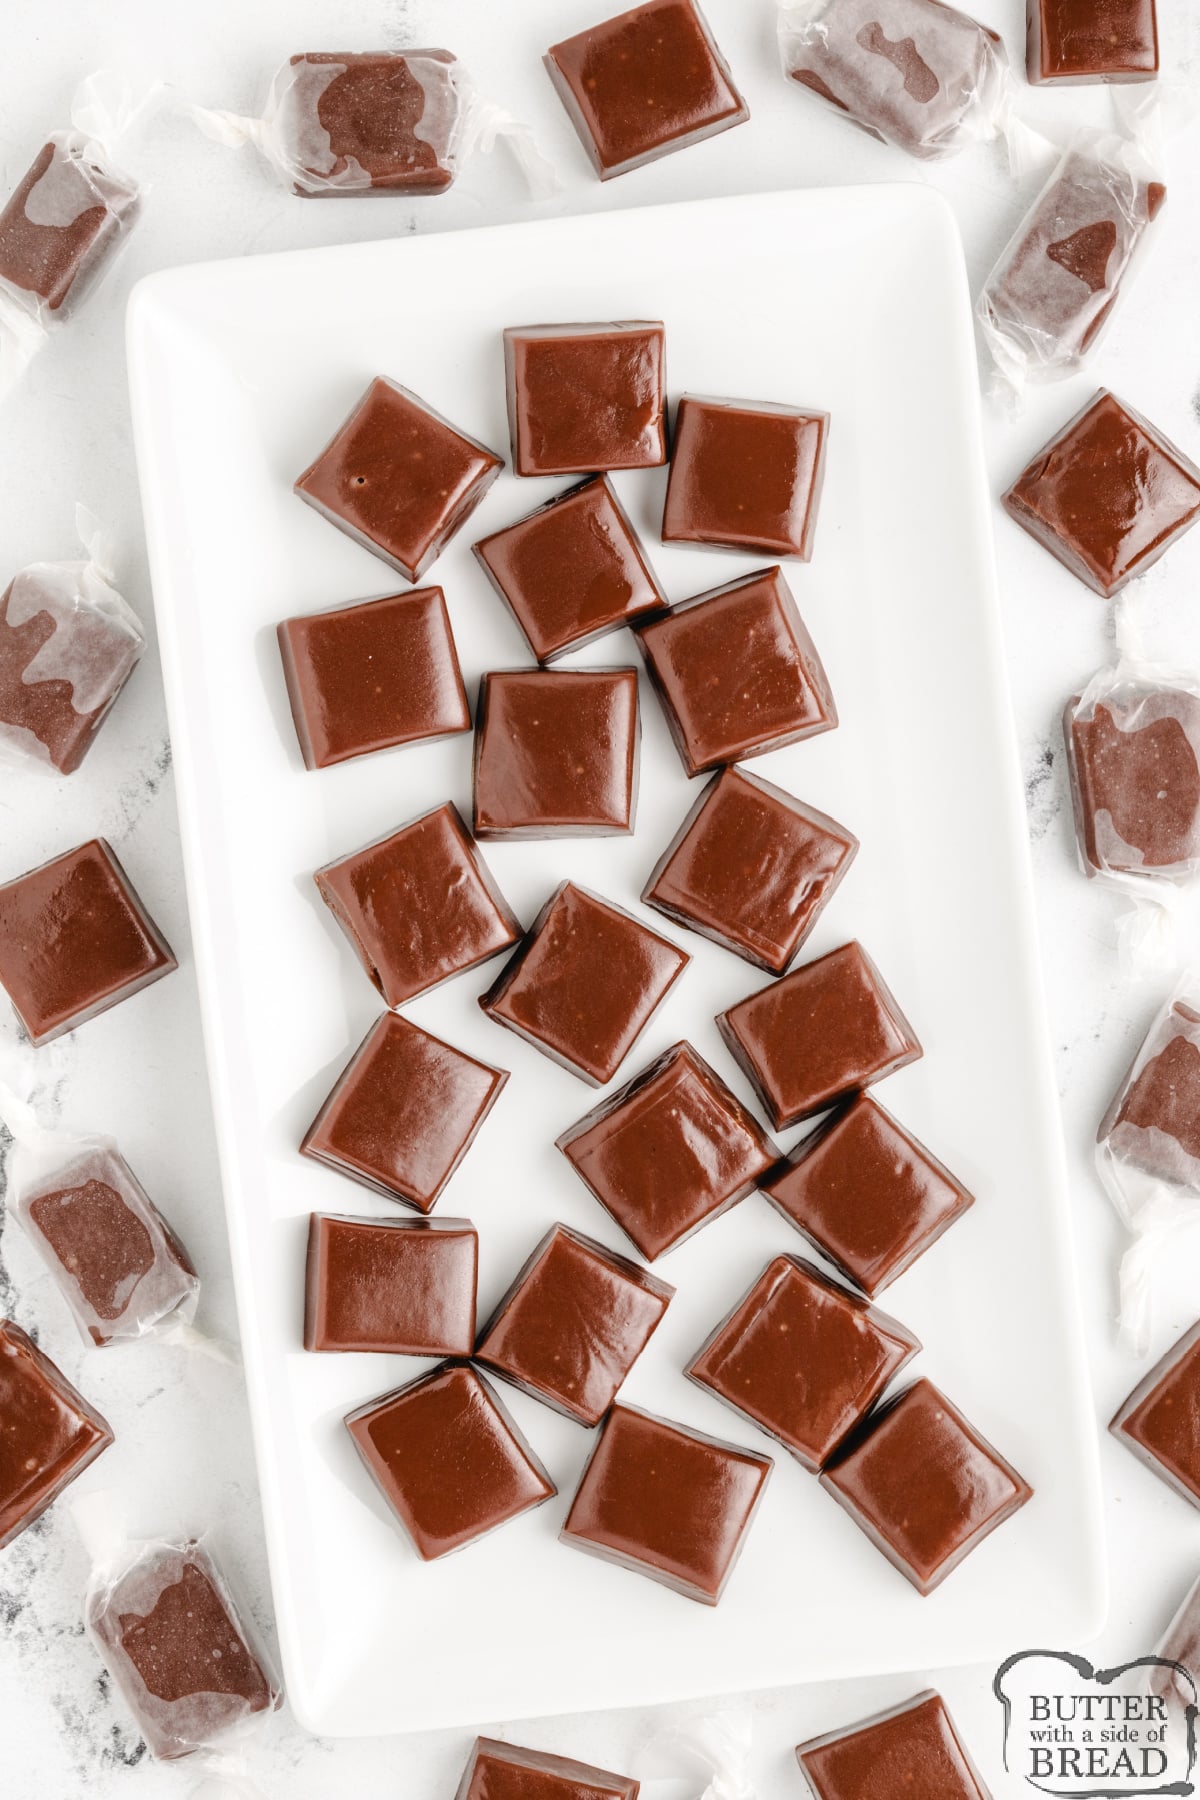
Chocolate Caramels are soft, chewy, four-ingredient homemade caramels with a rich chocolate twist. These make-ahead candies are perfect for holiday gifting and taste even better than store-bought.
Why You’ll Love This Recipe
- Reliable results. A candy thermometer and a little patience give you perfect caramels every time.
- Only four ingredients. Simple, straightforward, and pantry-friendly.
- Perfect gifting candy. Wrap them in wax paper and they look beautifully homemade and festive.
- Soft, chewy texture. Classic caramel feel with a deep chocolate flavor.
- Holiday favorite. Easy enough for beginners and impressive enough for neighbor gifts.
Ingredients in Chocolate Caramels recipe
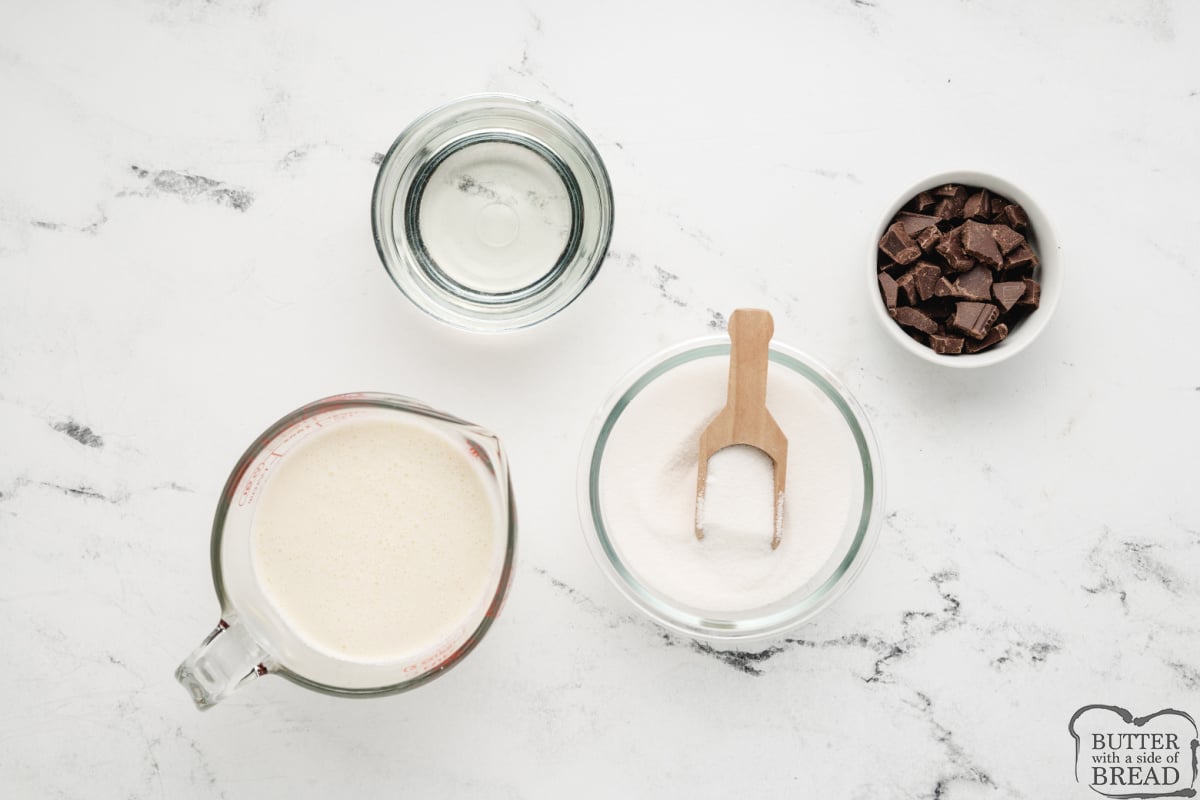
- Sugar: The base that caramelizes and gives structure.
- Light corn syrup: Prevents crystallization so the caramels stay smooth.
- Unsweetened chocolate: Adds incredible depth and a rich, bittersweet chocolate flavor.
- Heavy cream: Creates the soft, chewy texture we love in homemade caramels.m, divided
Tips & Tricks for the Best Chocolate Caramels
- Use a reliable candy thermometer. Even a small temperature difference can change the texture of your caramels, so make sure your thermometer is accurate. If you are using a digital one, test it in boiling water (it should read around 212°F at sea level) to confirm it’s calibrated correctly.
- Keep the heat steady and stir constantly. Caramel needs consistent heat and consistent movement. Stirring helps prevent scorching, uneven cooking, or a grainy texture. Once it starts to boil, don’t walk away — it only takes a few seconds for the temperature to jump.
- Use a heavy-bottomed saucepan. A thin pan heats unevenly and can cause scorching or hot spots. A good-quality saucepan helps the mixture cook smoothly and evenly from start to finish.
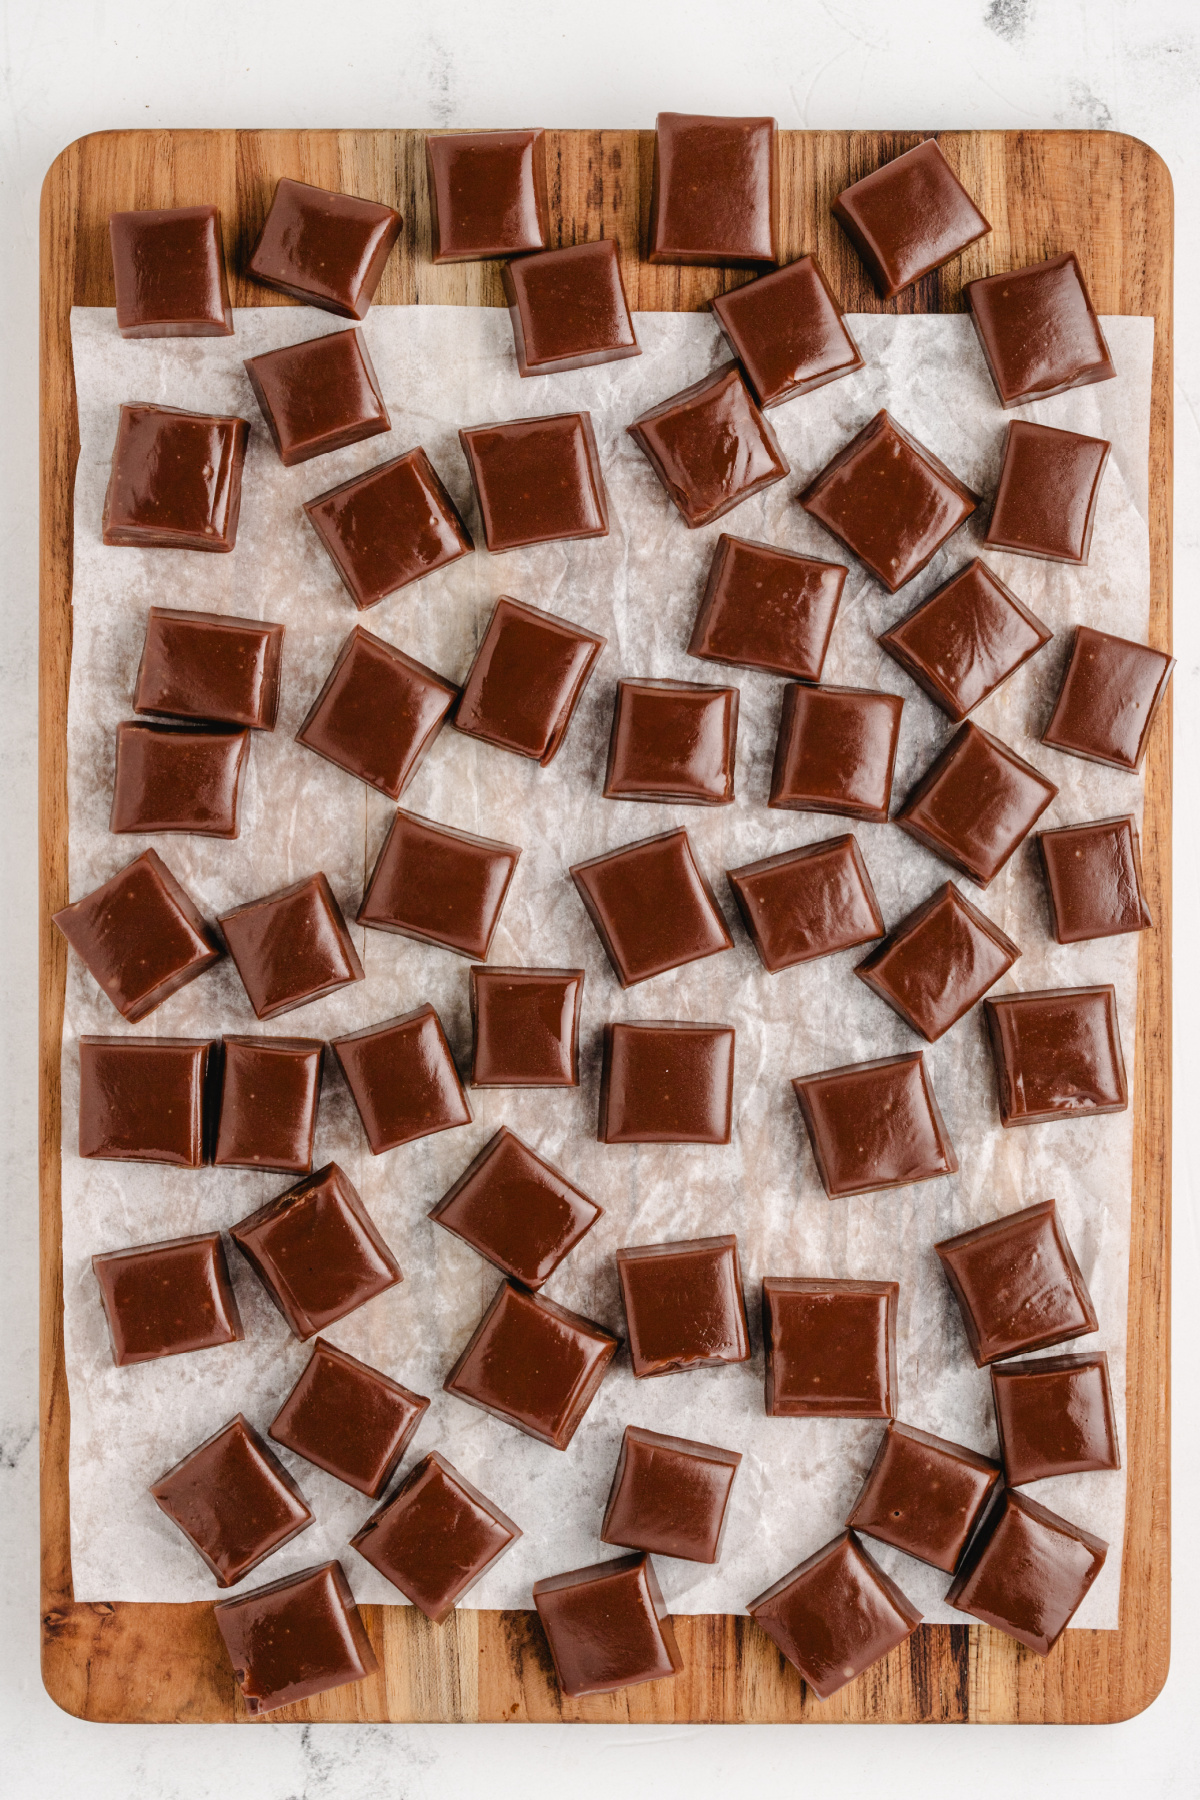
- Prep the pan before you start. Once the caramel reaches the right temperature, you won’t have time to line the pan or hunt for foil. Have your 8×8 pan lined and buttered before you begin cooking so you can pour immediately.
- Test early if you live at a higher altitude. Caramels reach the soft-ball stage sooner at higher elevations. Begin testing around 234°F rather than waiting until 240°F. Adjusting by small increments helps you avoid overcooking the batch.
- Let the caramels cool completely before cutting. Warm caramel is almost impossible to cut cleanly. Let it sit for several hours or overnight. If you’re in a hurry, you can chill the pan, but bring it back to room temperature before eating so the texture is soft and chewy again.
- Wrap pieces individually to preserve freshness. Use precut wax paper squares for fast wrapping (and to spare yourself the nightmare of cutting hundreds of tiny squares). Wrapped caramels stay soft, fresh, and freezer-friendly.

Storage Instructions
Chocolate Caramels keep wonderfully well when wrapped individually and stored properly. Here’s how to store them for the best flavor and texture:
Room Temperature
- Store wrapped caramels in an airtight container or zip-top bag.
- Keep them in a cool, dry spot away from any humidity.
- They’ll stay fresh for about 2–3 weeks, though lasting that long without being eaten is a miracle in my house.
Refrigeration
- Caramels do not need to be refrigerated, but chilling them makes them easier to cut and extends their shelf life.
- Place wrapped pieces in an airtight container so they don’t absorb other fridge odors.
- Let them warm up for about 20–30 minutes before eating so they soften back to that perfect chewy consistency.
Freezing
- For best texture, thaw them at room temperature before eating — they soften quickly.
- These freeze beautifully! Wrap each piece tightly and store them in a freezer-safe bag or container.
- Properly wrapped caramels will stay fresh for up to 6 months.
Chocolate Caramels Recipe
Ingredients
- 1 cup sugar
- ¾ cup light corn syrup
- 2 ounces unsweetened chocolate broken into small pieces
- 1 ½ cups heavy whipping cream divided
Instructions
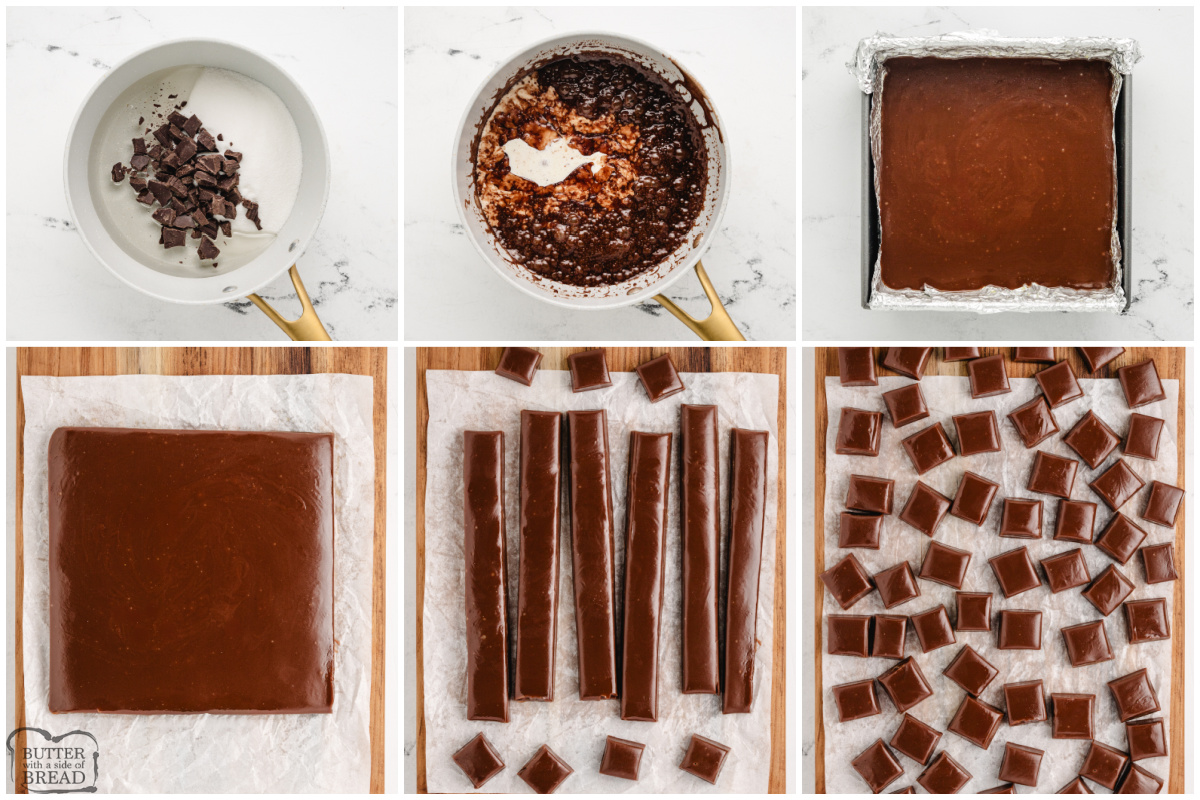
- Line an 8X8 pan with foil and grease the foil with butter.
- In a large saucepan, bring the sugar, corn syrup and chocolate to a boil over medium heat and stir until smooth.
- Add 1/2 cup cream and stir constantly until a candy thermometer reads 234°. Add another 1/2 cup cream and return mixture to 234 degrees, stirring constantly. Add the remaining 1/2 cup of cream and cook until the temperature reaches 240°. Test candy. (If you are at a high altitude, you may want to begin testing when the mixture reaches 234°.) If the mixture dissolves in the water, you need to keep cooking until the temperature goes up 2 more degrees, then test again. If mixture hardens when a small dollop is placed in ice cold water, then remove from heat and pour into prepared pan.*
- Immediately pour the mixture into the prepared pan and let stand until firm – about 5 hours or overnight.
- Using the foil, lift the candy out of the pan. Remove foil and cut into 1 inch squares. If desired, you can wrap the individual pieces in waxed paper, twisting the ends. These make great gifts for neighbors and friends!
Video
Notes
Nutrition
📫 Save this recipe! Send it to your email! 📩
I consent to receiving emails from this site.
Frequently Asked Questions
Do I need a candy thermometer to make homemade caramels?
Yes — a thermometer is the most reliable way to get perfect, soft-chewy caramels. Since even a few degrees make a big difference, a thermometer helps you hit the exact temperature you need. Digital thermometers are often easier to read (especially when things get steamy).
How does altitude affect caramel-making?
Higher elevations require lower cooking temperatures. The soft-ball stage typically falls between 234–240°F at sea level, but you’ll want to reduce the final temperature by about 2°F for every 1,000 feet above sea level. Testing a small dollop in ice water can help confirm the right texture.
Why are my homemade caramels too hard or too soft?
This almost always comes down to temperature.
- Too hard = cooked a little too long
- Too soft = didn’t reach the correct temperature
Even a 2–3 degree difference can change the final texture, which is why a thermometer and altitude adjustments matter.
Can I use dark or semi-sweet chocolate instead of unsweetened?
Unsweetened chocolate is ideal because the recipe already includes sugar. Using sweetened chocolate can make the caramels overly sweet and change the texture, so stick with unsweetened for the best results.
How long do Chocolate Caramels take to set?
They typically need at least 5 hours at room temperature or overnight for clean cutting. Chilling speeds things up, but be sure to cover the pan tightly so the candy doesn’t absorb fridge odors.
Do I have to wrap each caramel individually?
Wrapping isn’t required, but it keeps the caramels fresh longer and prevents them from sticking together. I like to wrap mine in the precut pieces of wax paper– they cost under $10 for 250, which generally lasts me at least a few years! So worth it to not have to cut small squares of wax paper each year!
More easy candy recipes to try:
- Easy Snickers Fudge brings together butter, cocoa, sugar, milk, caramel, salted peanuts, and chocolate in a rich layered treat that tastes like pure bliss.
- Made with just four simple ingredients, Christmas Chocolate Caramel Cups are adorable bite-size candies filled with creamy caramel and topped with festive sprinkles, making them a perfect holiday gift.
- With only five ingredients, the Old Fashioned Potato Candy recipe transforms mashed potatoes into a delicious chocolate-covered treat that tastes surprisingly similar to a Mounds bar.
- Marshmallow Peanut Butter Chocolate Bark comes together in minutes with only three ingredients, creating an easy chocolate candy that’s ideal for parties and gift-giving.
- Made with chocolate and vanilla pudding mixes and no candy thermometer required, the Easy Fudge recipe delivers a quick six-ingredient chocolate fudge that comes together in just minutes.
With just four simple ingredients, Chocolate Caramels deliver rich flavor and a soft, chewy texture, making them an easy holiday favorite.


quilcene says
Can you use powdered unsweet chocolate rather than the chances of chocolate?<br />
Nina Potter says
Have you ever made in the microwave? Would like to try.
Nellie says
I have never tried these caramels in the microwave, but if try it let me know how it works out!
Mildred pleasant says
I like the easy recipes
Jessica says
Thank you Mildred!
Mildred pleasant says
Makes it fun to make home made candies
Jessica says
I agree!
jackie says
Mine never hardened. It was like hot fudge fir ice cream???
Nellie says
How long did you cook the mixture for? Sounds like the mixture didn’t get quite hot enough to set. At most altitude, caramel reaches the correct consistency at about 234°, but it may need to be higher than that for your altitude. It can be necessary for it to reach up to about 246° in some cases.
Kherunnissa says
Thank you
Susie Reynolds says
I tried to make these and they are hard as a rock, is there any way to soften them up. I can’t figure out what I did wrong
Nellie says
I’m so sorry this didn’t work out! Unfortunately there is not a way to soften the caramel once it has gotten too hard. It sounds like your caramel got a bit too hot – were you using a candy thermometer?
Debbie says
I have made pralines that are too hard and a few seconds in the microwave softens them up before eating. They are caramel pralines so I think it would work the same. I definitely don’t throw them out. Too good to waste.
Jessica says
I agree Debbie!
Rosagallica says
Is the final temperature of 248F a typo? Should it not be closer to 238F? If you cook the caramel mixture to 248F you will end up with chocolate Turkish Taffy not Chocolate Caramels. I’d also suggest stirring in a teaspoon of vanilla extract after removing the mixture from the heat.
Nellie says
Depending on your elevation, you may need to cook the caramel to a slightly higher temperature. In the recipe, we indicated that you should start testing the caramel at about 235 degrees, and for many people, this will be closer to the right temperature to get the desired consistency. The addition of vanilla at the end is always a great idea!
Kimberly says
So, you didn’t actually try the recipe? You just decided that you were so much smarter that the people who wrote the recipe, that they deserved one star for doing things differently than you. You sound like such a fun person to have around…..
Davey says
Where can I get precut wax paper?
Nellie says
I got mine on Amazon – here’s a link: https://amzn.to/2ChKSc1
Davey says
Dear. Mrs nellie something went wrong the candy was not hard enough some leaked thru foil I used non stick. Pan let them cool on counter 12 hours then in fridge these were a gift for moms birthday her party is at six on Friday October 19 if you reply in time I can remake them.
Nellie says
Davey – if the candy wasn’t hard enough, it likely hadn’t reached the proper temperature. Altitude makes a big difference in candy making – the closer you are to sea level, the higher the temperature will need to be. What elevation are you at?
Bea says
I made these with a very expensive chocolate but I’m not a fan. The cocoa powder has a much better flavor and was the group consensus so I’m saving my expensive chocolate for pastry. I found the Special Dark Chocolate has the best taste. Thanks. I did take the caramel off at 243°F the caramel was soft and perfect.
Patricia Brewer says
These were not a caramel taste at all. I was a little skeptical seeing how there was no butter, which gives caramel it’s rich taste. These were blan and lacking. Needed flavor. Definitely salt at the most. I’ve seen this recipe all over the internet and figured I’d give it a try….Nope, not again.
Nellie says
Patricia – so sorry you weren’t happy with the recipe! It is definitely more of a chocolate taste than a caramel one – it’s the consistency that is more like a caramel. Happy Holidays!
Diane says
I followed the recipe directions exactly… They came out hard as a rock. …. I almost took it off the stove at softball stage but I didn’t and IF I try it again that’s what I will do…..I’m very disappointed. Xo
Nellie says
I’m so sorry they didn’t turn out for you! It definitely sounds like they cooked a bit too long.
Hannah Flack says
This was yummy! I’ve never made spaghetti squash before and I’m not sure if it’s supposed to me soft or not when it’s done. My squash was on the larger side so maybe I should have cooked it longer.
Laurie Jacobs says
Delicious !