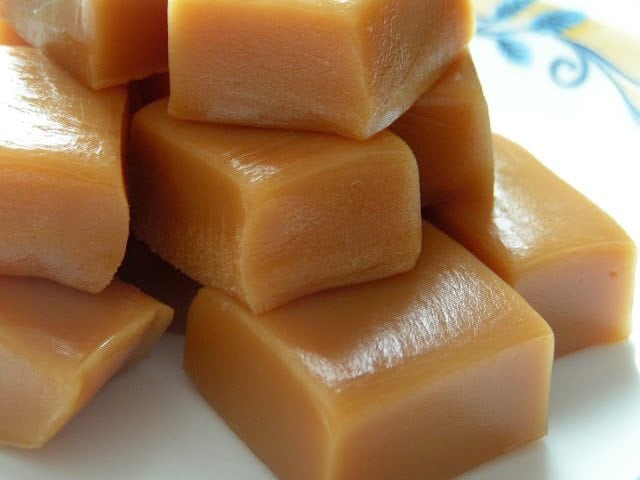
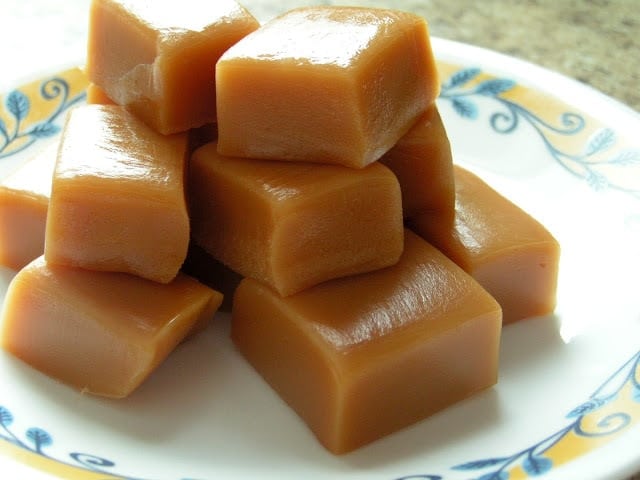
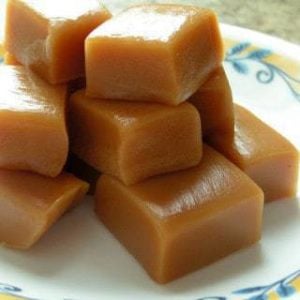
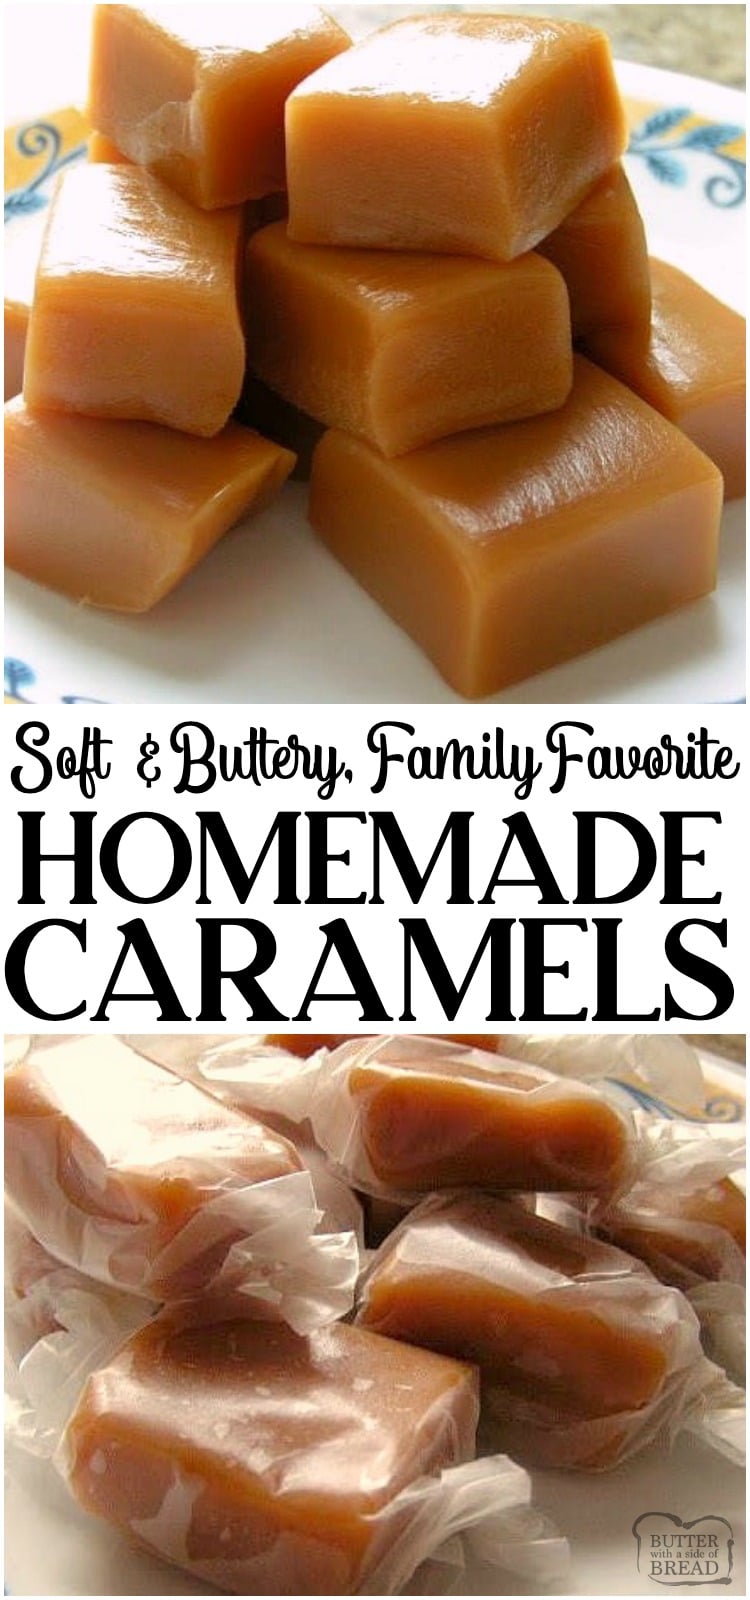
These Homemade Caramels will absolutely melt in your mouth! Incredible from scratch recipe for Homemade Caramel made with heavy cream and butter.

I love the holidays! One of my favorite parts is making all sorts of wonderful treats that I only make once a year. I’ve decided to share my creations with you all each day and first on the list was the homemade caramels.
How to Make these Homemade Caramel Candies
If you’ve never made caramel before, don’t be afraid, it’s actually really easy. You just need the ingredients, a large saucepan, and a candy thermometer. Well, a candy thermometer isn’t required, but it’s certainly very handy!
Important tips on making caramels:
- Use a STAINLESS STEEL pot when making candy! I’ve tried so many different kinds of pans. Stainless steel is the best!
- Know that different types of stoves cook candy at different rates. Gas ranges cook the fastest and electric take much longer.
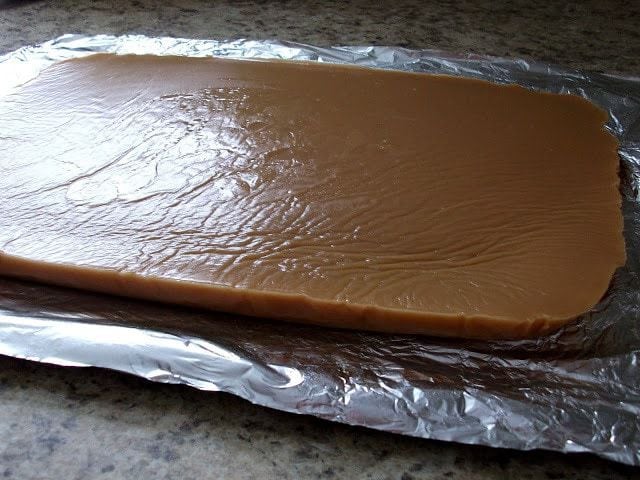
- Line your pan with foil, then spray the foil. Taking the caramel block out of the pan is a breeze after it’s cooled!
Don’t feel like you have to stir the mixture continuously. it’s OK to let it boil for a few minutes in between periods of stirring. I did the morning dishes while mine cooked! - When cutting the caramels, err on the side of smaller pieces, especially if you have small children. My kids love caramel, but I find sizes much larger than a penny are too big.
Products that will help you re-create this recipe at home:
- Stainless 6-quart saucepot with lid
- Digital candy thermometer
- Wooden corner spoon
- Waxtex wax paper
- 12x15x3 sheet cake pan
Does Homemade Caramel Need to be Refrigerated?
Your homemade caramel candy does not need to be placed in the fridge as it can do just fine on the counter at room temperature for up to 2 weeks if kept in an airtight container. I recommend wrapping each piece in wax paper, rolling up the ends and keeping them together in a Ziploc bag.
Does Homemade Caramel go Bad?
Eventually, your candy will no longer taste as good as it once did when it was fresh. As it’s exposed to more air, you may find that it dries out or becomes harder. While you may not get sick from eating an aged piece of caramel, you should avoid eating pieces that are too old as it just isn’t as enjoyable.
What do you need to make Homemade Caramels?
-SUGAR: you’ll need 2 cups granulated sugar AND 1 cup packed brown sugar
-CORN SYRUP: More sugar, but in syrup form! I use 1 cup of light corn syrup. You can use dark corn syrup, but remember your caramels will be much darker in color!
-MILK: You’ll need both 1 cup evaporated milk and 1 pint (2 cups) heavy whipping cream
-BUTTER: This recipe uses 1 cup butter, which is 2 sticks. No margarine, real butter only! I like using salted butter too.
-VANILLA: You’ll add 1 1/4 tsp. vanilla extract to the caramel after you remove it from the stove.
How to Make Homemade Caramels
In a medium-sized stainless steel pot, combine everything except the vanilla.
Monitor the heat of the mixture with a candy thermometer while stirring occasionally.
When the thermometer reaches 245 degrees F, remove it from the stove.
Stir in the vanilla and then transfer to a 9×13 pan lined with parchment paper.
Let the mixture cool completely.
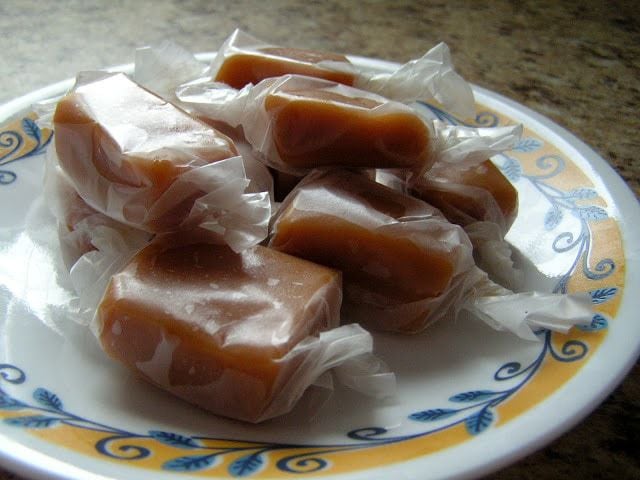
Once cooled, cut the caramel into small squares and wrap them in wax paper. Store wrapped caramels in an airtight container or a Ziploc bag.
How Long is Homemade Caramel Good for?
Homemade caramel, wrapped in wax paper and enclosed in an airtight container will actually last up to a month! The caramel will gradually get harder, but it still tastes wonderful & is safe to eat.
What Type of Vanilla Extract Should I Use?
A few years ago I tested 10 different vanilla extracts and found new favorites! I love using TOTONAC’s Mexican Vanilla for everyday use. It’s pure vanilla and contains no alcohol, which I like because I don’t like the taste of extracts made with alcohol. Each time I try another, I go back to Totonac’s quickly afterward; it’s so good! I also love using Nielsen Massey Vanilla Bean Paste. Again, this one has the best flavor by far!
HOLIDAY BAKING: HOMEMADE CARAMELS
Ingredients
- 2 cups white granulated sugar
- 1 cup packed brown sugar
- 1 cup corn syrup
- 1 cup evaporated milk
- 1 pint heavy whipping cream 2 cups
- 1 cup butter 2 sticks
- 1 ¼ tsp vanilla extract
Instructions
- In a medium size pot, combine everything except the vanilla.
- Monitor the heat of the mixture with a candy thermometer while stirring occasionally.
- When the thermometer reaches 245 degrees F {240 degrees is also called soft ball stage, I like to cook mine to 245 degrees}, remove pot from heat.
- Stir in vanilla.
- Transfer mixture to a 9×13 pan lined with parchment paper. Let the caramel cool completely. (I generally cover it with plastic wrap after a couple hours and leave it on the counter overnight to cool.)
- When cooled cut the caramel into small squares and wrap them in wax paper for storage. Enjoy!
Notes
Important tips on making caramels:
- Use a STAINLESS STEEL pot when making candy! I’ve tried so many different kinds of pans. Stainless steel is the best!
- Know that different types of stoves cook candy at different rates. Gas ranges cook the fastest and electric take much longer.
- Line your pan with foil, then spray the foil. Taking the caramel block out of the pan is a breeze after it’s cooled!
Don’t feel like you have to stir the mixture continuously. it’s OK to let it boil for a few minutes in between periods of stirring. I did the morning dishes while mine cooked! - When cutting the caramels, err on the side of smaller pieces, especially if you have small children. My kids love caramel, but I find sizes much larger than a penny are too big.
Nutrition
📫 Save this recipe! Send it to your email! 📩
I consent to receiving emails from this site.
What Do I Do If My Caramel is Too Soft?
If your homemade caramel is too soft, it means that you didn’t heat it to the correct degrees. You can either reheat the mixture until it reaches a few degrees higher than it was originally or you can eat it as is and mark it as a lesson learned for next time.
Can You Freeze Caramel Candy?
Caramel freezes well, but you’ll want it to come to room temperature before eating so you don’t break a tooth or lose a filling, haha. You may also notice that as the caramel thaws it might begin to “sweat” this is sugary water excreted from your caramel which may make it into a mess to eat, but it’s still perfectly fine. Remember to have each piece of caramel individually wrapped inside an airtight container so that they don’t all form together in the freezer.
What Happens If You Cook Caramel Too Long?
You do not want to overcook your caramel but you also shouldn’t rush the process. If you cook your caramel too hot or too long you’ll end up with a harder and more brittle end result and we want soft and chewy caramel, not a peanut brittle texture. Also, remember that the caramel continues to cook a small amount even after it’s been removed from the heat.
How to package homemade caramel
After you cut the caramel into small squares, you can wrap them in wax paper and twist the ends to secure it. For years and years, I cut the small 4-5″ squares of wax paper myself. A couple of years ago I discovered that you can purchase them already cut! See Cut Wax Paper Squares Here. I’d say that’s $7 well spent. One package should last you 3-4 years as well, depending on how much caramel you make.
Check out these delicious caramel recipes that are sure to satisfy those tastebuds.
- Chocolate Caramel Apples
- Cinnamon Caramel Apple Dip
- Caramel Snickerdoodle Cookies
- Chocolate Caramel Turtle Pie
- Caramel Popcorn Cake
- Salted Caramel Bars
These Homemade Caramels will absolutely melt in your mouth! Incredible from scratch recipe for Homemade Caramel made with heavy cream and butter.


Connie says
I have made these a few times and twice before the Candy thermometer said 40 I started seeing brown streaks in the caramel. It was almost like it was starting to burn. I was continuously stirring. Did I have the heat to high? They were still soft and tasted good!
Jessica says
What kind of pan were you using? Were you on a gas stove? I find lower heat works better on a gas stove & I always use stainless steel to make candy in.
Jackie says
I used stainless steel on medium low heat. Would cast iron work better?
Darcie says
I’ve made four batches of these caramels and only one turned out. I cook them in a stainless steel pan on a gas over using medium-low heat. It take about 1.5 hours to reach 235 degrees and then they burn. I’m not sure what I’m doing wrong. Please help?
Jessica says
What type of thermometer are you using? And are you sure it’s still working properly? If you’re using med-low heat, that does make sense that’d it’d take so long… but I don’t understand why it’s burning at the end? Candy does tend to cook sloooowly, then very quickly. It sounds to me like your thermometer is off, you get to the correct temp, then exceed it right at the end. : (
Rita says
Wow, outstanding. They take a lot of time but well worth it. Friends loved them and asked for recipe. Will definitely make again. I boiled to 246, perfect. Thanks for the delicious candy. I use several of your recipes and all have been hits,
Deb M says
I’ve made this several times but butter the butter ends up separating at the end and it ends up greasy. My recipe says to cook it to cook it to 250 degrees. What am I doing wrong?
Jessica says
Try whisking it instead. I haven’t had caramel separate, but I’ve had toffee separate- and it can be fixed with a whisk!
Debb says
I am allergic to corn so was wondering if honey or maple syrup could be substituted for the corn syrup?
Nicole says
While I have not tried it I do think that honey should be able to work well. If you try it, let me know how it goes! I’m really interested in hearing about it.
Sherri says
Soft, buttery, heavenly! It took about two hours on the stove to reach 245 degrees but we’ll worth the time. Will be making these again!
April says
Can I add nuts to this recipe?
Nicole says
After spreading out the caramel in the pan to cool you can lightly press nuts down into the caramel mixture so that they stay put as the caramel cools. Depending on how many nuts you want in every bite you’ll probably want about 3/4 cups to 2 cups worth. Walnuts or pecans would be great!
E.L. says
You mention both parchment paper and foil for lining the sheet pan. Which do you actually use & which do you find to be the best?
Jessica says
I used to use foil, but now that parchment is so readily available, I use that instead!
Misty Smith says
Taste amazing!
This recipe is not as time consuming as others I have made.
The final result was amazing, creamy and I will be using this recipe from now on!❤️
Nicole says
So glad you liked it
Gail says
Make sure you use a big enough pan. I started with my 2 qt. (Med pan) I had to switch to my 4qt (lrg pan) so it wouldn’t boil over. Took forever to get to 245 and by the time it did it started to burn on the bottom. Taste is good but dark brown spots in carmels.
Jessica says
Welcome to the wonderful world of making homemade caramels. : ) They can be finicky, but they’re worth it. There are so many variables with candy making! Did you use a stainless steel pan like I suggested? I hope you read my tips at the top!
Vicki says
For the first time in my adult life I followed a recipe to the T. And it worked beautifully in this endeavor! Wonderful caramels, perfectly firm. My first venture into candy making (I generally bake). Thank you! I’ll be making these again.
Jessica says
I am absolutely THRILLED to hear this Vicki! This is a treasured family recipe of mine that I make every year. I’m so glad you enjoyed it!
JoAnn Peterson says
I am going to make this recipe and want to know if I can dip them in chocolate and then sprinkle with flakey salt?
Nellie says
Sounds like a good idea to me!
Jackie says
Have made this recipe a few times and it worked out well. This time my caramels are too soft. I would imagine that they did not cook emough? Can I put them back on the stove and cook some more??
Anne Marie Garner says
The first time I made these, they were too soft. My answer to that? Put nuts under each piece and cover in chocolate! Turtle candies. They were delicious! Second attempt happening now. 🙂
Nellie says
Great way to use up caramel that doesn’t set quite right!